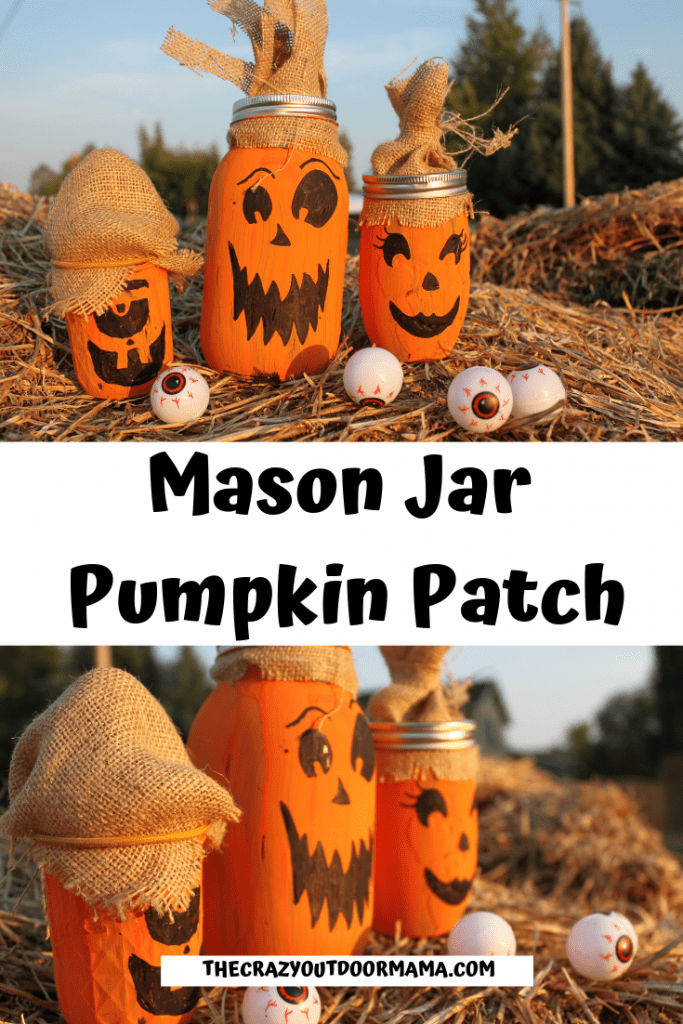
Skip the mess and make a cute mason jar pumpkin patch instead!
So lately, it seems our family has been too busy to do “real” pumpkins.
I have a three year old and one year old twins, so we keep pretty busy – last year when we bought some pumpkins, we carved one, said we would do the rest later, and ended throwing them out in December because we had completely forgotten to do the other ones!
Don’t worry, they didn’t rot. Squashes and such actually stay good for a pretty long time!
Anyways, so I really want to want to do pumpkins. But at the moment, my boy is scared of the “icky” guys, and I end up doing all the carving anyways.
Also, I’m a perfectionist and I have a hard time letting him decorate the pumpkin with markers and such. It ends up being mostly scribbles, which is fine, as long as I keep it inside as our “house” pumpkin!
This made me try to think of a way to do a pumpkin that was mess free, attractive, and could be re used year after year.
I love painting, and the way light looks shining through the paint.
So that was when this pumpkin mason jar was born!
It’s super easy, looks fancy, and is small enough that it can decorate your steps or your mantle come Halloween!
What you will need for your pumpkin mason jar decoration
- 1 Mason Jar + Screwing Part of Lid – any size works!
- Orange Paint
- Paintbrush
- Sharpie for face decorations
- Around 6″ high by 10″ long size of burlap. This is just for the stem, so use as much or little as you like!
- 1 Electric “Flameless” Tea Light
Directions to making your cute pumpkin mason jar craft!
It’s easy to get super creative or keep it simple with this craft! I love when you can personalize something and add your own flair! I’m basic though and awful at drawing, so don’t limit yourself to what might look good on this guy!
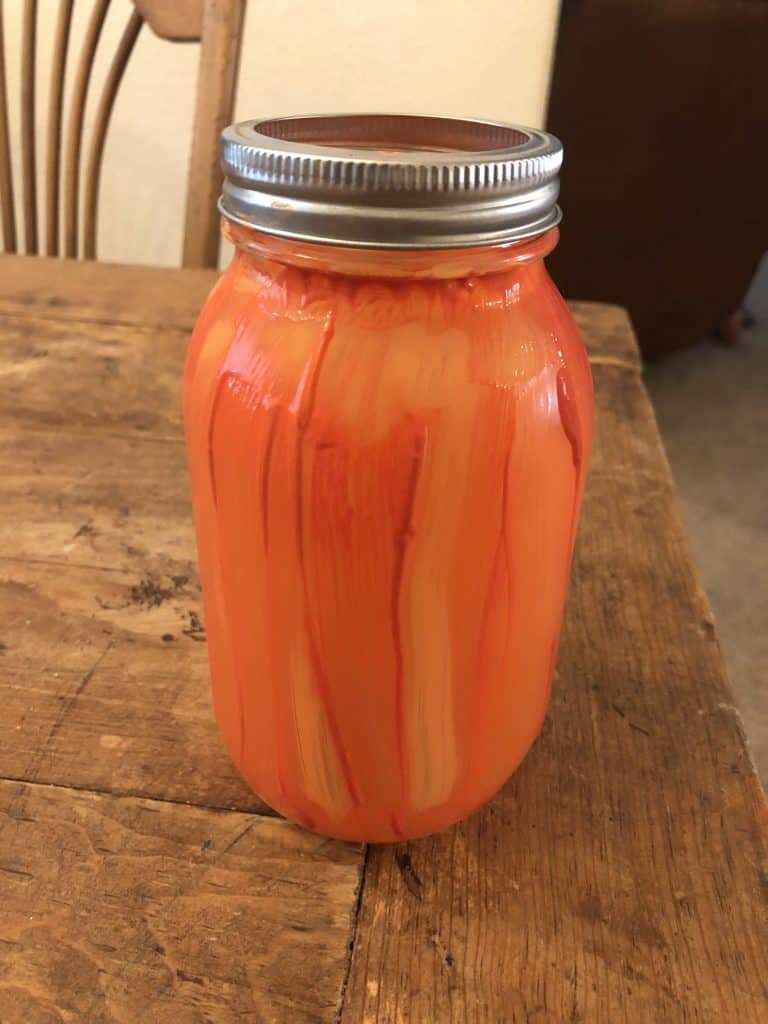
Step 1: Paint Mason Jar Orange
I liked putting more pressure on one side than the other in order to get more texture, and give the appearance of the “lines” that pumpkins actually have!
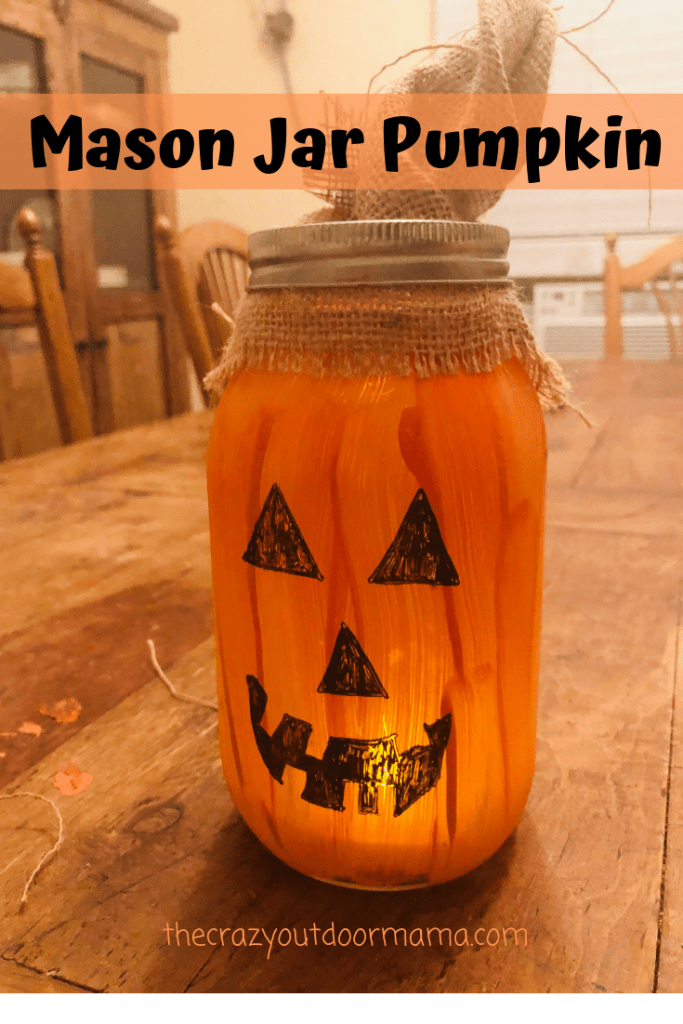
Step 2: Add Pumpkin “carving” face decor!
Get creative or stay traditional! I’m awful at drawing so I decided to stay traditional, but there’s a ton of options!
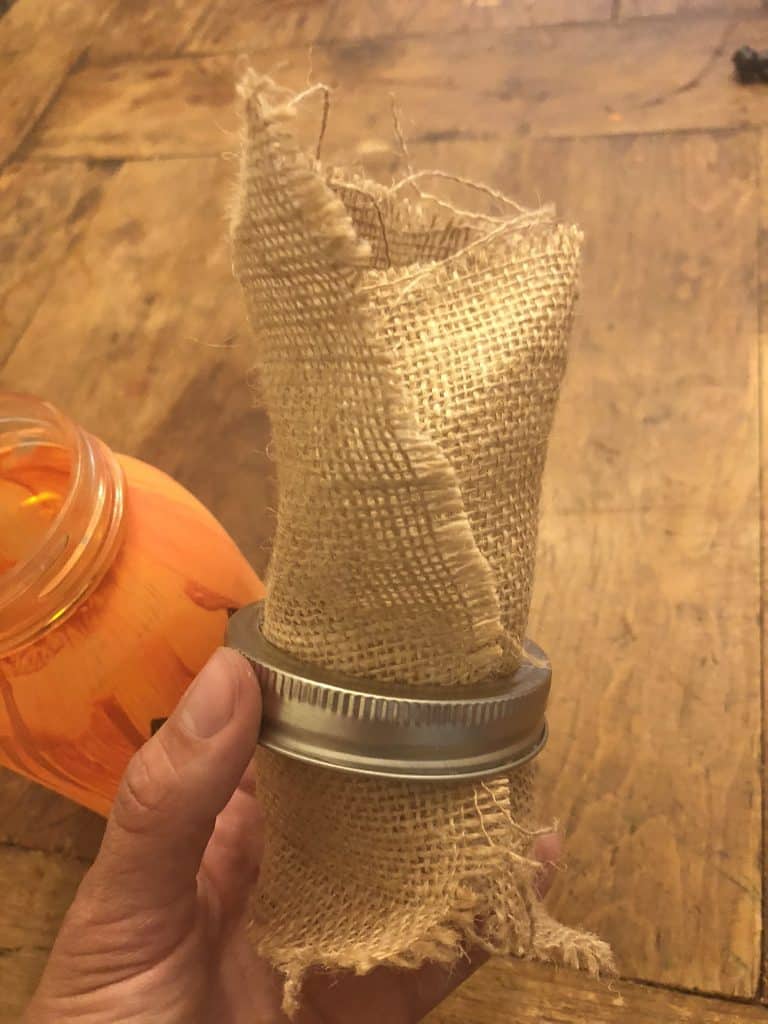
Step 3: Add “stem” of the Pumpkin!
Arranging your burlap strip around the opening of the mason jar, put the screwing portion of the lid over it and screw it on! This will hold the stem in place and make for some cute brown overlap for added texture on top!
Step 4: Drop in your Flameless Light!
With some Mason Jar sizes being so deep, it’s just easier to use a flameless light. Plus, they are alot safer than normal tea lights, which is great if you have curious hands around! If you can, find a “flickering” one to make it look more real! I found a set of 6 at Hobby Lobby for only around four dollars, and they are great!
- Solar Eclipse 2024 Kids Printable Activity Pack! - April 8, 2024
- 11 RV Bathroom Makeovers to Inspire You! - April 7, 2024
- 13 Dreamy Hammock Camping Set Up Ideas + Pics - February 22, 2024