Spring is basically a countdown to mud season in our house – and after a few years of watching my kids track it everywhere, I finally decided to just lean into it and make them their own mud kitchen!
The only problem? Every mud kitchen tutorial I found involved scavenging for wood, borrowing tools, and committing to a permanent structure that would sit in my backyard forever. I also really wanted something we could collapse and take camping, because keeping kids busy at the campsite is basically its own full time job.
And that’s when I spotted it: my wire cube shelf set, just sitting there waiting for a better purpose than holding my sweaters.
Guys. WIRE CUBES ARE A PERFECT MUD KITCHEN.
Less than 30 minutes, about $40 total (plus a fun thrift store run), zero tools, and we had a fully stocked mud kitchen that drains itself, organizes its own utensils, packs completely flat for camping, and – most importantly – my kids are absolutely obsessed with it.
If you’ve been putting off building a mud kitchen because the wood-and-screws versions feel like too much, this is your sign. Let me show you exactly how we did it!
As an Amazon associate, I earn a commission should you purchase something through one of my links.
Table of Contents
Why Wire Cubes Are Actually Perfect for a Mud Kitchen
Before we get into the build, let me explain why wire cube shelves solve basically every problem that wooden mud kitchens have:
- Water drains right through. Because the sides and surfaces are open wire, mud and water drain naturally instead of pooling. No rot, no soggy wood, no mold – even if it rains all weekend at camp.
- Built-in storage. The wire slots are the perfect size for hanging spoons, ladles, and whisks. Tools have a home, which means they actually get put away – by the kids, even!
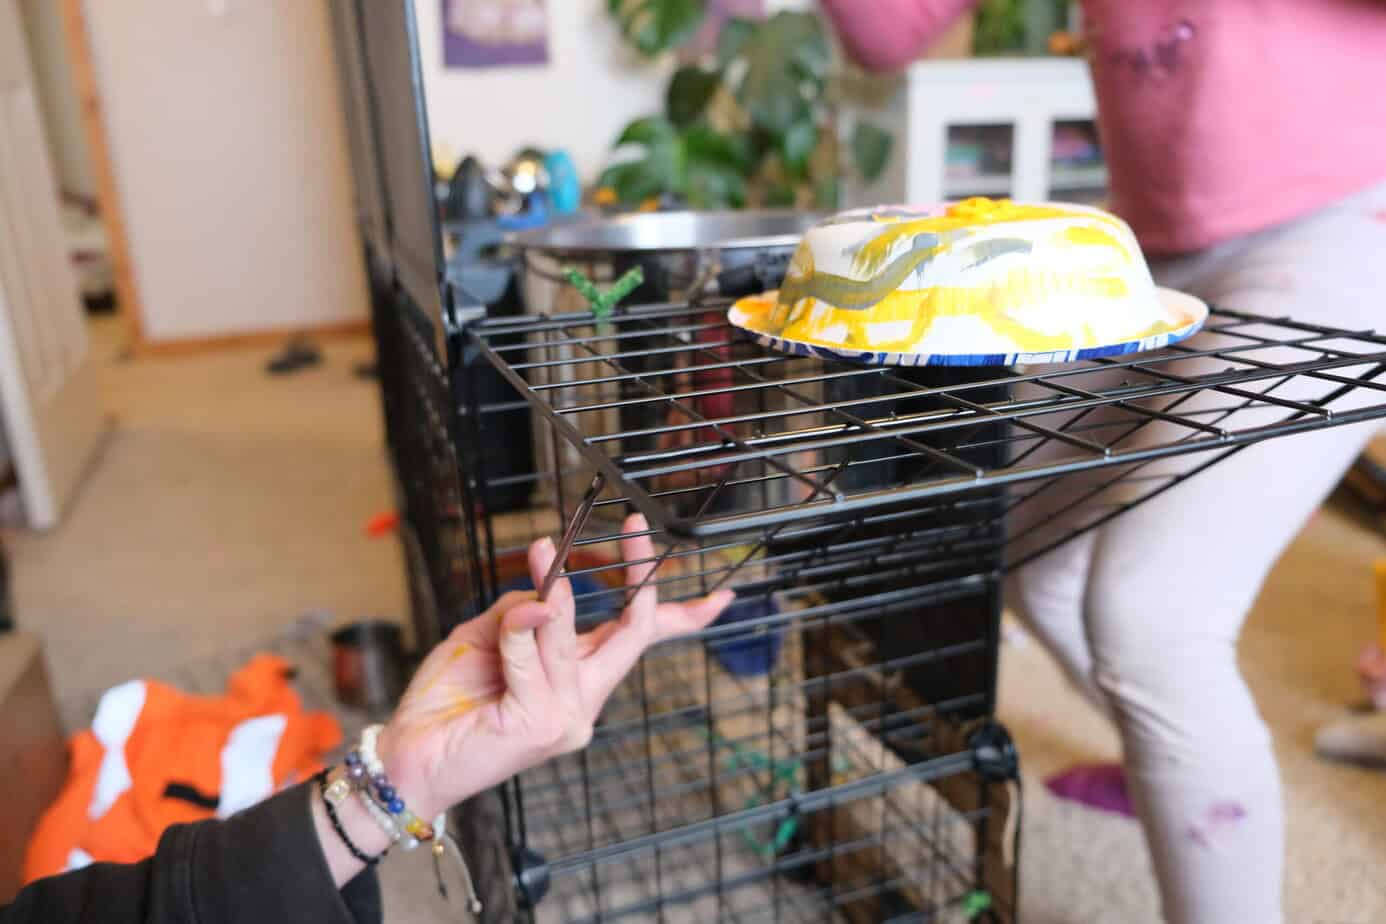
- Zero tools needed. The panels connect with the plastic connectors they come with. For extra stability in a few spots, zip ties do the job – no drill, no screws, no measuring tape.
- It collapses completely flat. Pop the zip ties, pull the connectors, and the whole thing breaks down into flat panels that stack together. Fits easily in the back of the car for camping trips.
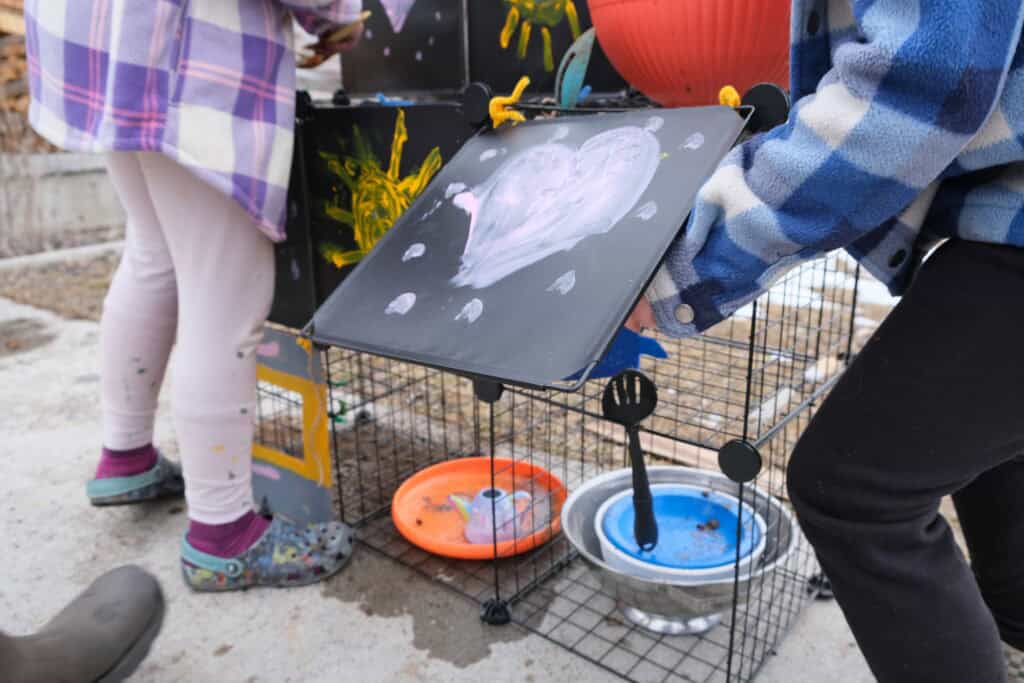
- The solid panels can be painted. The set we used comes with both wire panels AND solid panels. The solid ones became our decorated backsplash, our painted oven front, and the hidden storage row. Tempera paint works perfectly – and the fact that it weathers off is a feature, not a bug. They just get to paint it again next spring!
- It’s genuinely budget-friendly. A wooden mud kitchen build typically runs $80–150 in lumber alone. Ours came in around $30 total for the cube set, plus whatever you find at the thrift store.
What You’ll Need
The Wire Cube Set
We used these HUBSON wire cube organizers — and the key thing to look for is a set that includes BOTH wire panels AND solid panels. The solid panels are essential for the decorated backsplash, the hidden storage row, and the oven front. Whatever set you buy, make sure it has both types.
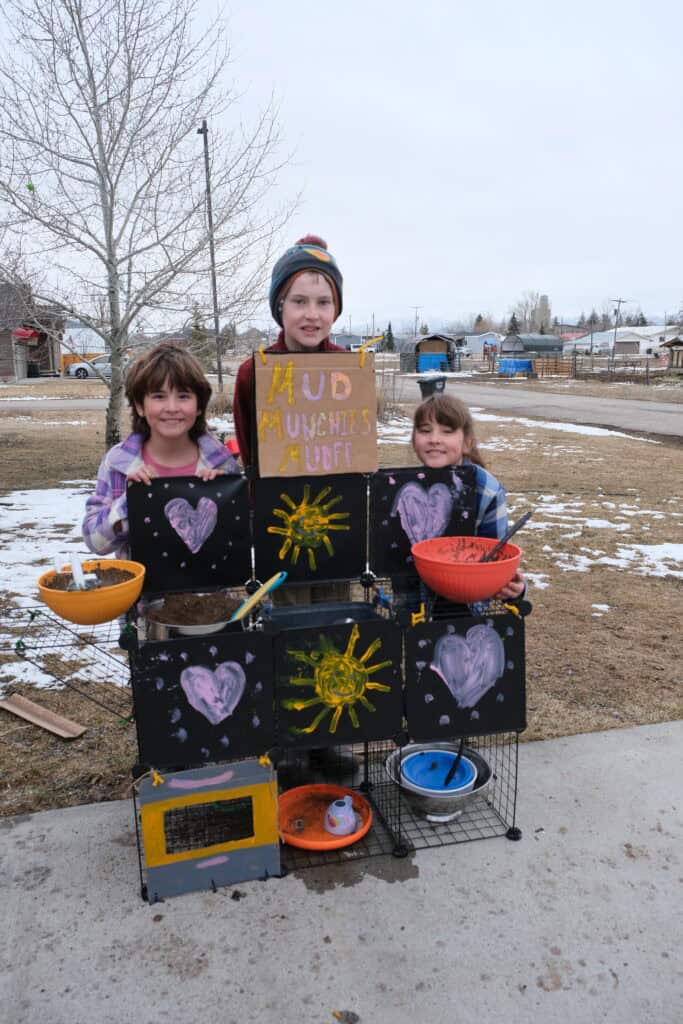
Here’s the panel breakdown for our build (approximately 30 panels total):
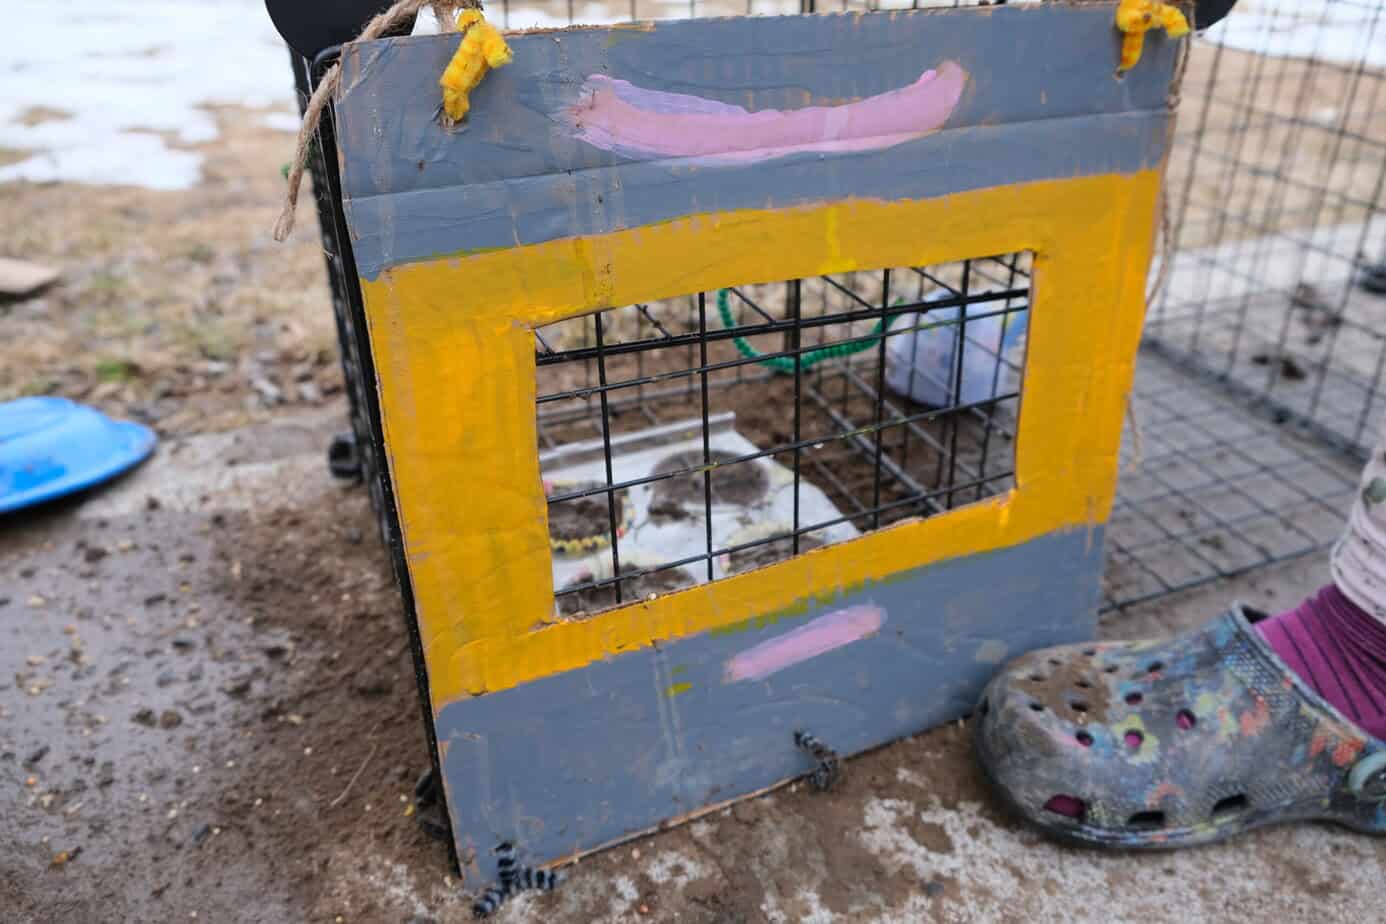
- Bottom Row, 14 Panels – 6 for the enclosed oven, 4 for the other open storage area
- Counter Row, 13 Panels – 2 for optional side table, 2 cubes open top for buckets, one cube closed top at the end of the row, all with solid fronts to color
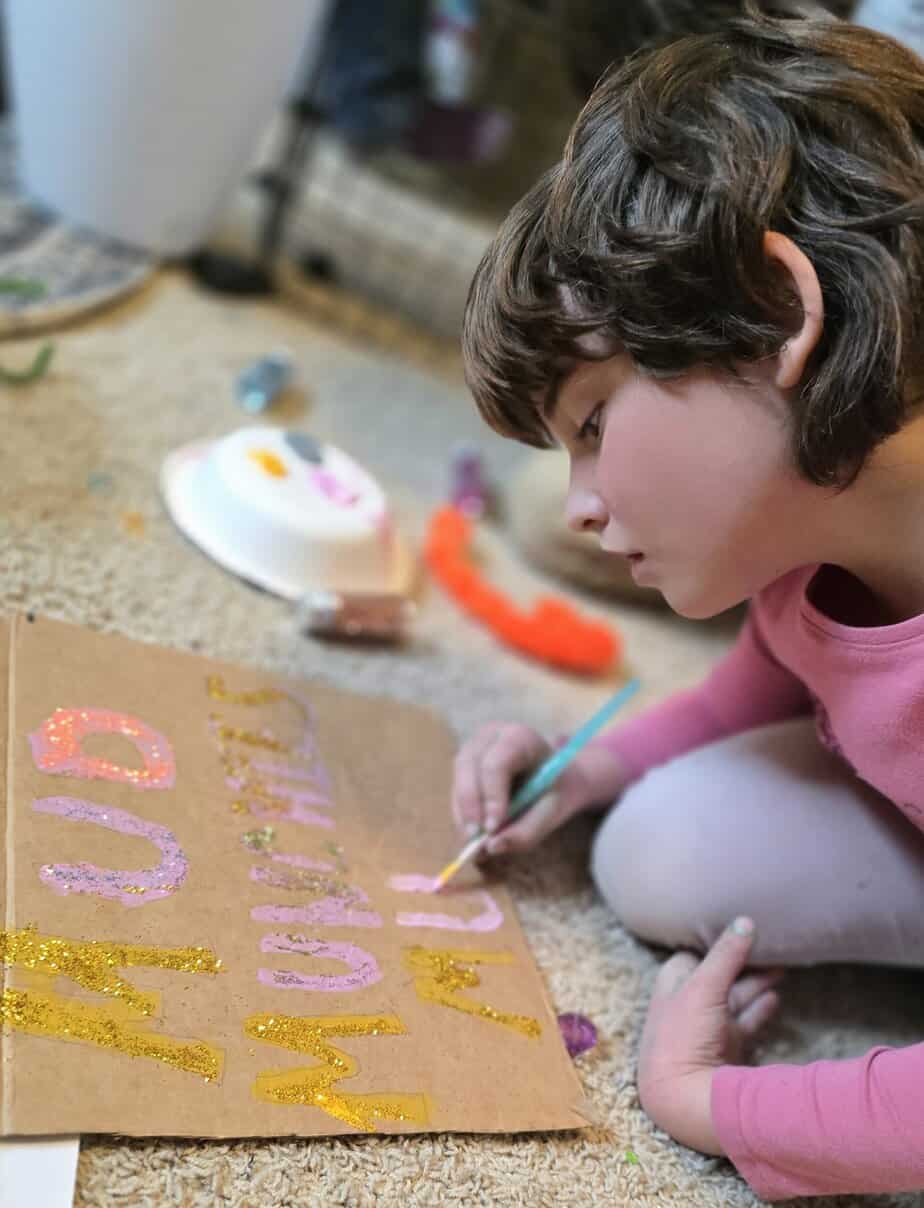
- Backsplash 4 Panels – 1 Row of solid panels with 1 more panel on top to hang the sign (ours was “Mud Muchies Mudfe!)
Everything Else You Need
- Plastic connectors – included with the cube set, these are your main fasteners
- Zip ties – for extra security on the base corners and the mud/water areas where things get heavy. Easy to snip when you want to take it down.
- Pipe cleaners – great for softer connections you’ll want to undo more often, like attaching the cardboard oven door
- Scissors – to trim zip ties and cut cardboard
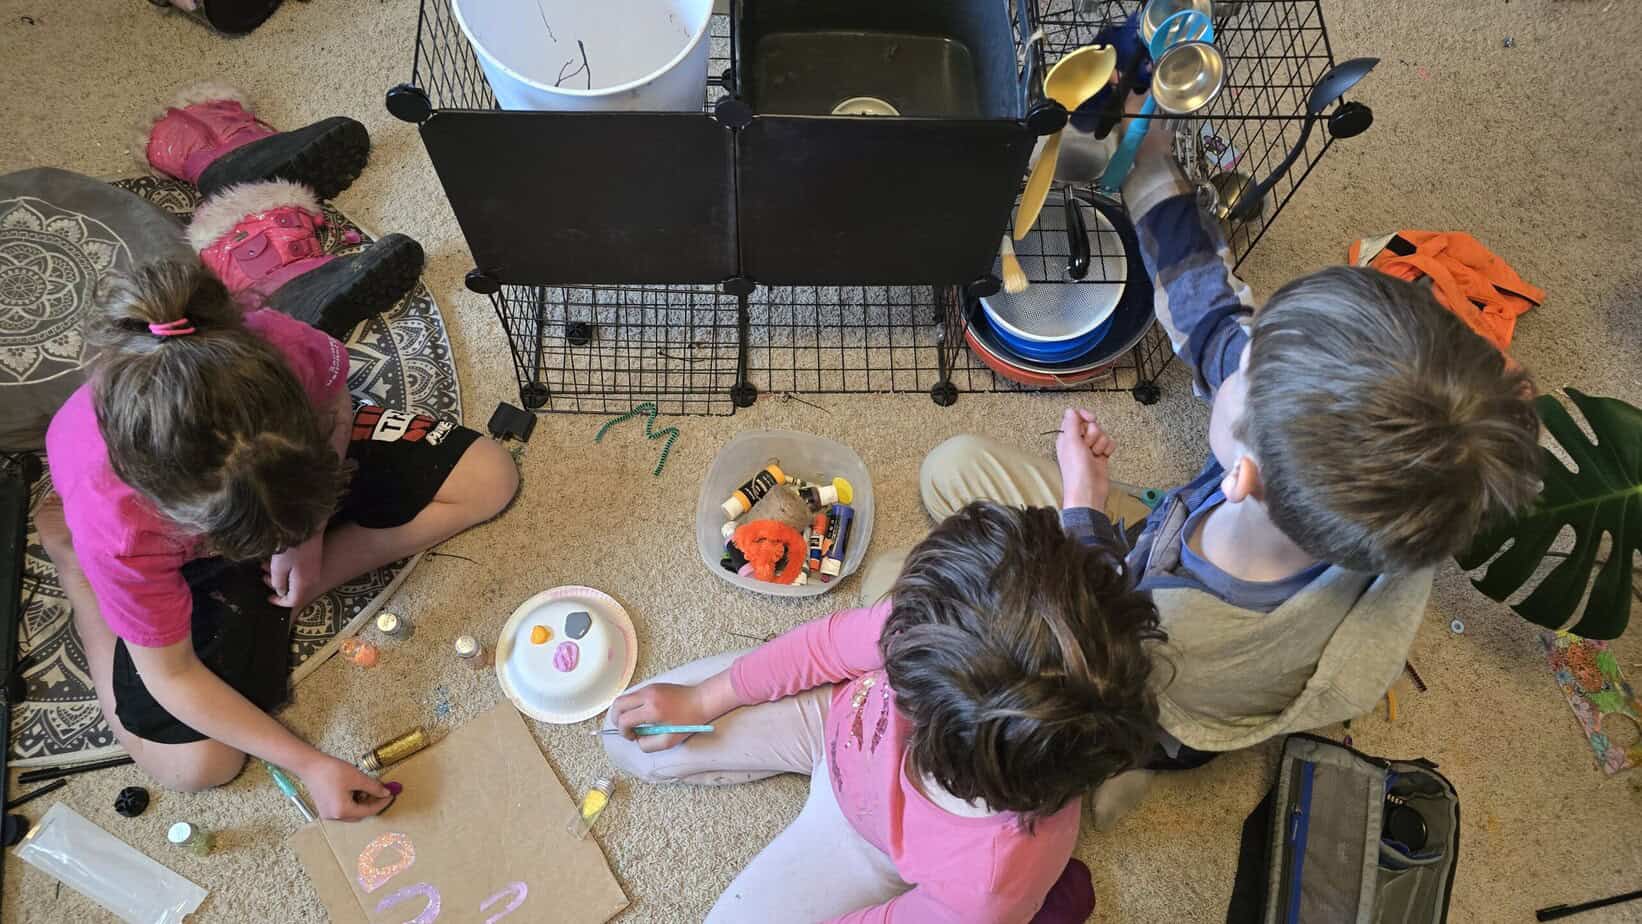
- Tempera paint + brushes – for decorating the solid panels. Tempera is ideal because it’s non-toxic, cheap, and when it weathers off the kids just repaint it!
- Cardboard – for the oven door panel and the kitchen name sign
- A marker or paint pen – for the sign
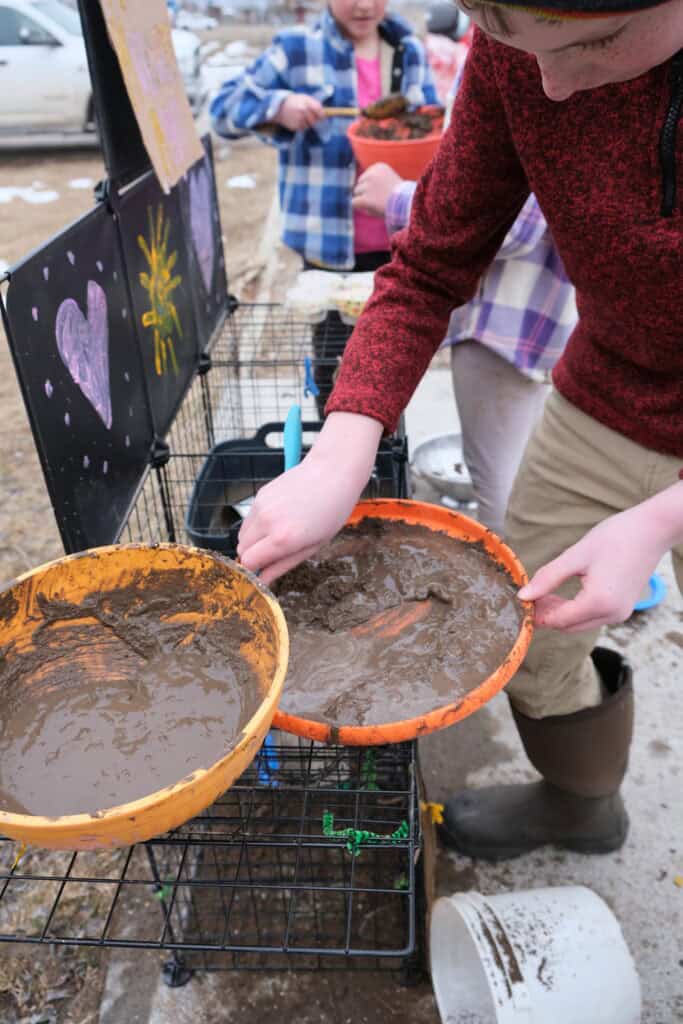
The Sink (Optional but Amazing!)
We got lucky at the thrift store and found a small camping sink that fit perfectly into one of the counter holes. If you can find one, grab it – it makes the whole thing feel like a real kitchen and gives kids a proper “washing up” station. If you can’t find one, a mixing bowl set into the counter hole works just as well!
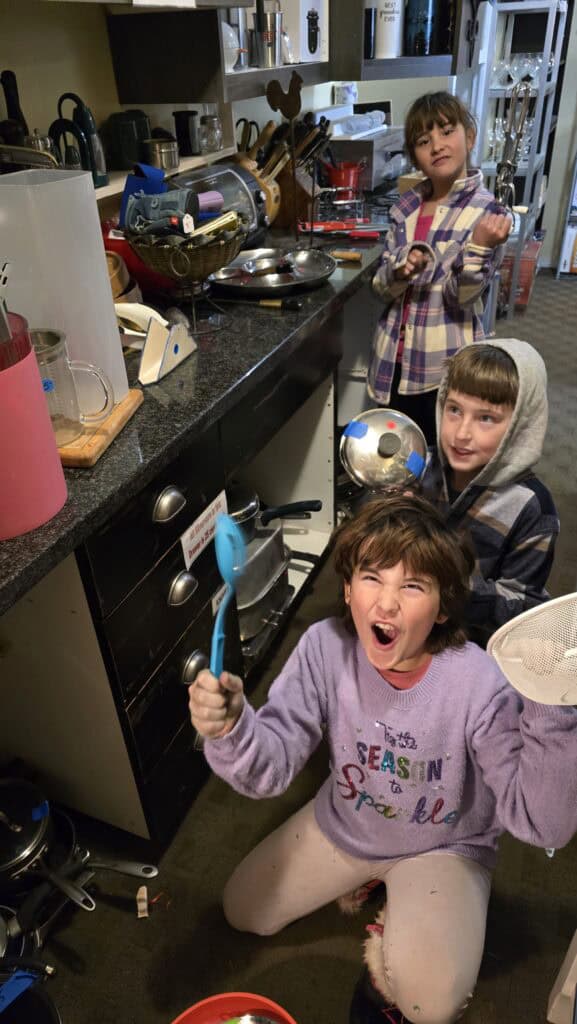
The Thrift Store Haul (~$5–15 depending on your store)
This is the fun part! Head to your local thrift store or Goodwill and look for:
- Mixing bowls in a few different sizes
- Pouring cups and measuring cups
- A manual hand whisk – or two, because they will fight over this one!
- Wooden spoons and ladles
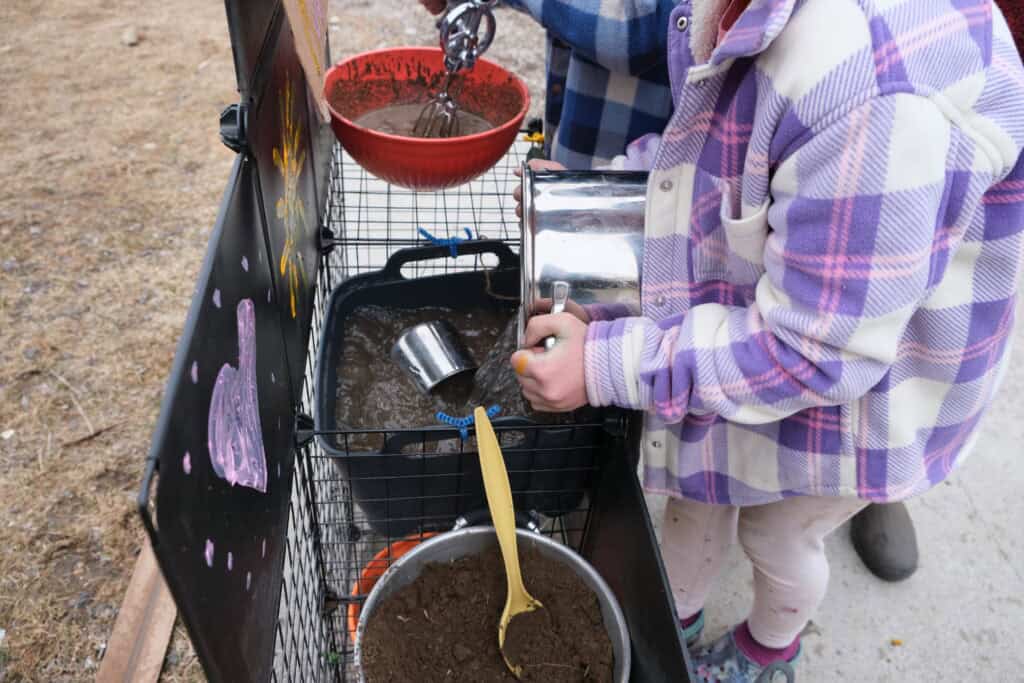
- Colanders and strainers – mud draining through a colander is endlessly fascinating to kids
- Muffin tins and small baking pans
- Ice cube trays
- Durable bowls – no glass!
Pro tip: Grab duplicates of the most popular items cups, bowls, and whisks especially. If friends come over to play, having extras means nobody is waiting for a turn and you avoid the inevitable meltdown over the whisk. Trust me on this one.
How to Build It: Step by Step
The whole build takes under 30 minutes, and no special skills are required. If you’ve ever assembled a wire cube shelf unit, this is the exact same process – just configured as a kitchen instead of a bookshelf!
DIY Mud Kitchen from Wire Cubes - No Wood or Tools Needed!

Budget friendly, easy to clean, and with no wood required, this DIY mud kitchen made from wire shelving cubes is quick to make and provides TONS of fun! Best of all, it's easy to pack down and set up for outdoor activities anywhere - camping to backyards!
Materials
- 30 pack set of wire cubes (linked below)
- Carboard
- Paint
- Pipe Cleaners
- Zipties for added stability
- Thrift Store Kitchen Items
Tools
- (Optional)Mallet
Instructions
- Build the Bottom Row First - Make a set of 3 cubes across with an open front. If you choose to include the oven in your mud kitchen design, use an extra panl for that an attatch it with pipe cleaners so it can swing open and closed.
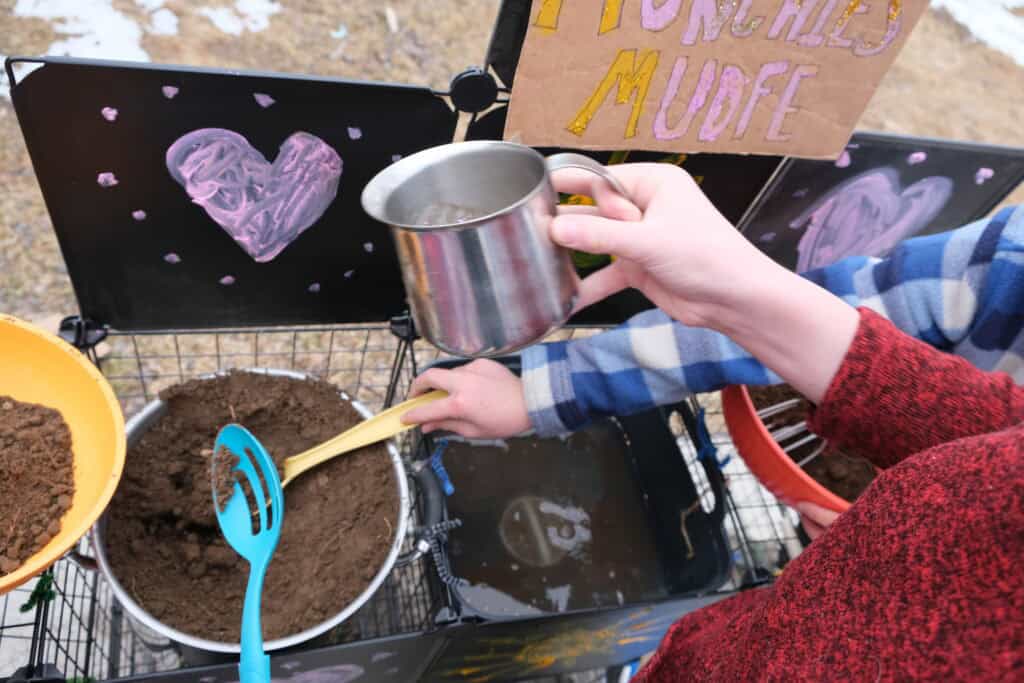
- Build the Second Row/Counter Top - This row has solid panels for the front so that they can be painted and decorated. The "counter" will have one closed top and two open. The two open tops will be for the mud pot and water pot/sink, then the closed top is for the kids to set their mud dished on! This also looks nice as the solid panels reduce the cluttery look.

- Build the Side Table - Attatch one panel out from the counter, then using pipe cleaners, attach one panel at an angle so that the table is braced against the side of the counter row (see the picture, it's easier than this sounds!)

- Add the Backsplash and Kitchen Name Panel - Solids are fun for this so that they can be painted on as well. We put the name of our mud kitchen on a piece of cardboard mounted to it (it's called Mud Munchies Mudfe =P)

- Decorate! - The painted stuff isn't *needed* but it's very fun! We made a front for our oven and some cute naturey symbols on the fronts. And, of course, lots of glitter on our sign!
Notes
Make sure to go the thrift store for your goodies - we got various bowls, whisks, spatulas, strainers and everyone's favorite so far (that even I was surprised to find!) a manual, mehcanical whisk! 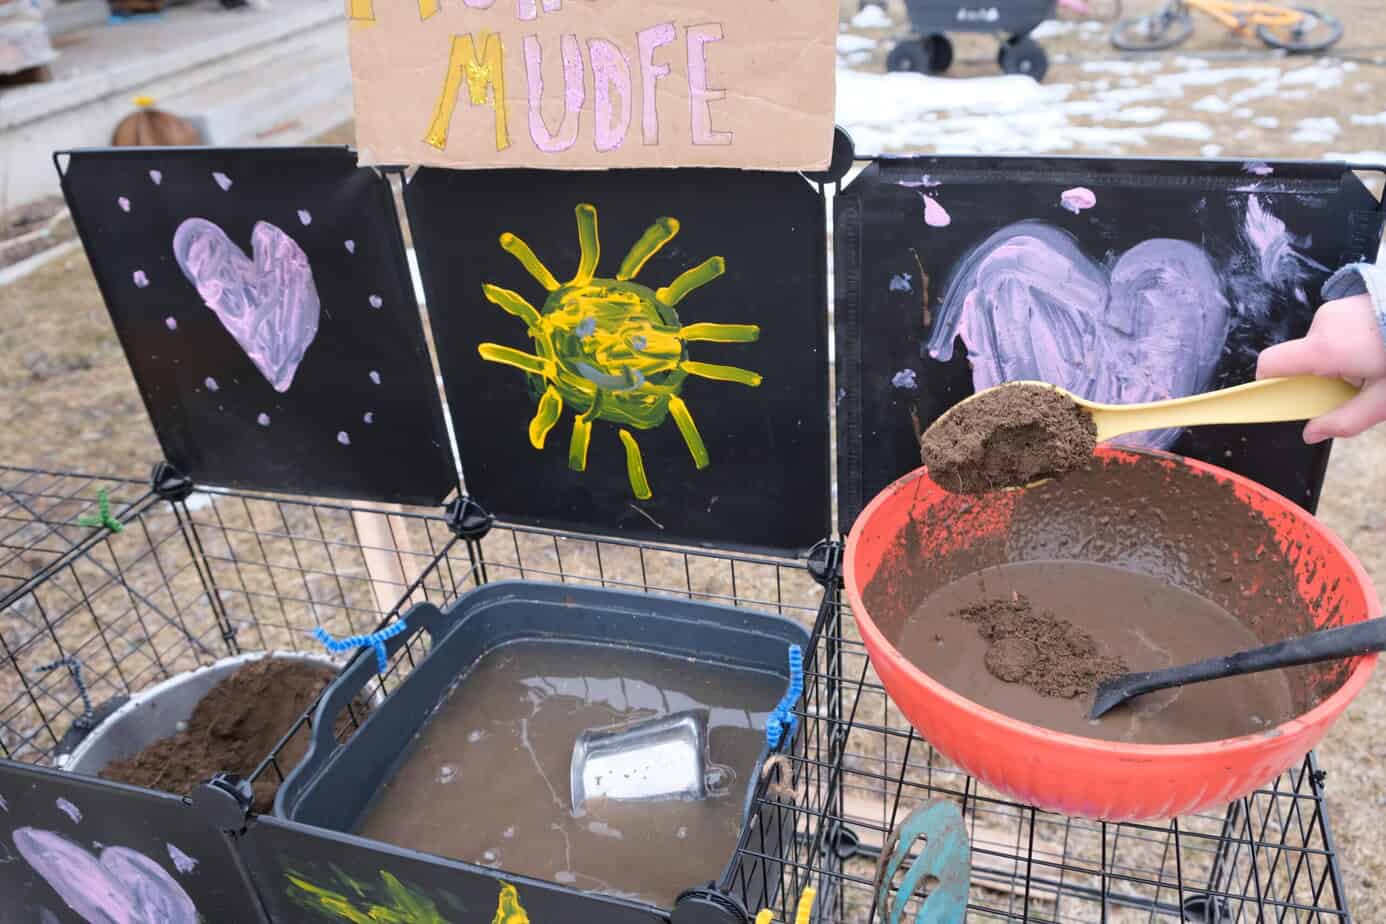
Recommended Products
As an Amazon Associate and member of other affiliate programs, I earn from qualifying purchases.

Setting It Up at Anywhere
This is honestly where the wire cube mud kitchen really shines – and the whole reason we made it this way in the first place!
Packing It
Pop the zip ties on the non-essential connections, pull the connectors, and the panels stack completely flat. The whole structure tucks easily into the back of the car alongside your regular camping gear. The thrift store tools pack into a small bin or bag – we use one dedicated “mud kitchen bag” so it’s always ready to go.
Setting It Up
Once you’ve assembled it a couple of times at home, setup at camp takes about 10 -15 minutes. Find a flat spot that water won’t ruin – near a tree in the grass is great because kids can use the surrounding nature as their “pantry” – and put it together exactly the same way you did at home.
The Backyard Is the Best Mud Kitchen Pantry in the World
Pair this with a fun cooking challenge, such as these “Sensory Soup” mud kitchen recipe cards, and they’ll disappear for the afternoon collecting and creating outside. Dandelions, flower petals, grass, pinecones, acorns, leaves, pebbles, bark, seed pods – it’s all right there, and it’s all free.
If you want more ideas for nature materials kids can collect and use, check out our Build a Nest Scavenger Hunt – the collecting instinct is exactly the same and the two activities pair perfectly together on the same day!
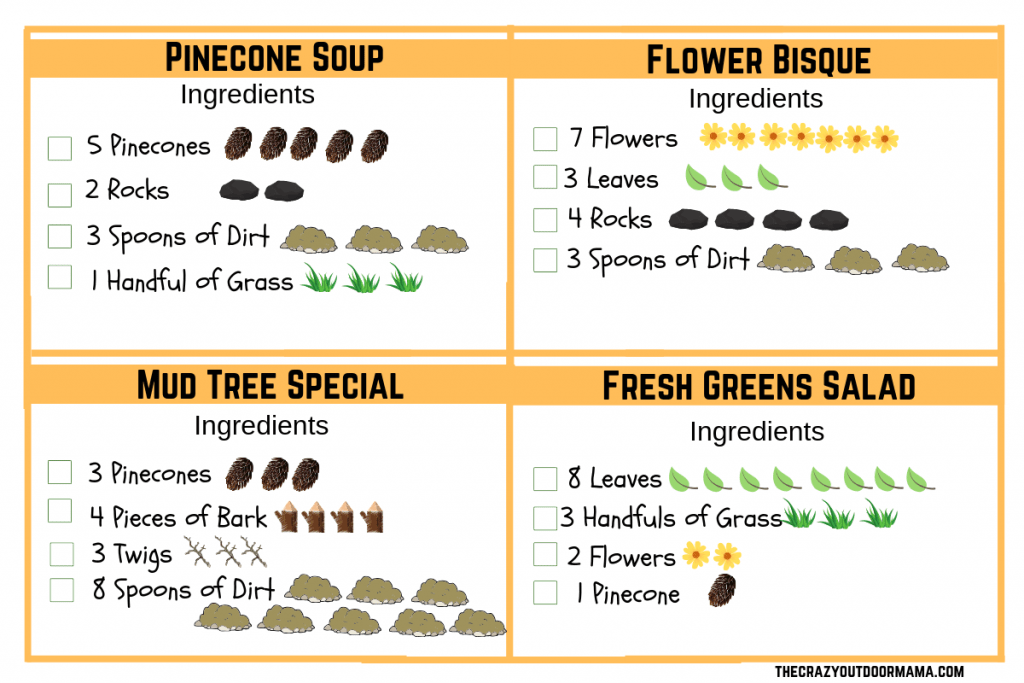
Mud Kitchen Recipe Ideas
Once the kitchen is set up, kids really don’t need much direction – hand them the tools and the mud and they’ll figure the rest out! But if they need a little inspiration to get started, here are some classic mud kitchen recipes:
- Mud Pie – pack mud into a pie tin, decorate the top with flower petals and pebbles, and “bake” it in the oven
- Nature Soup – fill the big pot with water, mud, and whatever they can find: grass, dandelion stems, leaves, sticks. Stir vigorously. Serve to adults with a straight face.
- Petal Potion – flower petals mashed and stirred into water with the whisk. Smells surprisingly nice, looks absolutely magical. Save little glitter bottles and such to reuse them for potions bottles!
- Dandelion Salad – There’s so many parts to dandelions – roots, stem, leaves, petals, and the white fluff at the end!
- Mud Pizza – Lots of room to use their gathered nature spices and toppings, and works really well if you use an upside down frisbee as a mold!
Tips for Getting the Most Out of Your Wire Cube Mud Kitchen
- Modify the design as needed (it’s easy since it’s all just wire cubes!) – Need more table space? Need to add some hooks to hold more tools? Keep some pipe cleaners and zip ties around for quick modifications!
- Make repainting a spring tradition. Since tempera paint weathers off over the season, doing a fresh coat of paint together at the start of spring has become a little ritual in our house. The kids love having ownership over how it looks each year.
- Use a dedicated water jug rather than a hose. A gallon jug gives kids plenty of water to use without leaving the house on by accident! It also means you can set the mud kitchen up anywhere in the yard without needing to be near a hose (we set ours up in the driveway so all the extra water just runs down into the rocks!)
- Organize tools in the wire slots on the counter – This lets them drip dry and it’s easy for kids to see what tools to grab!
- Grab doubles of the whisks, spatulas and strainers – It’s less fights when you have multiple kids =P
Frequently Asked Questions
Is mud play safe for kids?
Yes! For healthy kids, playing in regular garden soil and mud is not only safe but genuinely beneficial. Soil contains natural bacteria that research has linked to improved mood and immune function. The main things to keep in mind: use soil that hasn’t been treated with pesticides or herbicides, and have kids wash their hands when they’re done. At camp, natural soil is perfect.
What age is a mud kitchen for?
The sweet spot is roughly 2–8 years old, but older kids get into it too – especially when friends are involved. My kids range in ages from 8 – 10and they all play together at the mud kitchen happily. For toddlers specifically, a slightly lower setup and fewer tools at once works best so they’re not overwhelmed.
How do you clean the tools?
A quick rinse with the hose at home, or a bucket of clean water at camp. The wire frame itself just gets left out — rain handles it. At the end of the season, a more thorough rinse and dry before storing flat is all it needs.
Can you do this in a small space or apartment?
Yes – and this is one of the wire cube version’s biggest advantages over permanent wooden builds! For a balcony or small patio, just build a smaller version (even one cube wide works). Use a bin of potting soil instead of digging in a yard, and a jug of water as your source. The whole thing collapses and stores flat inside between uses, which makes it totally practical even without a yard.
What if I don’t have a wire cube set already?
The HUBSON set linked above is what we used and the solid + wire panel combination is the key feature to look for. You can also check Facebook Marketplace and thrift stores — wire cube sets turn up there constantly, often for just a few dollars.
More Outdoor Activities Your Kids Will Love
If your kids are the type who love getting muddy, collecting things from nature, and generally being feral outside — same — here are more activities they’ll be obsessed with:
- Sensory Soup Nature Activity – the original nature kitchen activity that pairs perfectly with mud kitchen day
- Build a Nest Scavenger Hunt – collect nature materials with a purpose, free printable included
- Worm Hunt Sensory Game – perfect right after a rain, pairs beautifully with mud kitchen day
- 21 Camping Activities for Toddlers – if you’re taking the mud kitchen camping, here are 21 more ideas to fill the trip
- 14 Outdoor Rainy Day Activities for Kids – because mud kitchens and rainy days were made for each other