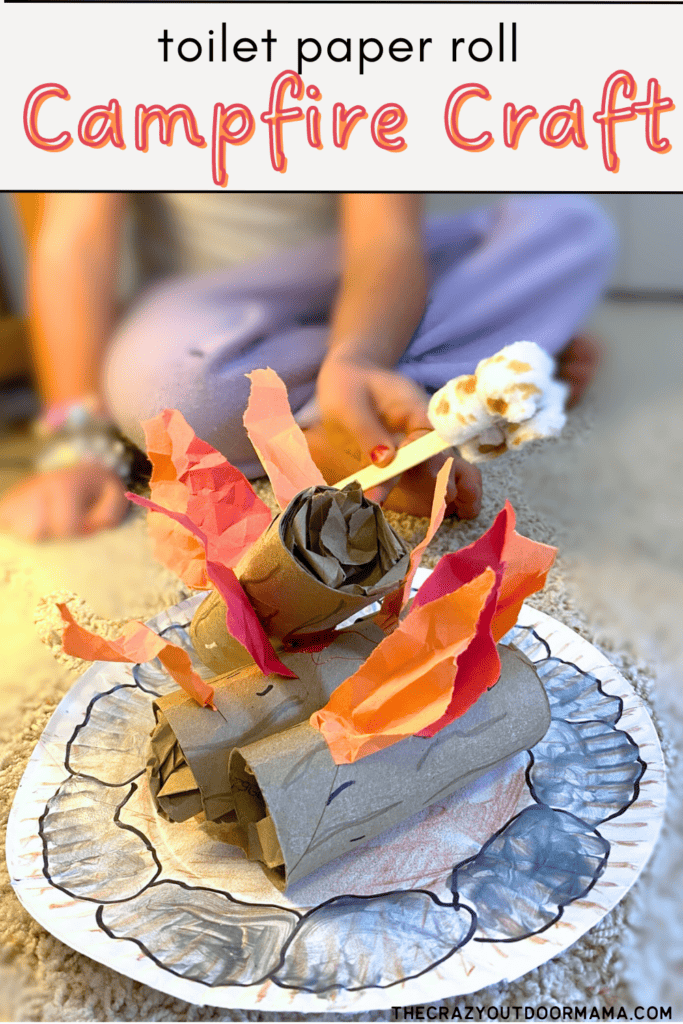
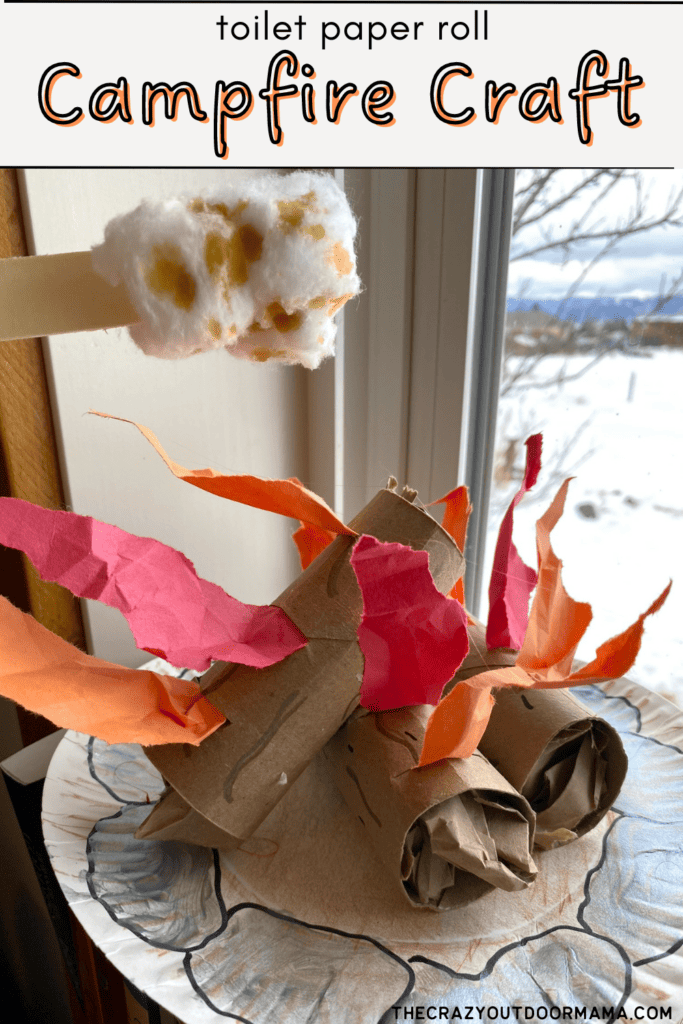
If you have some empty cardboard rolls laying around, then you are off to a great start for this camping themed craft – a cardboard log campfire with a cotton s’more!
I tend to be a collector of throw away stuff – pretty much EVEYRTHING can be used to make a craft. Lids, old packaging, wrapping paper… and I love crafting with it because it feels like I am creating “free” fun for my kiddos!
The kids stuffies needed a campfire for their campout, and I had a bunch of cardboard/brown paper type stuff in my “random” bin, so this is what happened!
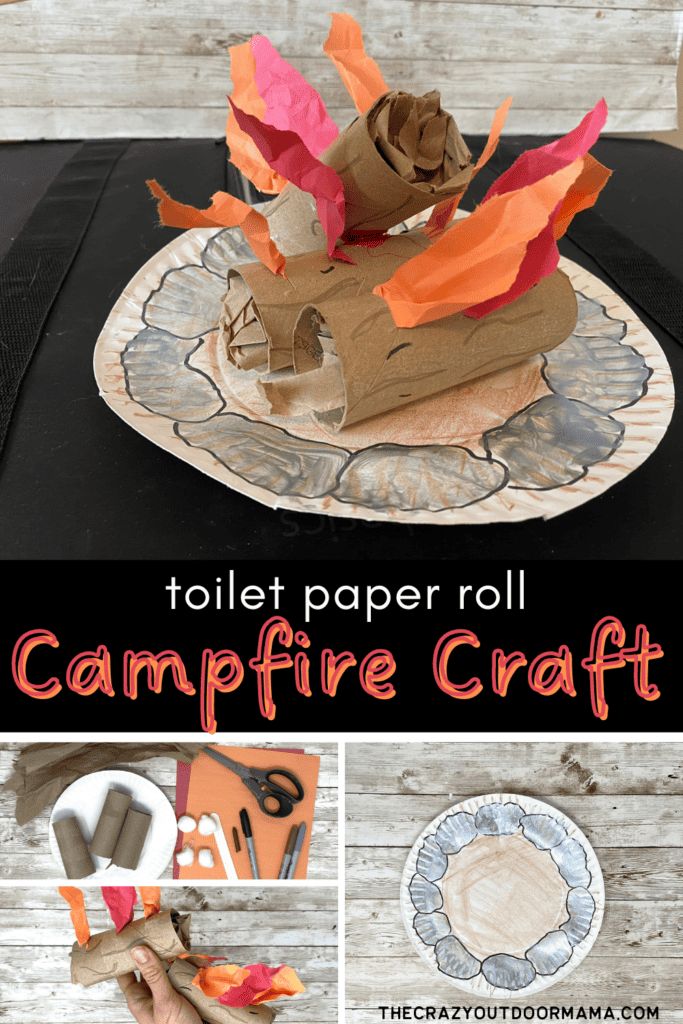
Materials Needed for Craft
- 3 Empty TP rolls/cardboard tubes
- Atleast 2 fire colors (I used red and orange, but yellow wouldn’t be bad either!)
- White paper plate
- Crayons/markers to decorate campfire pieces
- Popsicle stick for s’more handle
- 4 cotton balls for marshmallow
- Scissors
- Glue
- Optional – Brown packing paper to stuff the logs with so they don’t look hollow.
- Optional – Tiny bit of coffee for the perfect toasted look =P

Steps to Make Your Cardboard Tube Campfire
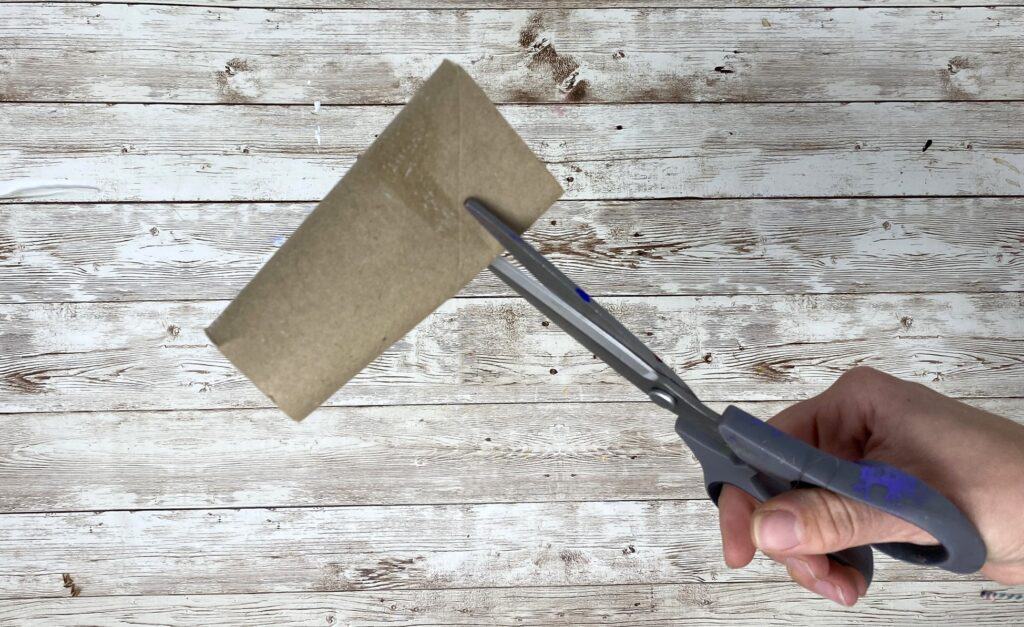
Step 1: Create slits for your flames – Cut three slits (more if you want to add more flames) spaced evenly apart. They should be around 1 inch deep – fold the tube slightly and cut.

Step 2: Decorate and stuff the logs – If you have brown paper, this is a fun extra step. Tear up the paper, crumple it tightly together, then stuff it into the tubes. It should mostly stay in itself if you pack it tight enough, but feel free to put some glue in the log as well. Add any “bark” lines you’d like.
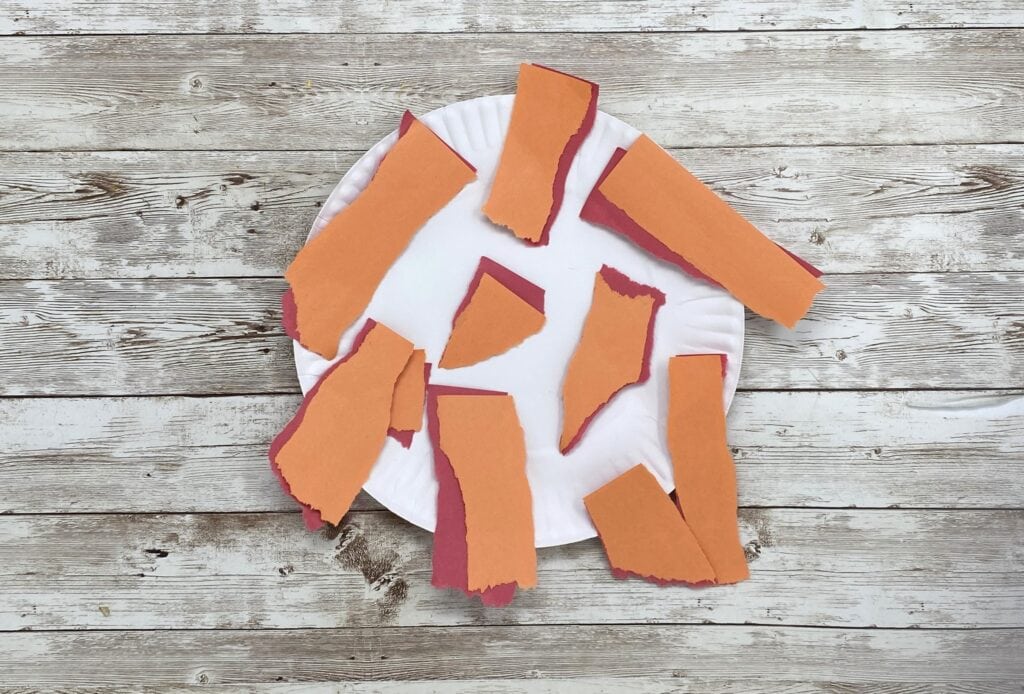
Step 3: Create the flames – Stack the two colors you chose ontop of eachother and rip it in half hotdog style. Then rip them up further into strips. Older kids (+me =P) may like further shaping via ripping them into more curved/flame shapes. Crumple the flames for an even cooler look!
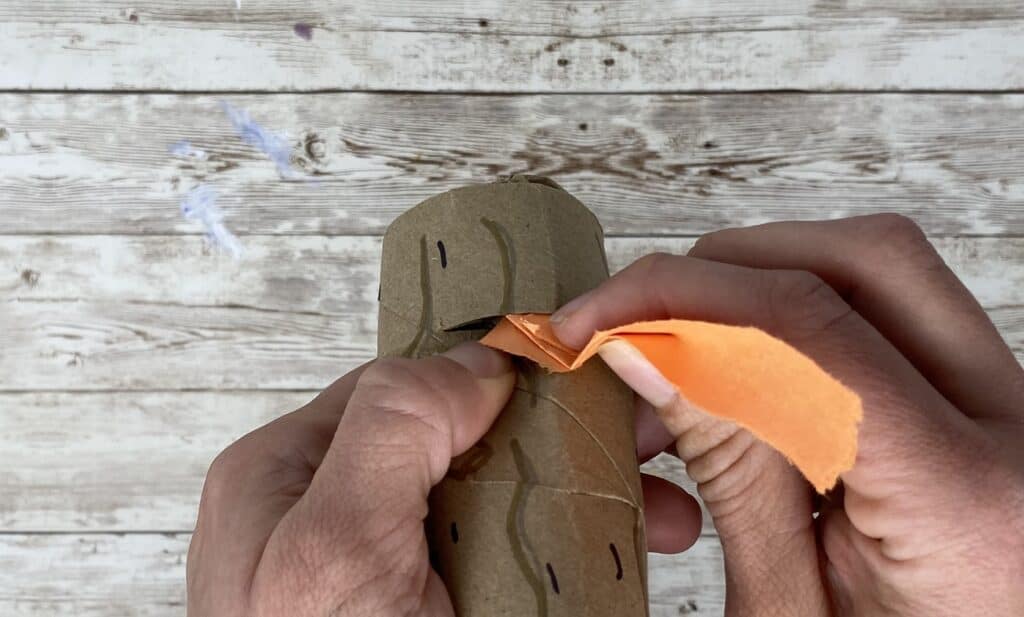
Step 4: Tuck the flames into the log slits – Push down one side of the slit with your thumb while inserting a flat/folded/smooshed part of the flame into the slit with your other hand. If it’s too hard, grab some scissors to widen it!

Step 5: Tuck all flames into the log – Once your flame is in, it can be crumpeled whichever way looks best. The slot should hold the flame in place, but if your kiddo made too deep of one, feel free to use glue. Bigger kids may want to do more slits for MORE fire! =d
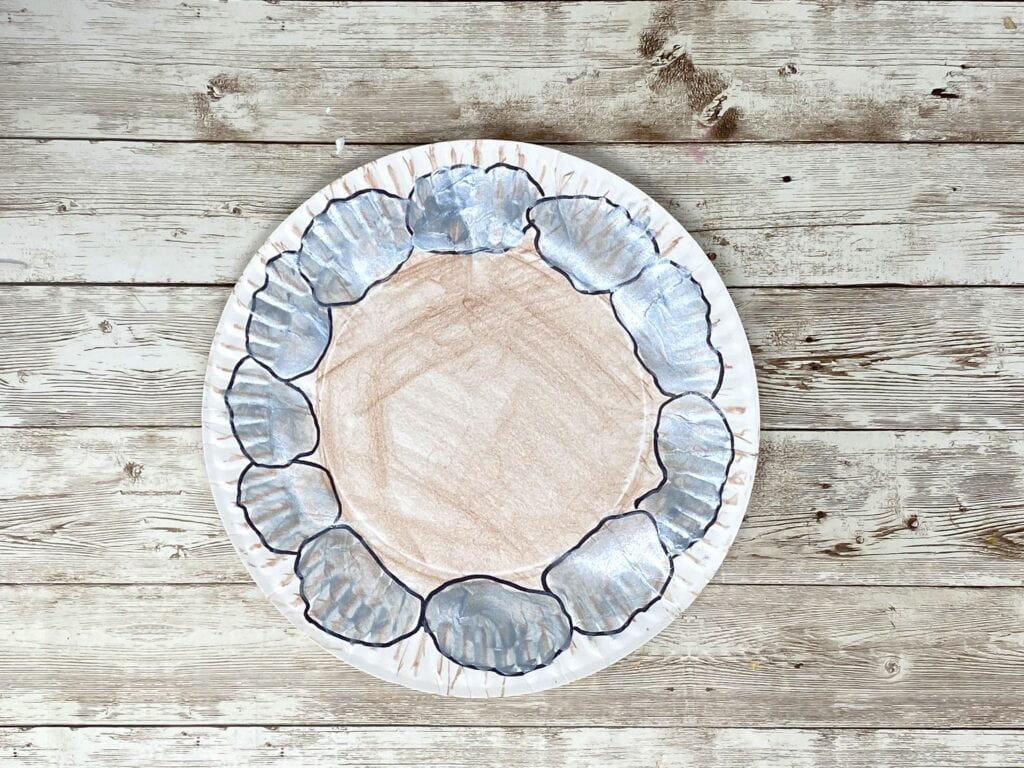
Step 6: Create your campfire ring – Color the paper plate and draw on your rocks. To achieve the fire ring affect, try to make sure the rocks touch on the side and are all a bit uniquely shaped. I also used paint to fill them in as crayons don’t work well on the textured sides of the paper plate.
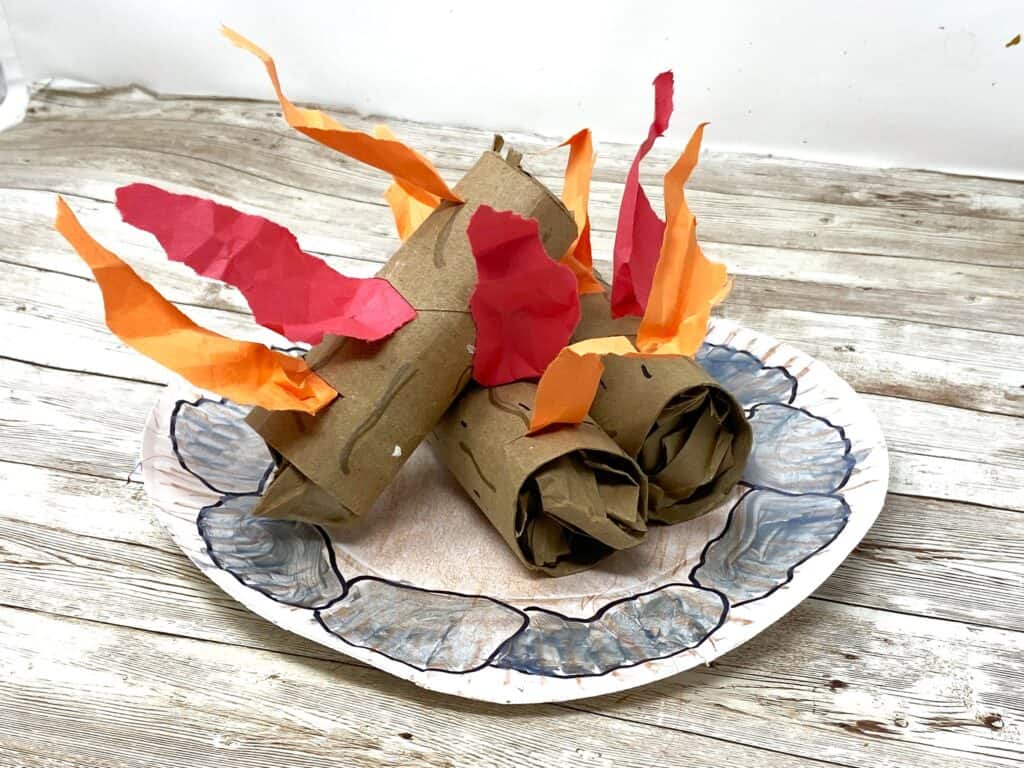
Step 7: Glue the logs in place – Place the logs however you like. I used hot glue (I’m impatient and hate waiting for regular glue =P) but regular glue would work fine too, depending on how you position your logs.
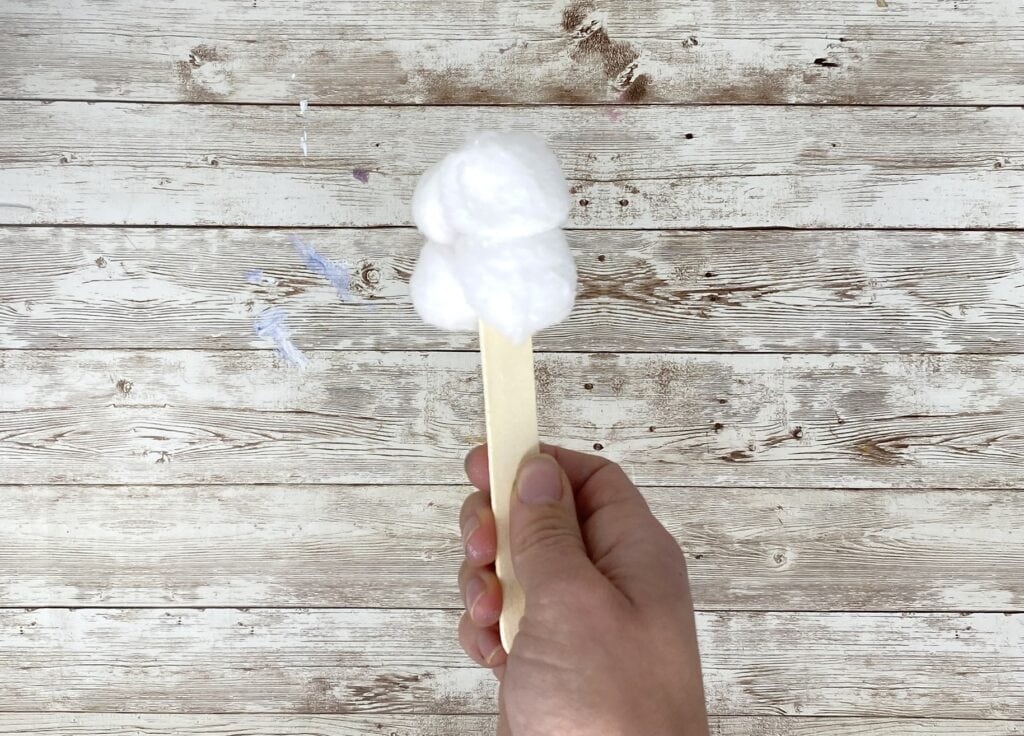
Step 8: Make your marshmallow – Glue two cotton balls to each side of the popsicle stick
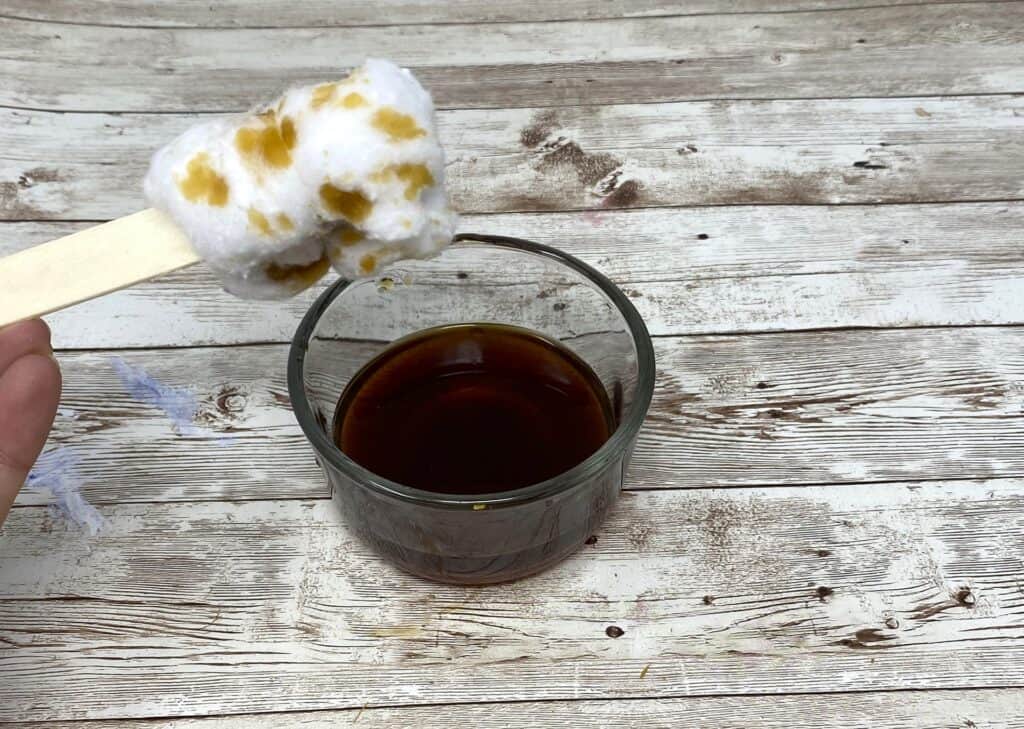
Step 9: (Optional) “Toast” the marshmallow – Get a small amount of coffee on your fingertips and splash it onto the cotton ball. Beware – dipping it to get a “burned” affect doesn’t look awesome… so just warn everyone. A marker probably works fine for the toasting too.
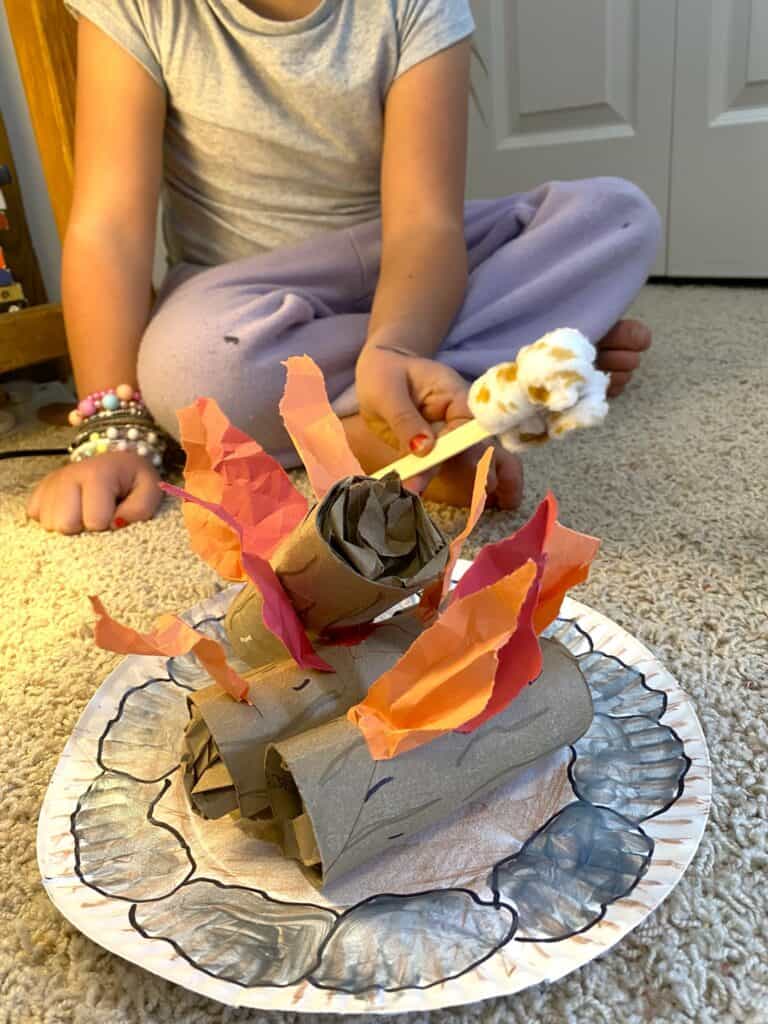
Step 10: Campfire fun! – Now all that’s left to do is invite some friends and get roasting with your new campfire craft!
Where Will You Use Your TP Tube Campfire?
As I sit here in winter in Idaho and look at the snow, I can’t help but look at my little campfire and wish it could also somehow put out heat. =P For now, we’ll use it inside and make a billion pretend campsites until summer time when we can get a real one!