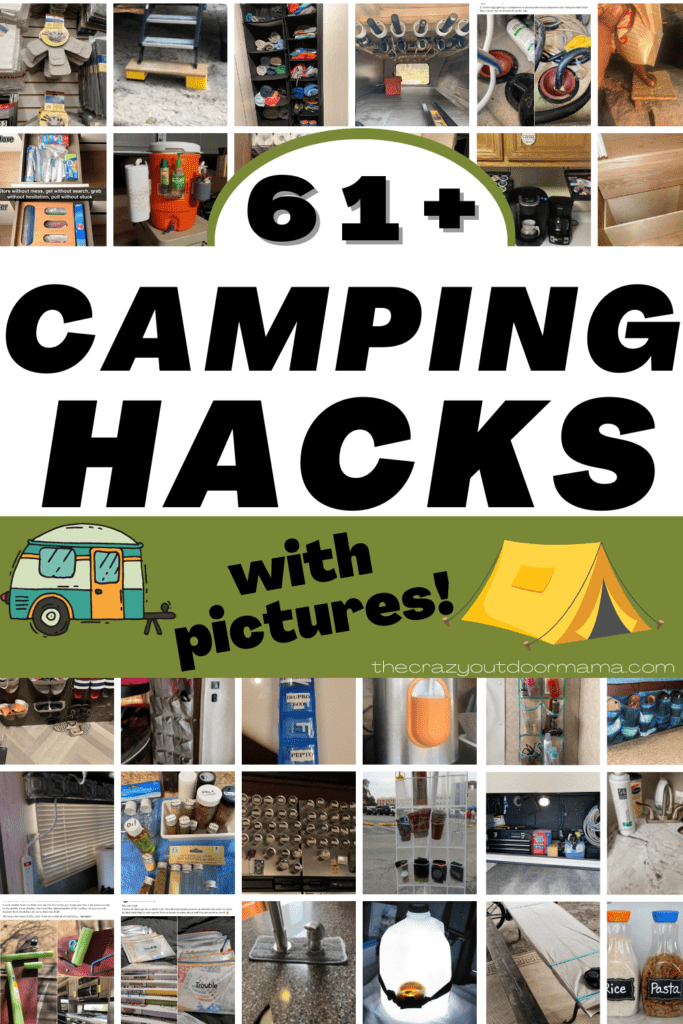
I’m excited to show you guys an amazing tutorial from Raechel Johnson today on how to make this BEAUTIFUL spring camping wreath!
As I’m writing this, we’re right in the midst of the corona virus outbreak (and hopefully when I read this months from now we’ll be done!) but on the bright side, the snow is melting and spring is coming (and so is camping!)
I saw Raechel post this beautiful wreath in one of the FB camping groups I’m in, and I just wanted to know how it was made so that others could DIY this pop of color and cheer too!
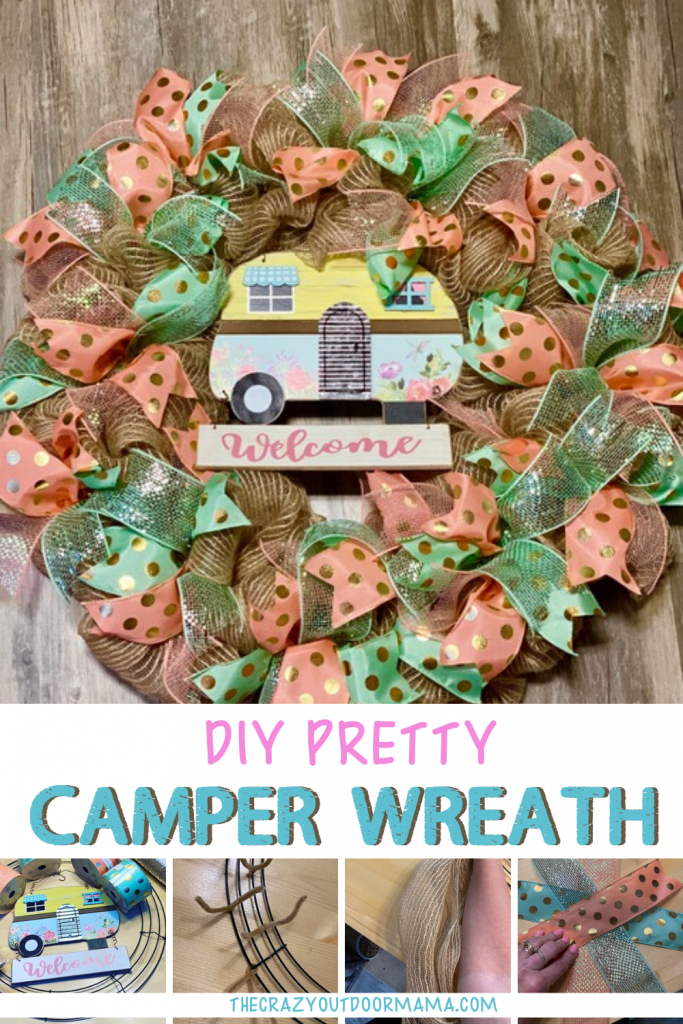
DIY Spring Camping Wreath
Make your very own, inexpensive spring camping wreath to welcome the camping season! With pretty pastel colors, this camping wreath will wow everyone who sees it!
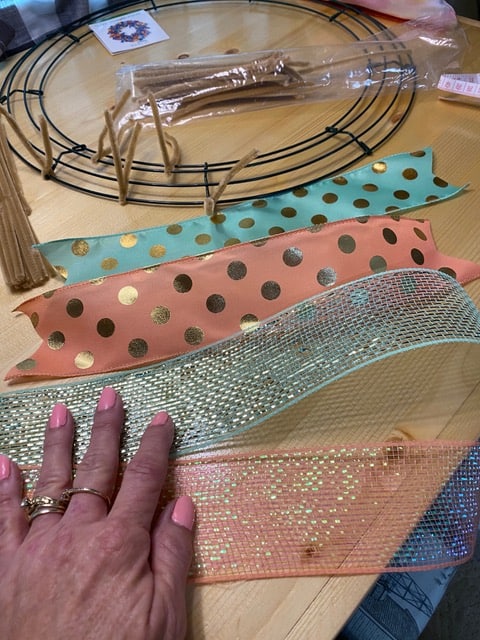
Materials
- -1 roll of Deco Mesh ( your choice of color ) used in project burlap color 21inches X 10yards
- -3-4 rolls of 2.5inch ribbon you can mix sizes but make sure 1 is 2.5 inches wide with wire
- -1 Package of pipe cleaners that match closely the color of your mesh
- -1 wreath form 14inches to 18inches ( the one used for this was 18 inches )
- -A roll of craft wire if you choose to have a decorative accent ( ie, like the little trailer )
Tools
- - Hot glue gun
Instructions
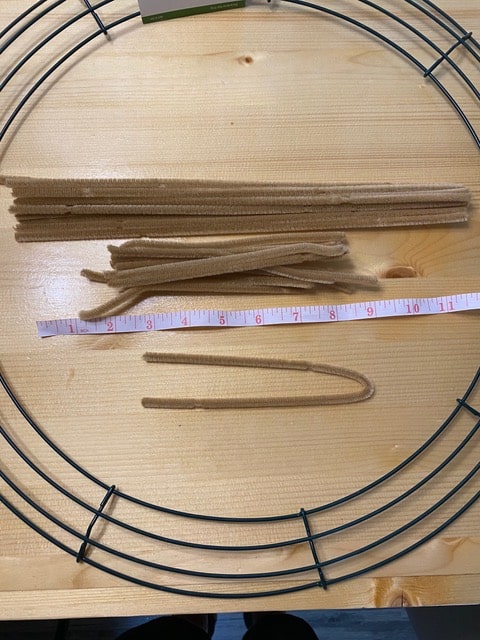
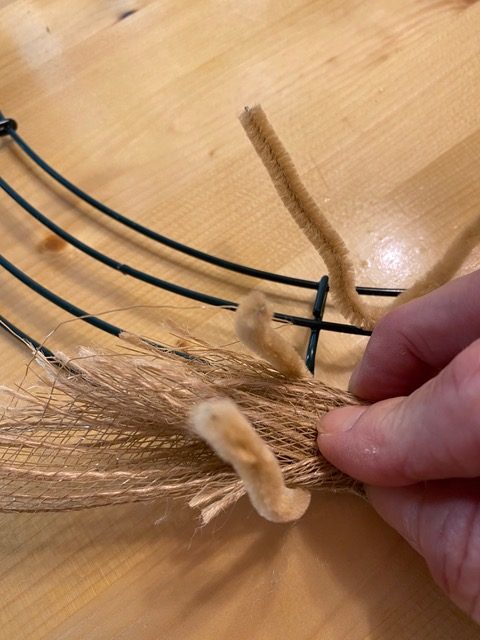
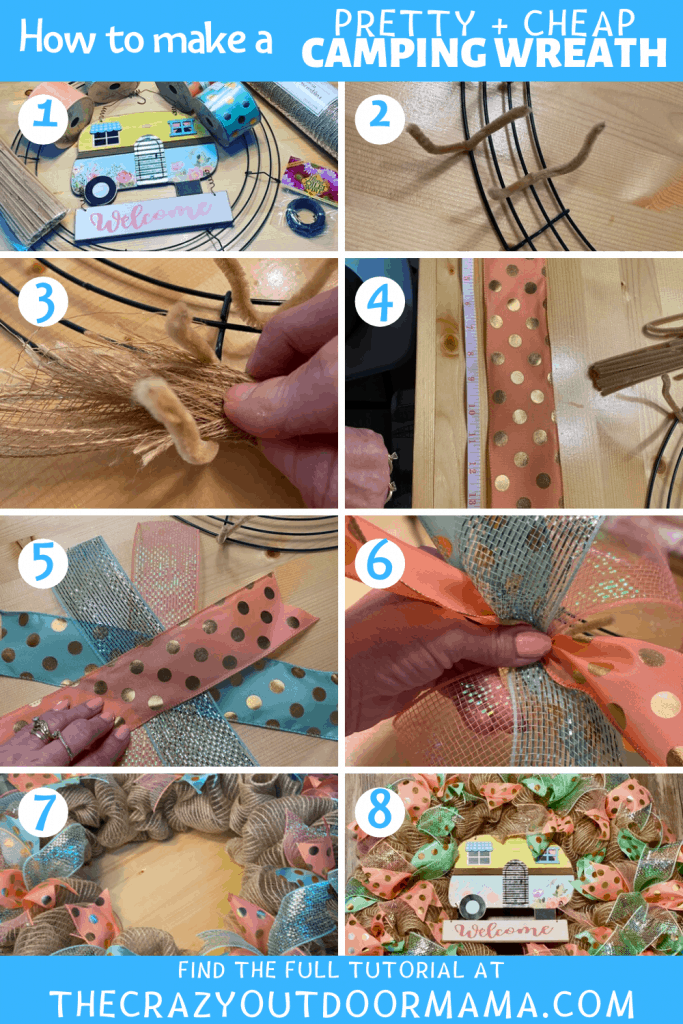
- Cut your pipe cleaners in half - you will need five per wreath section, so for an 18 inch form, you’ll have 45 pieces.
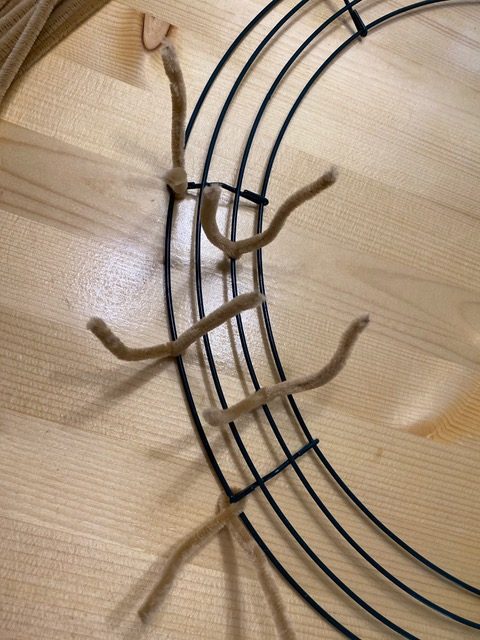
- Place the pipe cleaners like this - coming from the underside of the form and add a drop of hot glue before you give it one twist ( like the picture below ). Then continue all the way around the wreath having five pipe cleaners per section. The hot glue keeps the pipe cleaner from shifting around when adding the deco mesh. But only twist once as you need to room on the pipe cleaner to add mesh and ribbon later.
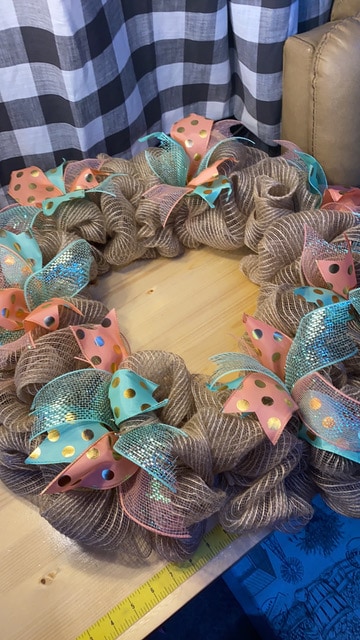
- Add mesh - Once you have all of your pipe cleaners on you can move onto adding the mesh. Open the mesh roll and gather the end in kind of a scrunch and twist the pipe cleaner around it once or twice but not too tight again as you need the pipe cleaner to add ribbon later.
- How to add the poof to the mesh - You will want approx 10 inches of mesh to create the poof to the next pipe cleaner and each pipe cleaner thereafter. I use my wrist to my elbow as it is pretty much 10 inches on everyone.
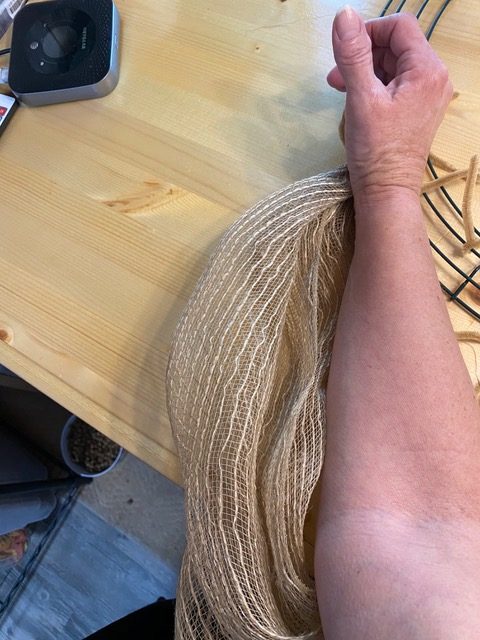
- Continue adding mesh until the end - Gather mesh and wrap pipe cleaner to make poof and keep going all the way around and continue doing this even into the center until you reach the final pipe cleaner. At the final pipe cleaner measure your 10 inches of mesh plus a small extra amount as this will be the end. Wrap mesh in pipe cleaner and cut off any excess and tuck down.
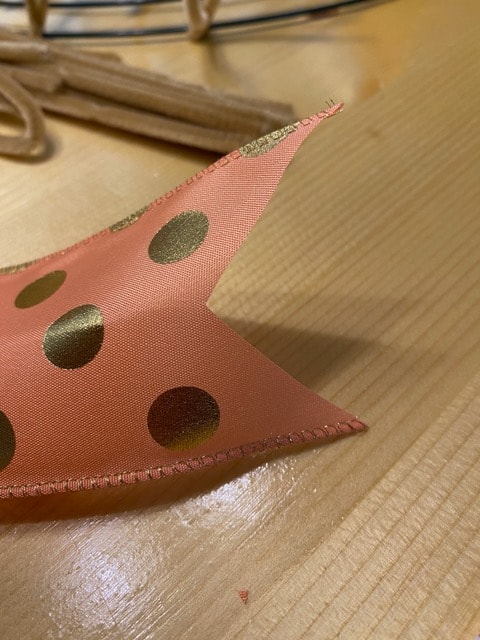
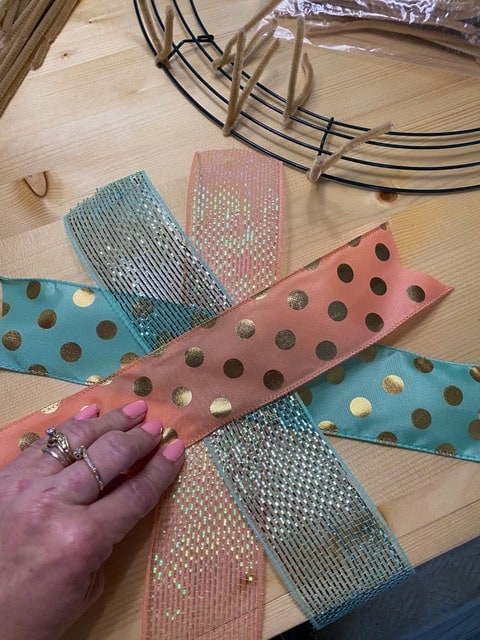
- Add ribbon accents - Now to cut your ribbon accents. You’ll need 14-14inches of ribbon per color using at least 2-3 colors. Also, cut your ends at an angle from the wired edge to create the angled edge.

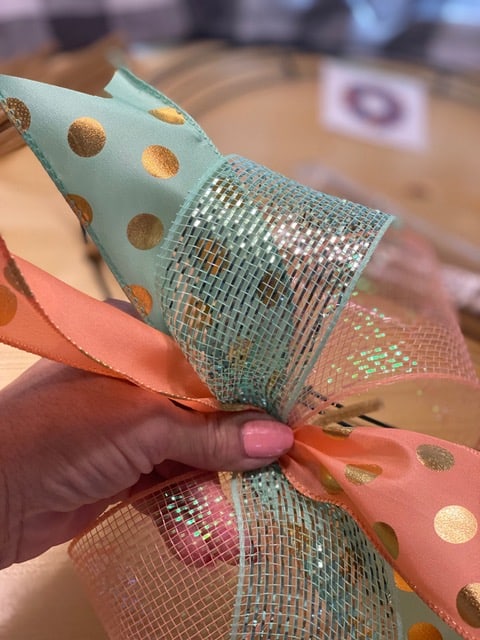
- Prep ribbons for the wreath - Once all ribbon is cut set out your piles of each color and prep to make your ribbon add ons to your wreath. The next 3 pictures are examples of what I do. I go around the outside of the wreath frame and do every other or so pipe cleaner and add a ribbon bundle, twist the pipe cleaner nice and tight then push any excess pipe cleaner towards the back after adding the ribbon. Lastly, fill in the center area pipe cleaners just to create a full look per how you like or want it.
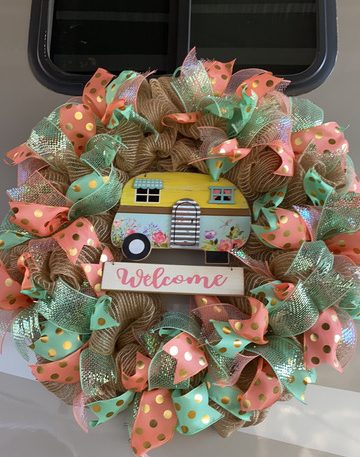
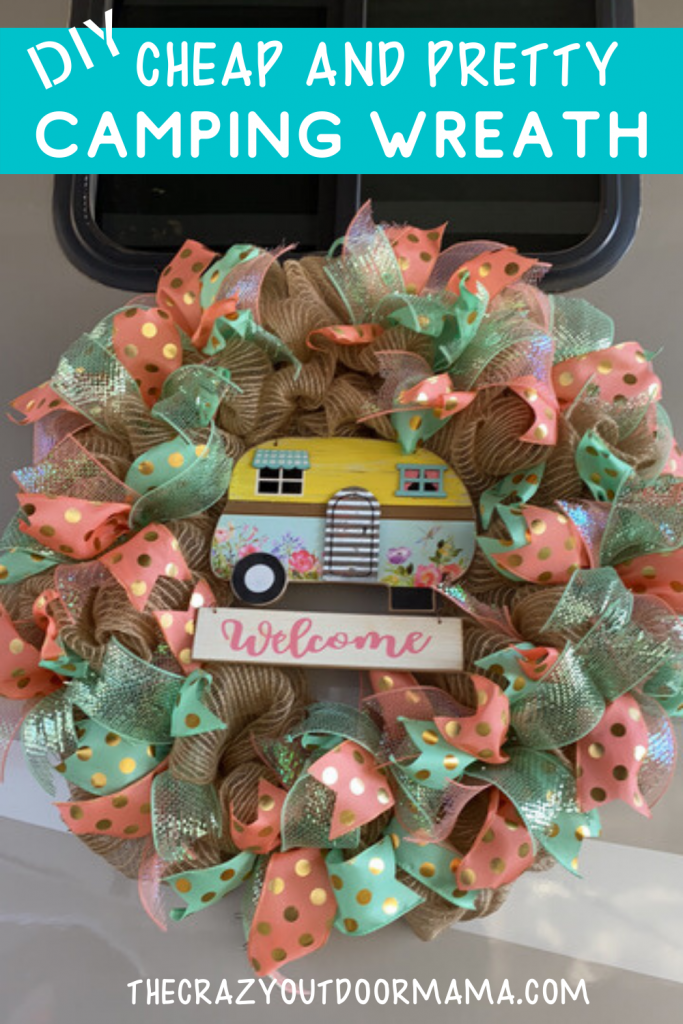
- Add your decorative accent of choice! - Once I get all the ribbon where I want I add a decorative accent and in this case, it was the cute little wooden trailer. It came with a hook so I was able to secure it to the wreath using its hook. But you can add anything as an accent per your liking.

Notes
I got all my supplies, except the trailer sign which I found on clearance at Dollar General for $1.50, at Hobby Lobby and used a 40% off coupon. I always look for the ribbon on sale as you can use any ribbon just make sure one has the wire edges.
Are you excited to welcome the spring camping season with this beautiful DIY camping wreath?
I know I am! Whether you hang this on your camper or “sticks n bricks” home, its sure to bring a smile to your face!
Other camping posts to prep for that first spring camp trip!
- Check out how to do a DEEP CLEAN in your RV or camper with a printable checklist to keep you focused) to prep it for spring camping!
- Get everything packed in your camper and prevent those emergency Walmart runs with this 9 page RV camping checklist!
- If you plan on camping for Easter and you have kids, check out these 9 fun ways to celebrate Easter while camping!
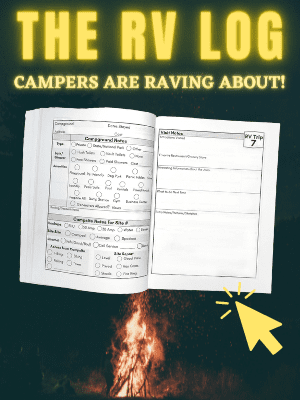
- Prep to log your camping memories with this free set of camping log printables – choose from black and white or color!
- Try out some of these 29 fun (and useful!) camping DIYs!
- 4H Archery Worksheets for Kids – Parts of a Compound Bow + More! - June 30, 2024
- 4H Archery Project Idea + Fun Archery Practice Ideas! - June 30, 2024
- DIY Nerf Orc Targets – Perfect for a Nerf Themed Party! - June 15, 2024