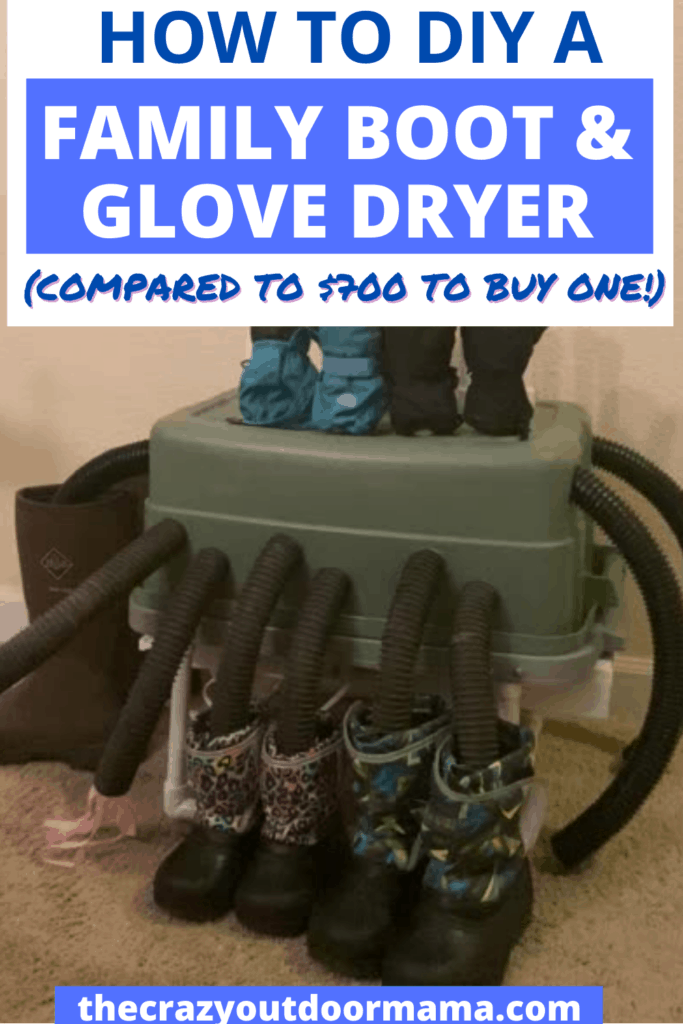
If you live somewhere snowy and have school aged kids, then you know the hassle of cycling soaked gloves and boots (positioning them for best air movement, remembering to swap them etc) on the dryer – that’s why we made this DIY one that can handle ALL of our gear (5 people!).
My kids are all finally in school, and I don’t know about you, but I’ve really been on the struggle bus (well.. before the dryer!) in regards to trying to get everything dry.
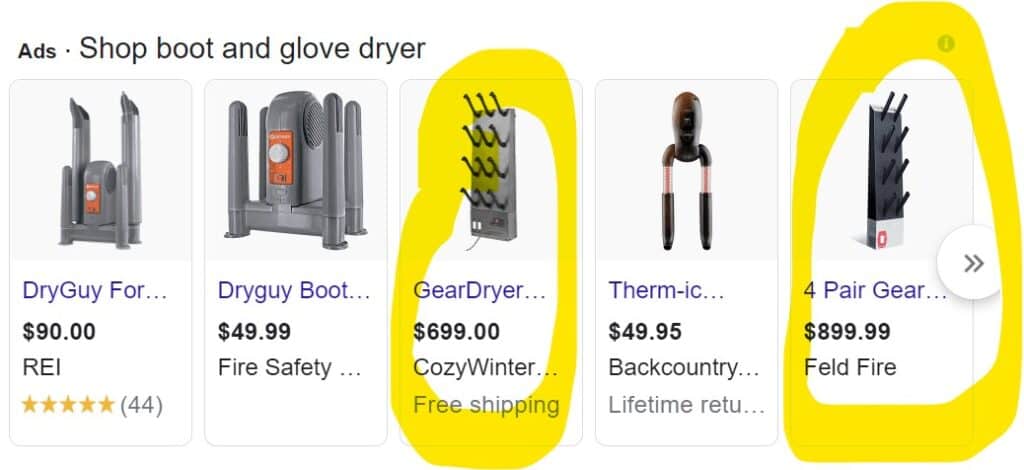
Since buying one was WAY too expensive (See the screenshot a little lower… $699 for the cheapest dryer that’s for more than one person!) we wanted to figure out a better solution.
The laundry dryer is way too harsh for the winter gear we have, and there are only so many vents from our home heating system (don’t even get me started on trying to perfectly prop up everything so air actually gets in!)
In fact, we haven’t been able to play outside sometimes because all the kids’ stuff was still wet! And we have two spares each!
Luckily, I married a pretty darn inventive guy and he came up with this system. There’s a TON of ways to make it easier or more efficient – it just depends on how much work you want to do.
Here we go!
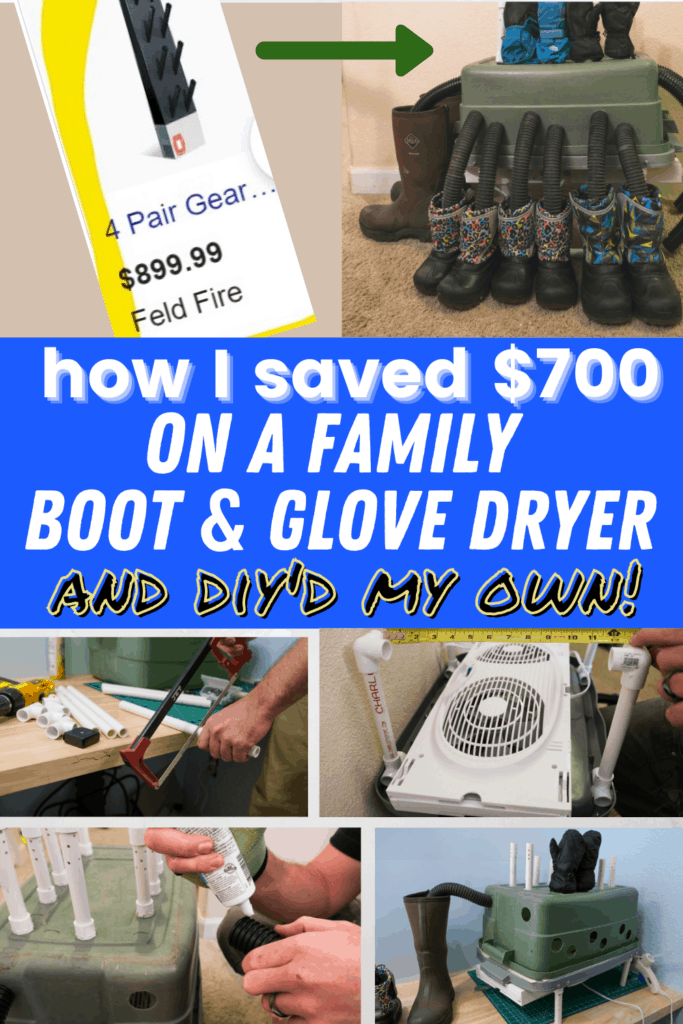
How to make a DIY big family 5 person boot and glove dyer!
This is probably one of the longest DIY’s I’ve published (my other post popular one, the DIY RV blackout covers is about half) but the screenshot below will show you why.
Those are the results that come up – notice how the dryers that are for more than one person drastically jump in price? There’s a $699 and an $899 one (and I don’t even know if those are meant for boots AND gloves)
Many of the tools and materials listed are just ways to do this project easier. If you don’t have something, it’s fairly easy to substitute until you can find a better option.
DIY Boot and Glove Dryer (for 5 people!)
If you're a big family who loves the snow, then you'll love how fast and easy it is to dry out everyone's gear (even the adults!) with this DIY Boot and Glove dryer. It's way cheaper than what you'll see on Amazon and the design is modifiable to fit however many people are in your family. The slow flow air is plenty to dry everything out but not near as harsh as the dryer!
Materials
- Bin that is roughly the same size as the window fan unit you're going to use (we just used a bin we had around the house... wish I could help more with this part!)
- Small window fan unit
- 1/2" PVC (it's cheap, so get as much as you think you will need... and maybe a little more!)
- 1/2" PVC End Caps
- 1/2" PVC T's
- 1/2" PVC 1/2S to 1/2NPT Adapter
- 1/2" NPT Lock Nut
- Side Outlet Ts
- 2/3" NPT Nut
- 1 1/2" vacuum hose (they sell just the hose at the store)
- Silicone Sealant
- #8 screws 3/4" long
- #6 self tapping screws 3/4"
- Double Side Foam tape (to hold things in place until you're ready to screw it in)
Tools
- Hot Glue Gun
- Saw to cut the PVC (although this goes WAY faster with a PVC specific cutting tool)
- Drill (to make the holes in the PVC for the glove dryer section)
Instructions
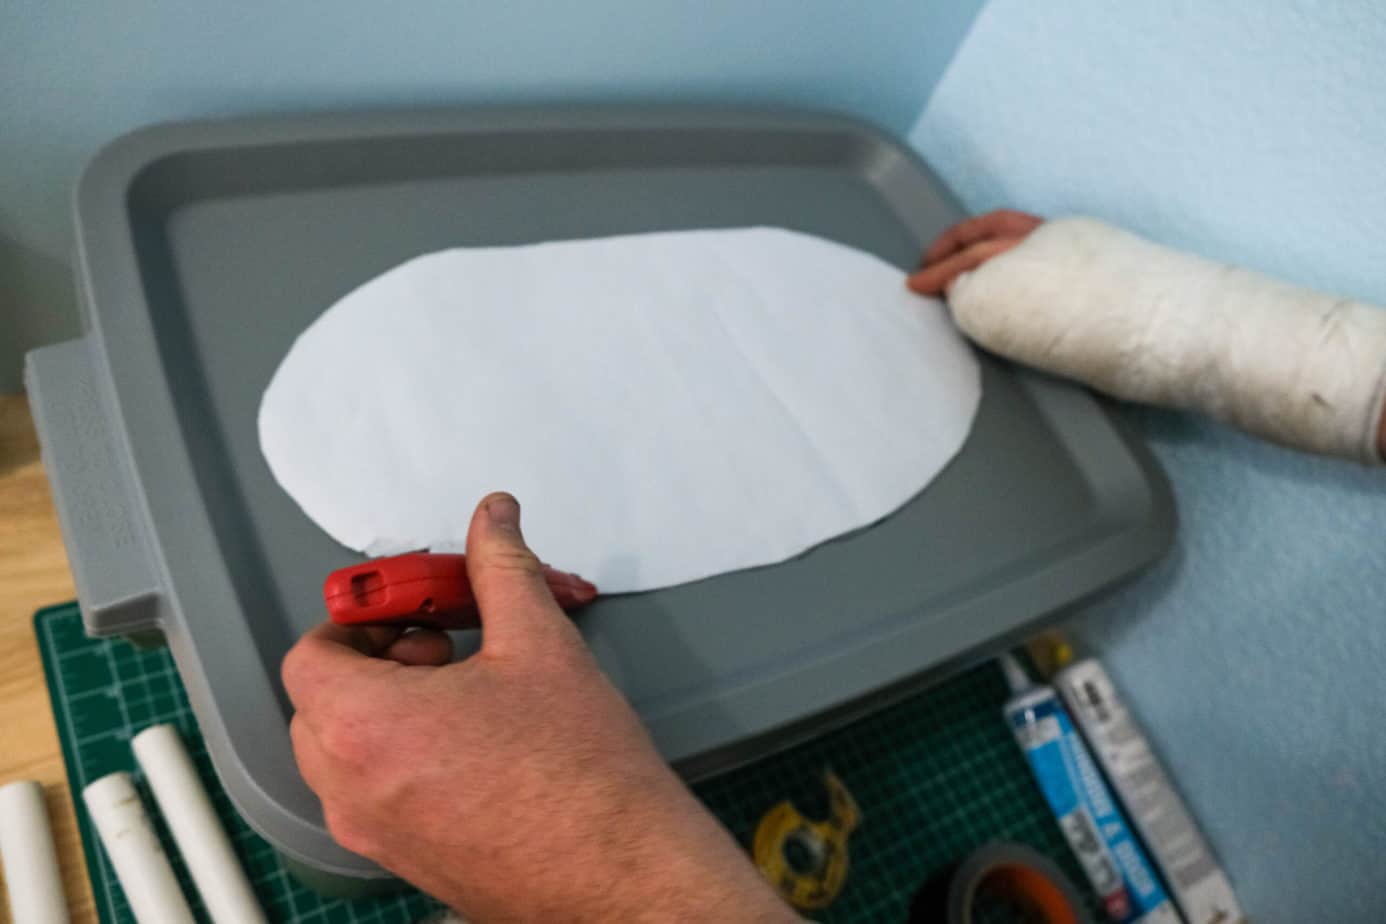
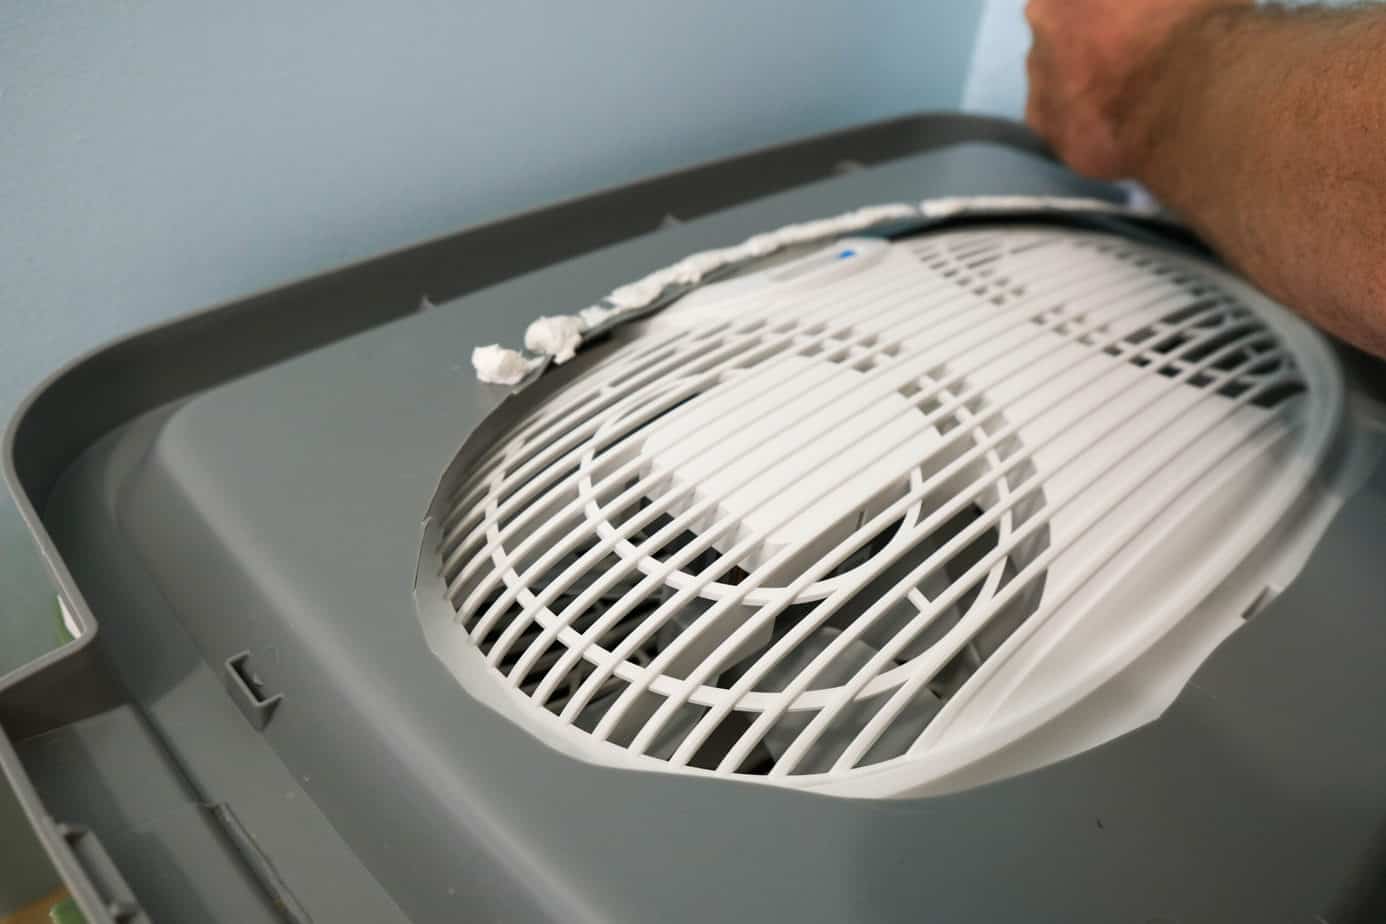
- Use some paper to trace out the rough shape of your window fan unit, put it on your bin's lid, then cut it out.

- Use a silicone adhesive and self tapping screws to attach the fan to the lid. The main body of the fan will go on the bottom/inside side of the lid. If you don't have self tapping screws pre drill the holes into the fan, it is made out of a hard plastic that will crack if it is not pre drilled. (Also make sure you are not going to be driving the screw into any moving parts or wires.) Set the fan and lid aside while the silicone dries.
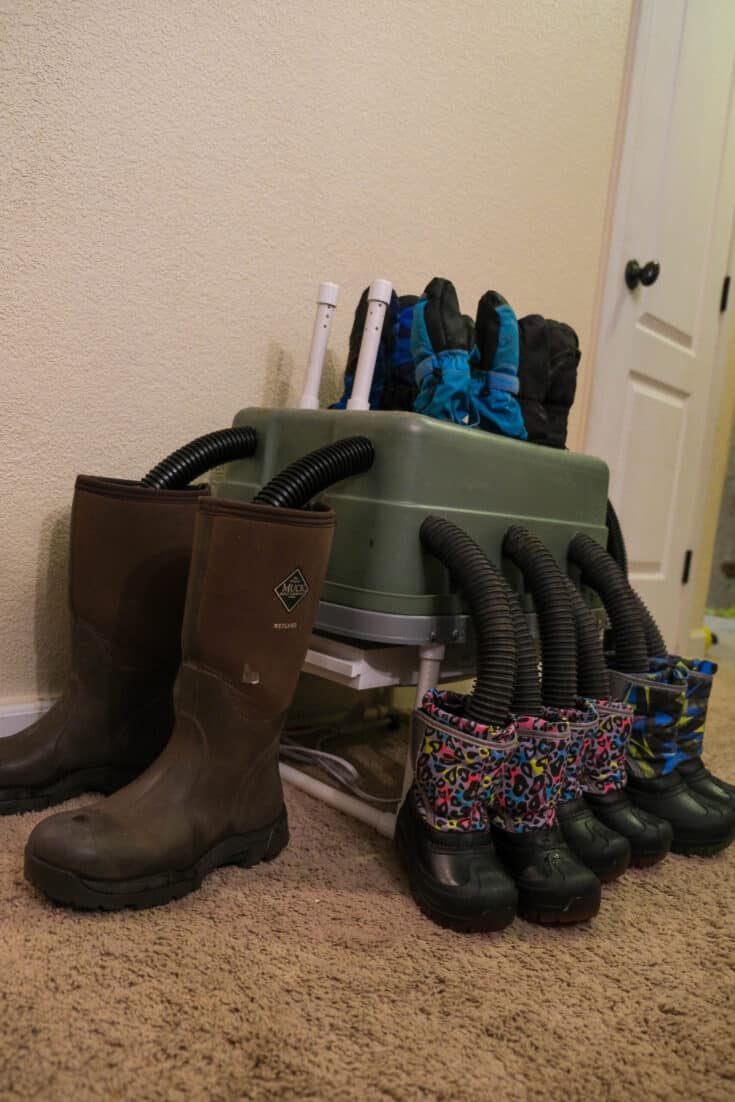
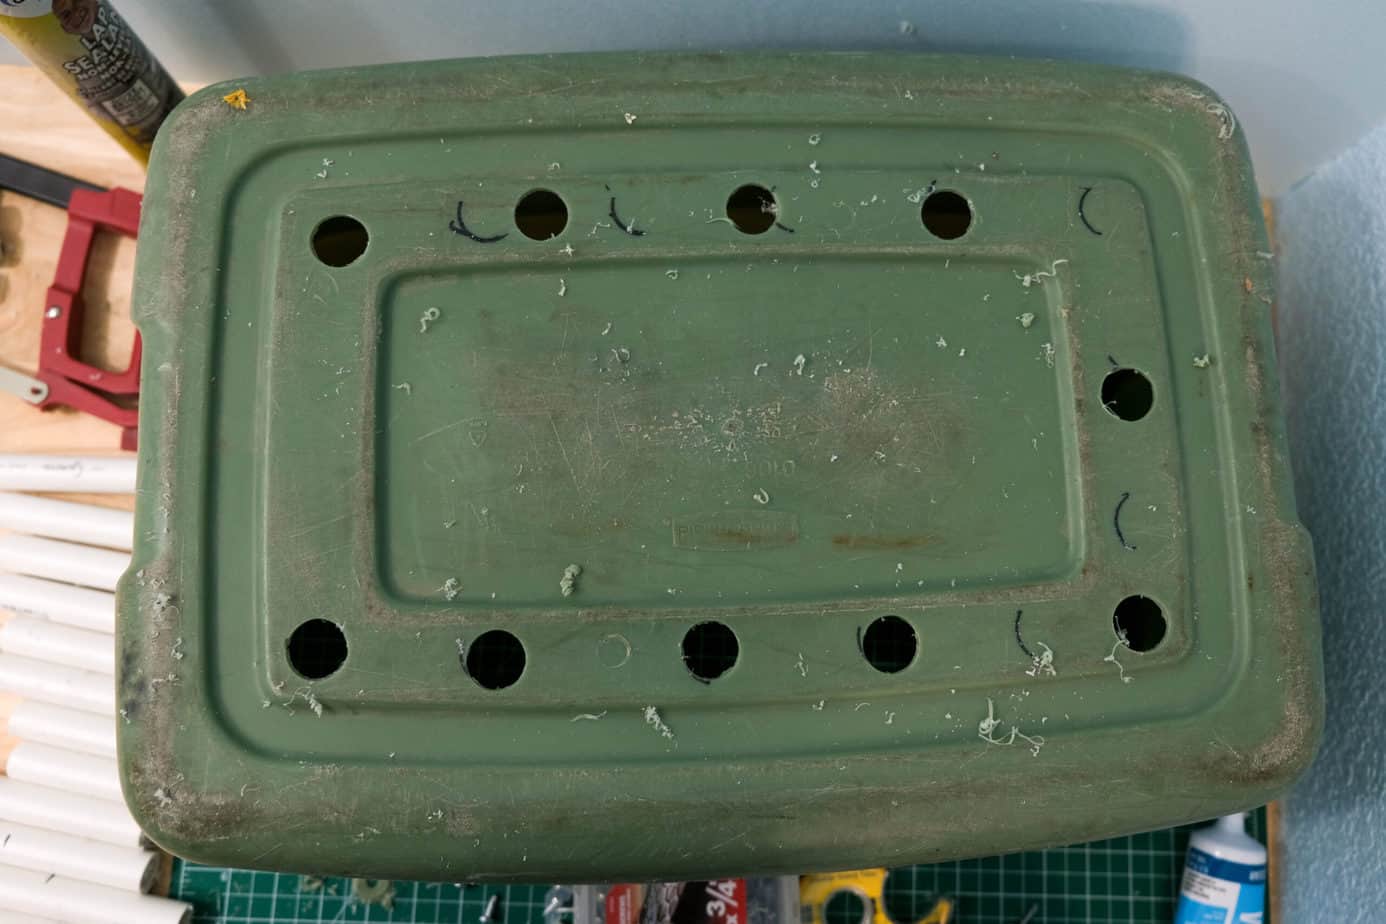
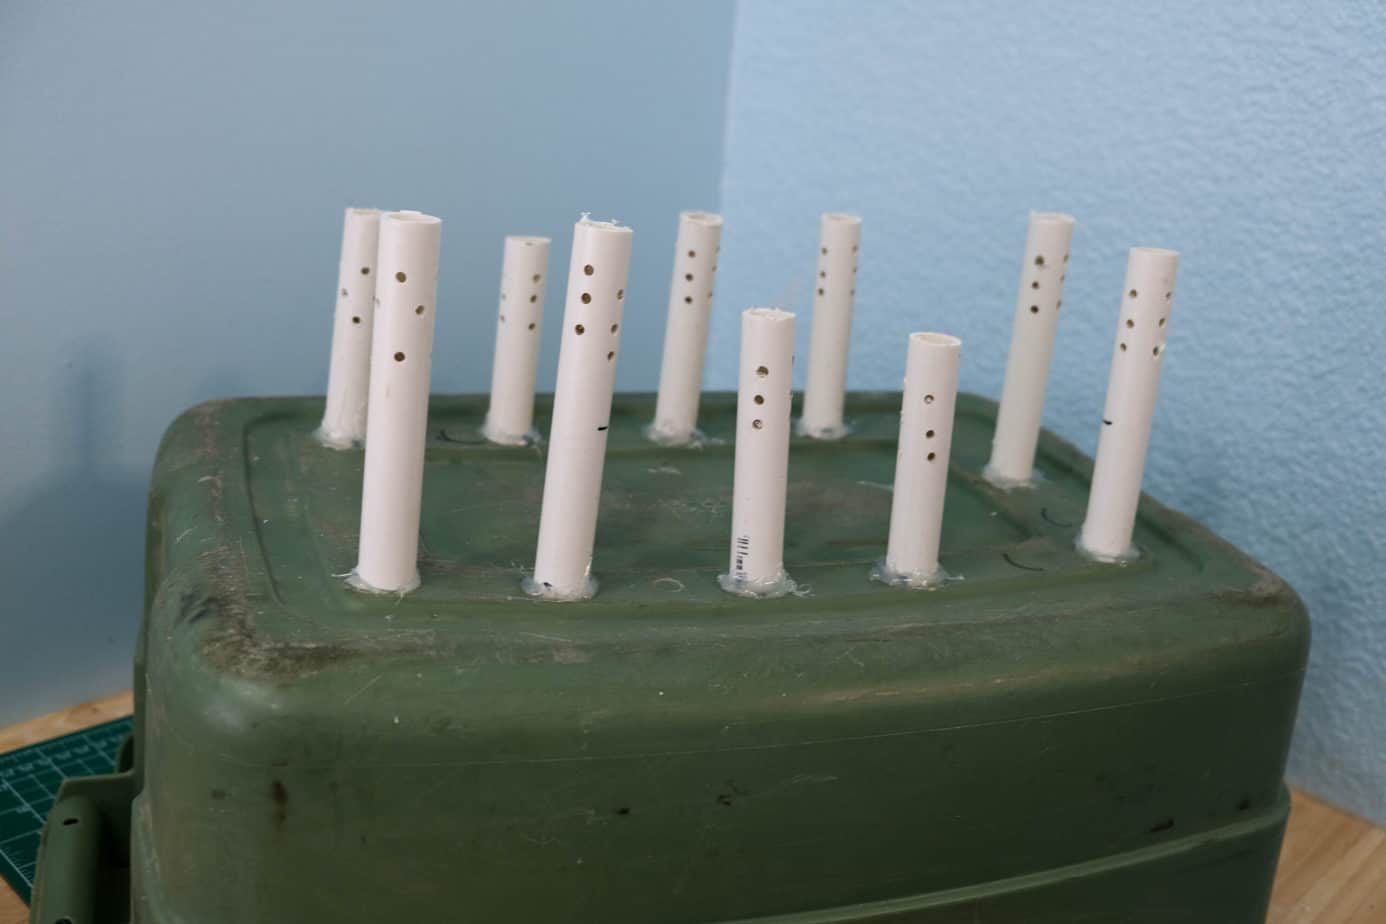
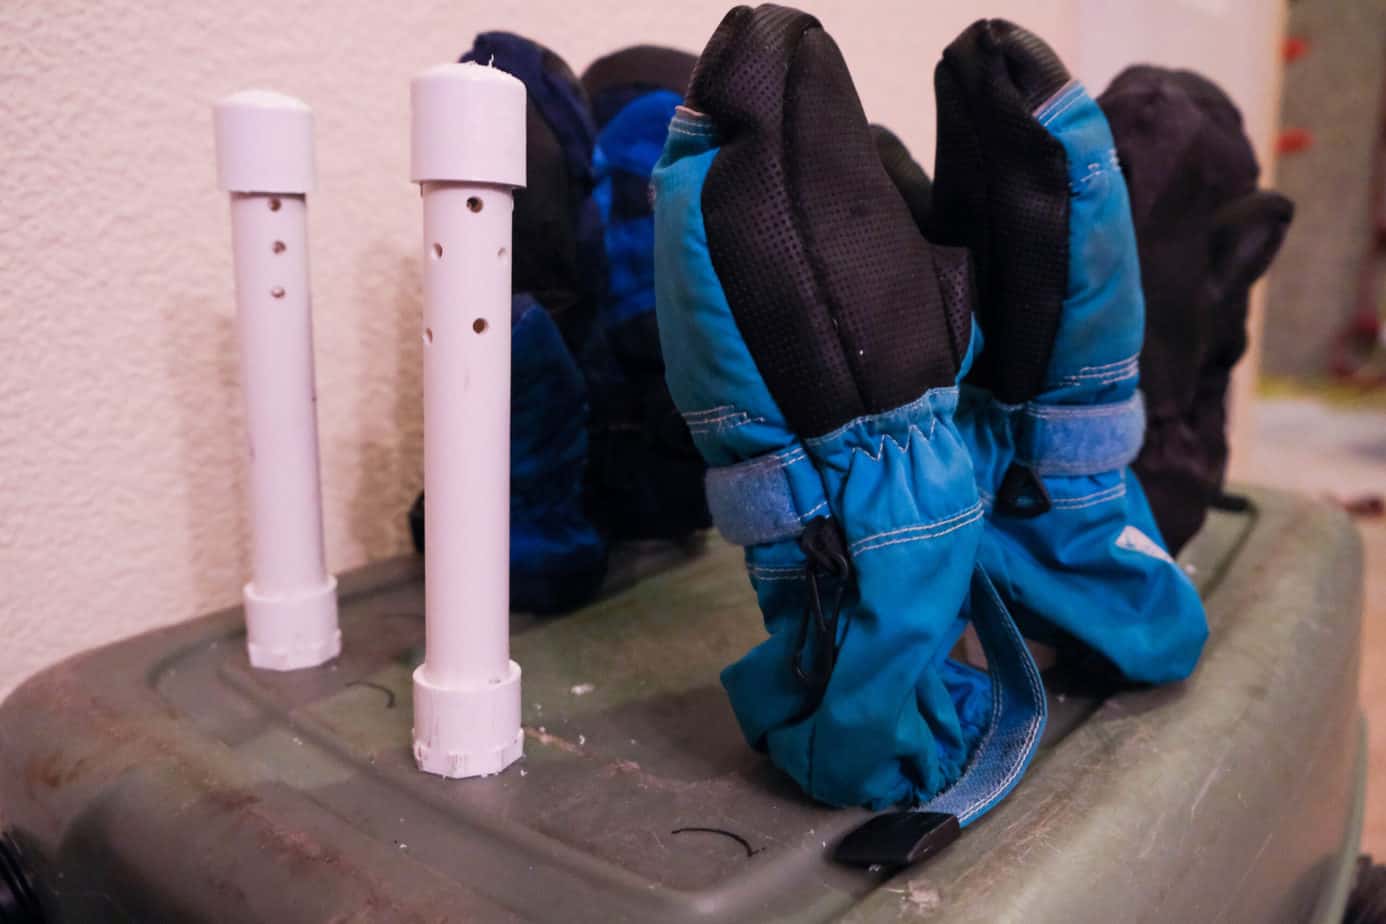
- On the main body of the tote use a marker to draw out where the glove and boot holders will go. Be sure to allow enough space between them to fit the gloves. We put all six holes for the kids small shoes on one side, and two on each end for our adult boots. If you have taller boots place the holes near the top.
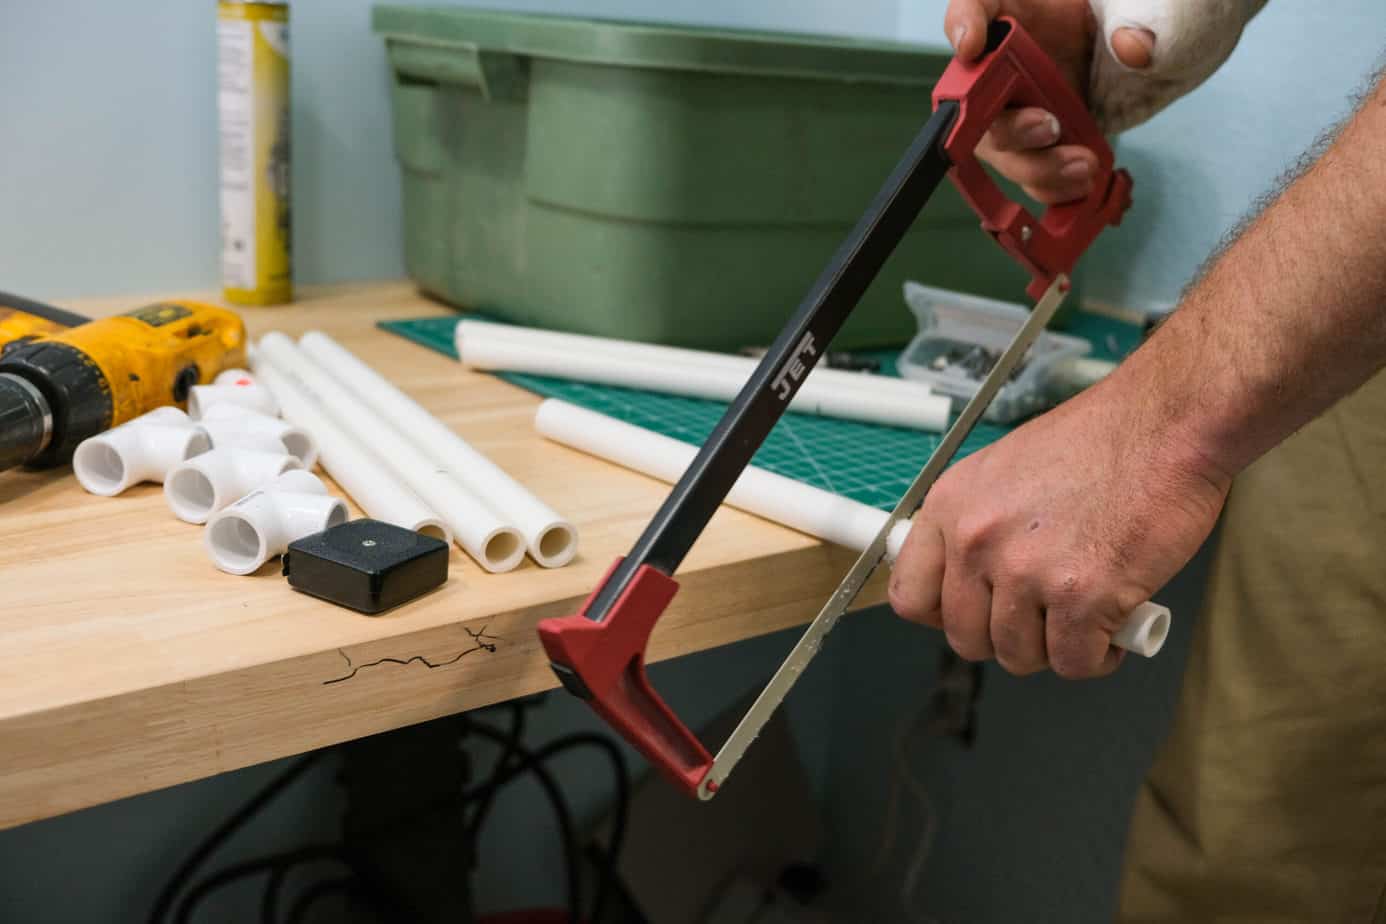
- Use an Exacto kife or hole saw's to cut the holes. For the vaccum hose use 1 1/2" hole saw and the 1/2 pvc needs a 1" hole saw. (I know in the picture the glove dryer pipes are already mounted, but we found it's way easier to work with to actually wait until all holes are cut before putting them in and would do it that way next time )
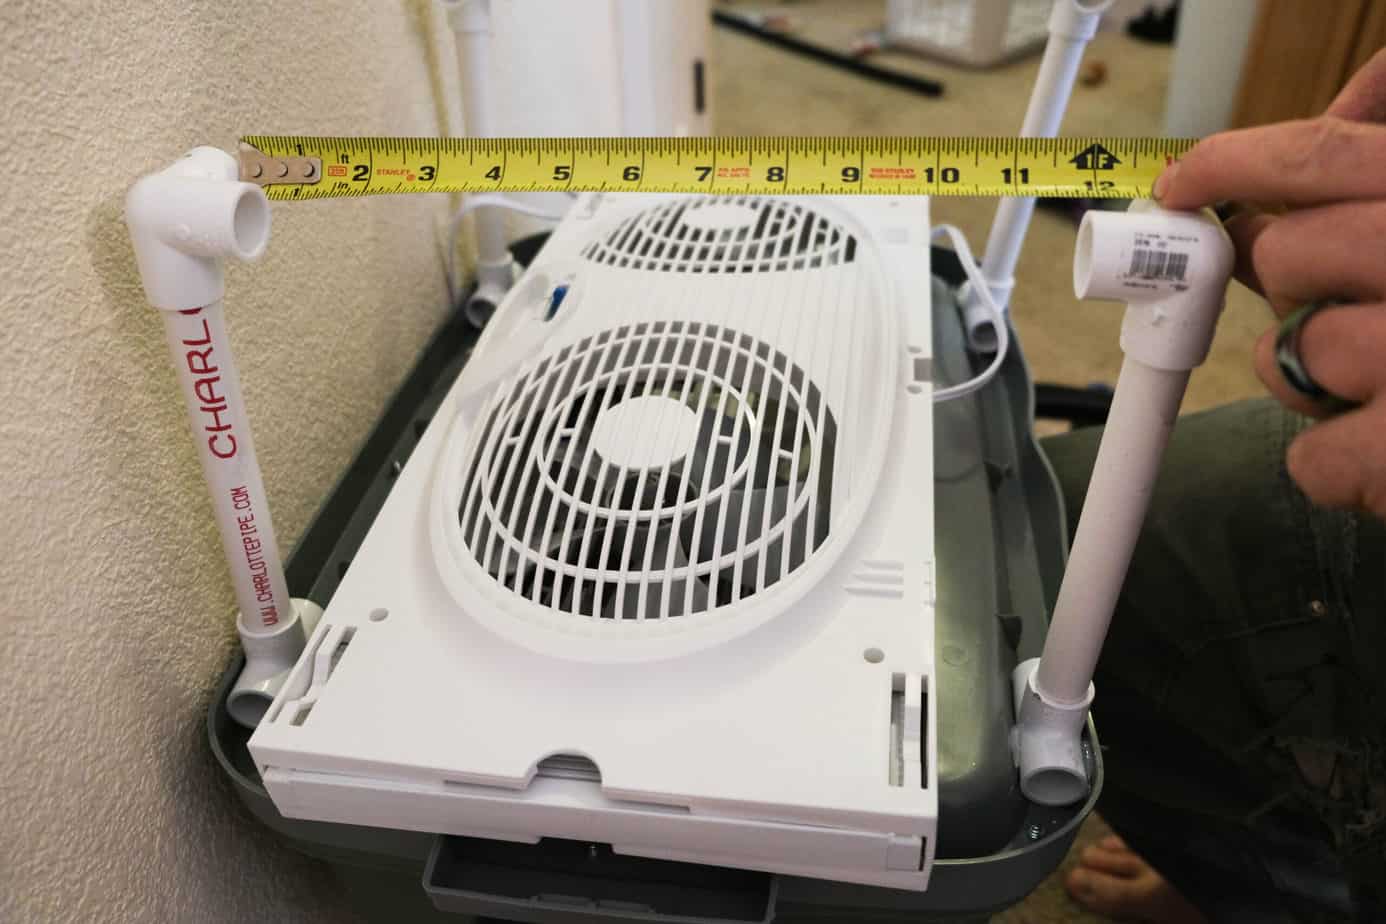
- Cut the PVC for the glove dryers. We used a hack saw but just about any saw or even a special pvc cutting tool would work. Cut the PVC to 5" for most goves or if you have larger mittens measure them and cut the pvc to match. Put the S to NPT adapters on one end and he end caps on the other(no need to glue them).
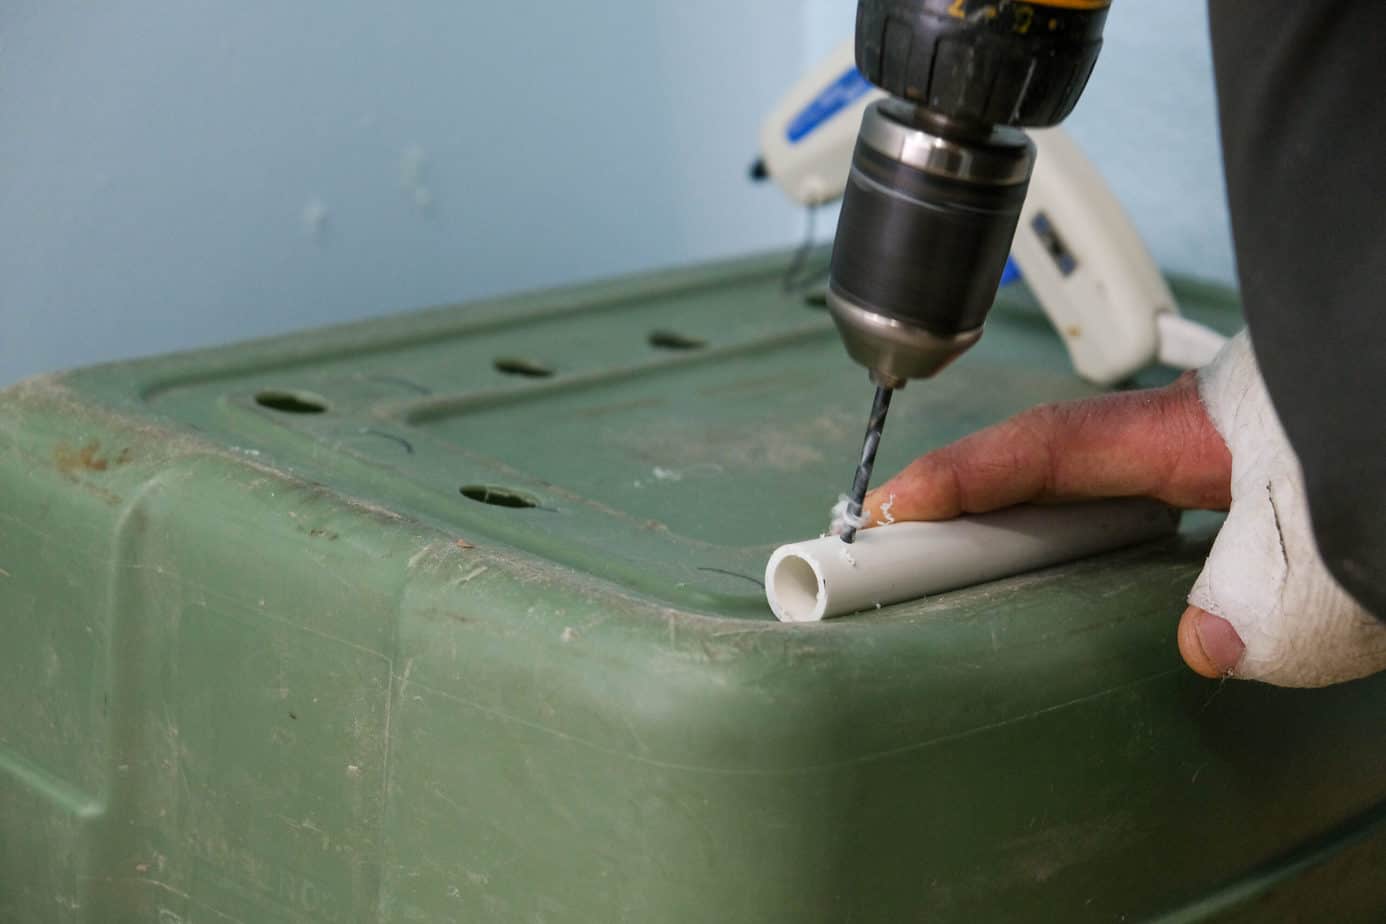
- Drill holes in the PVC, use a 3/8 drill bit in top of the end caps and a 1/8 or 3/16 bit in the sides. I drilled six holes straight through the pipes off setting them so the air flow comes out all sides.
- Insert the glove holders. Put a small ring of silicone adhesive around one of the top glove holes and insert the threaded end. Screw the NPT nut onto bottom side until snug. This is a difficult step since npt fittings are tapered, just be paitient and it will get tight.
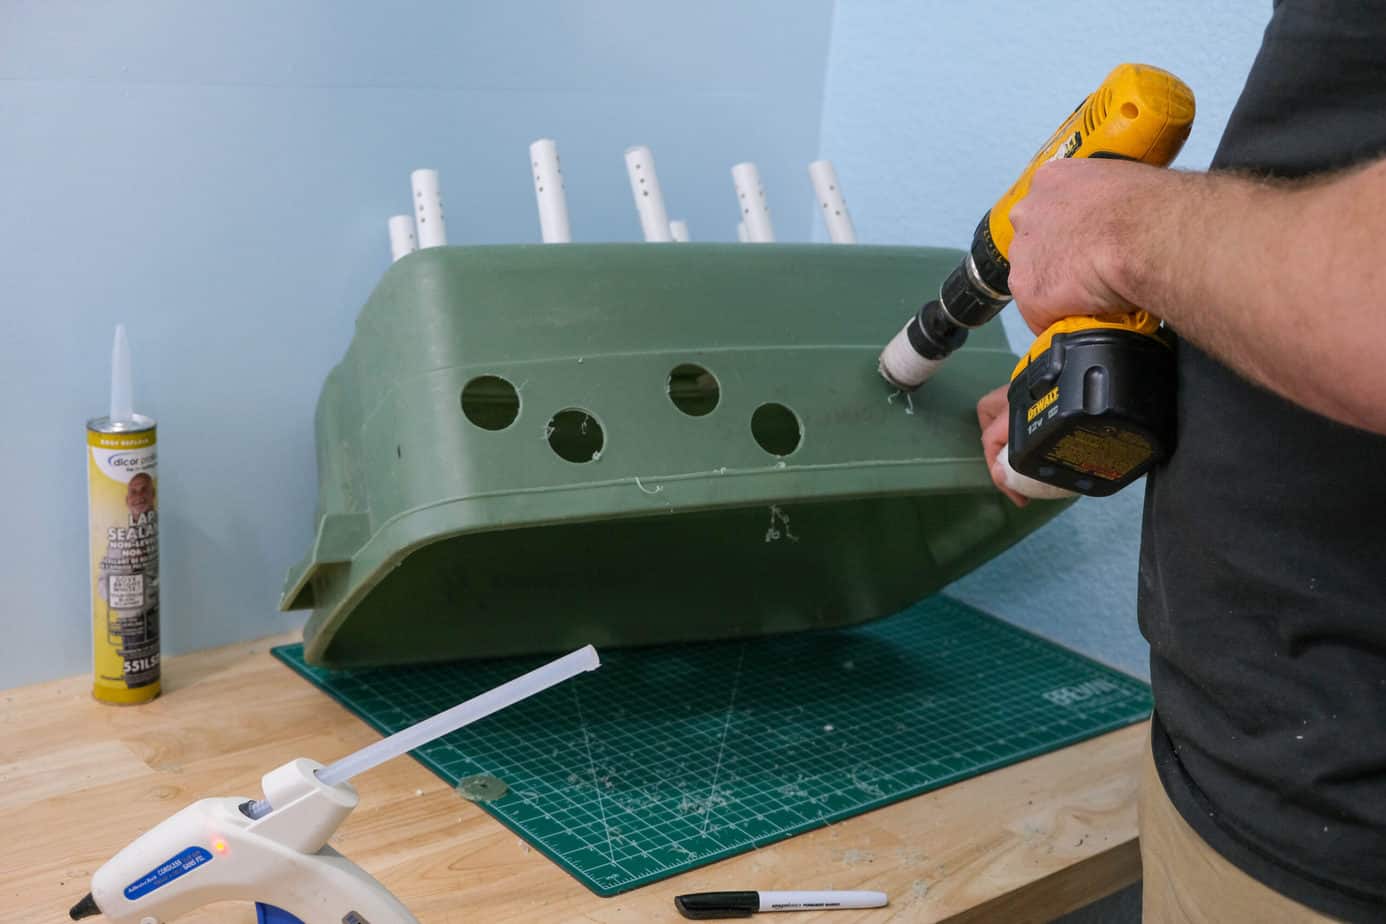
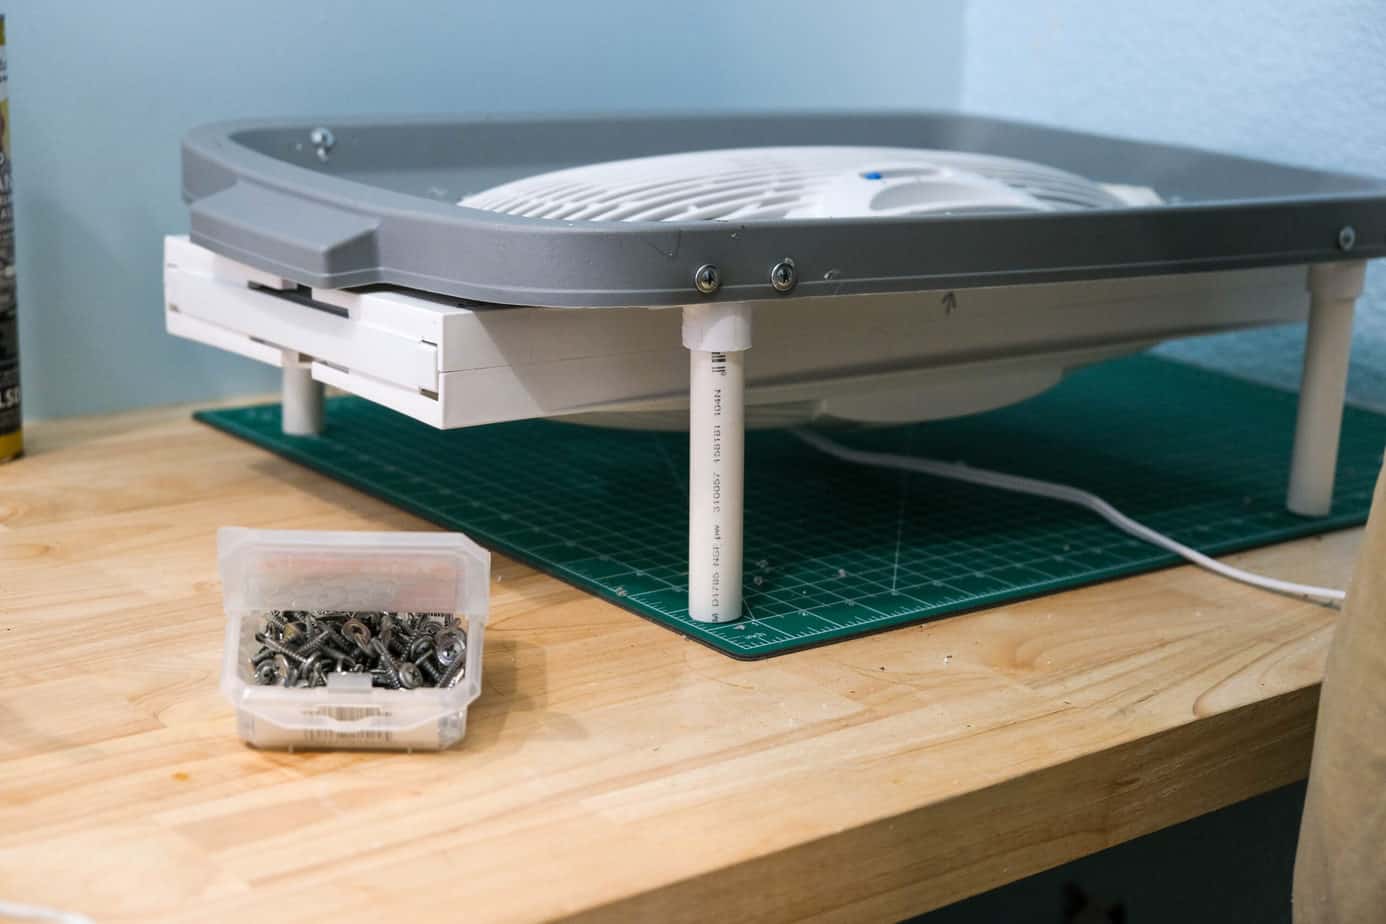
- Install the legs. Cut 4 more sections of pvc, I used 8" sections to get the boot dryer high enough for my tallest set of boots. Use hot glue and self tapping screws attach the regular t fittings to the lid of the tote. The t should fit into the groove that runs along the lids bottom edge with one opening pointing straight up.
- Stablize the base. Install the 4 legs into the t's, and put the side out t's onto the leg bottoms so that the open ends make the corners of a rectangle. Measure betweent the inside corners of each side of the rectangle and cut lenghts of pvc to install between them. Push the base sections into place and flip the fan and lid right side up.
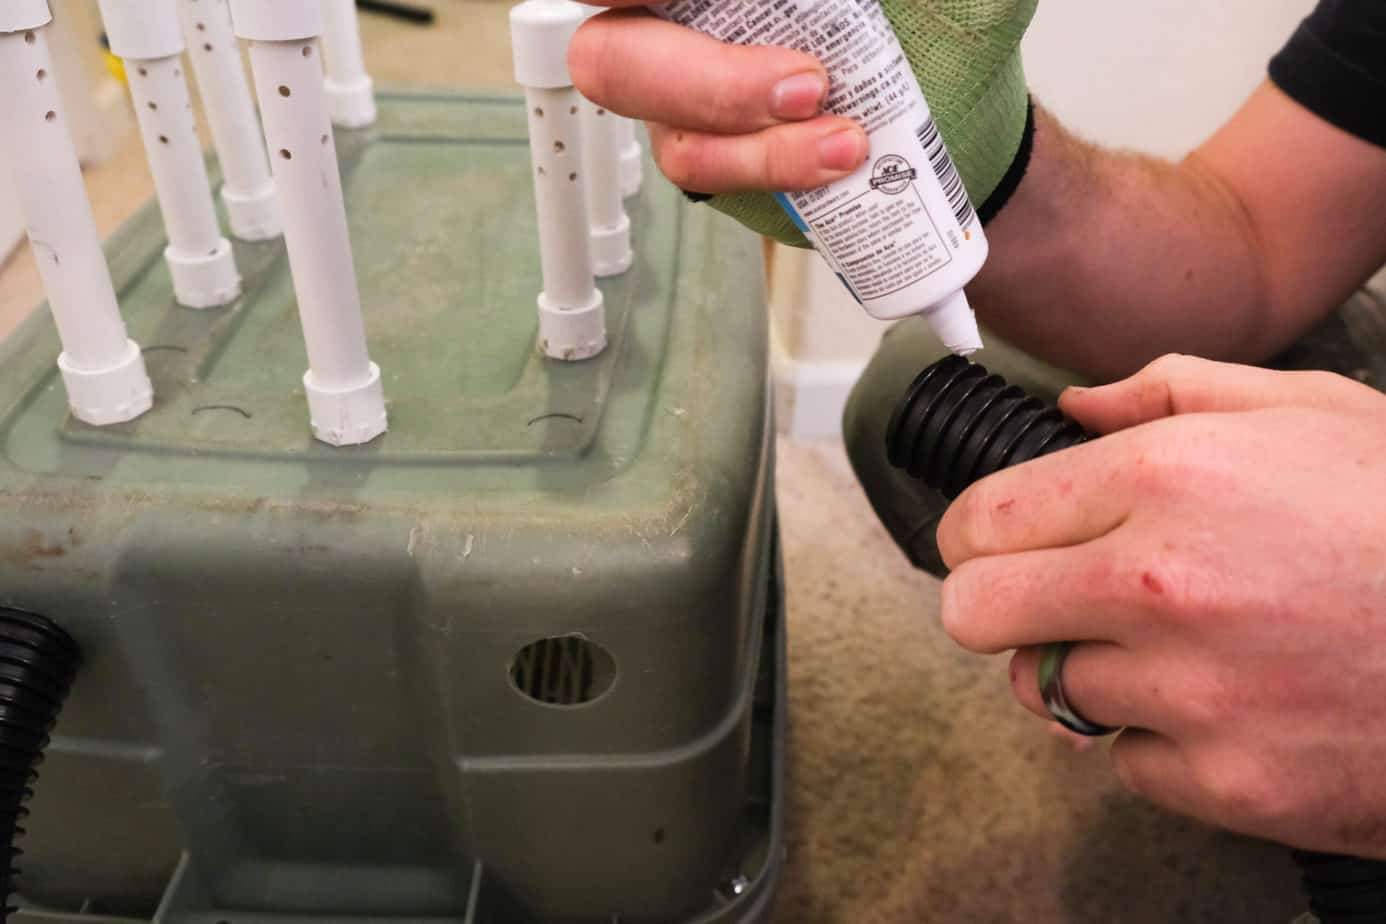
- Install boot dryer hoses. Push one end of the vacuum hose into the one hole about 1/4 of an inch. Let the hose dangle over the edge of the table you are working on with a natural bend where it runs out of the dryer. Cut the hose so that when hanging naturally it will just reach the floor. Use that piece as a template to cut the remaining sections of hose. If you have two different hole heights like we did make sure to measure and cut those differently. Install all of the hoses allowing the natural curl of the hose point the hose down. Use silicone adhesive to glue them all into place.

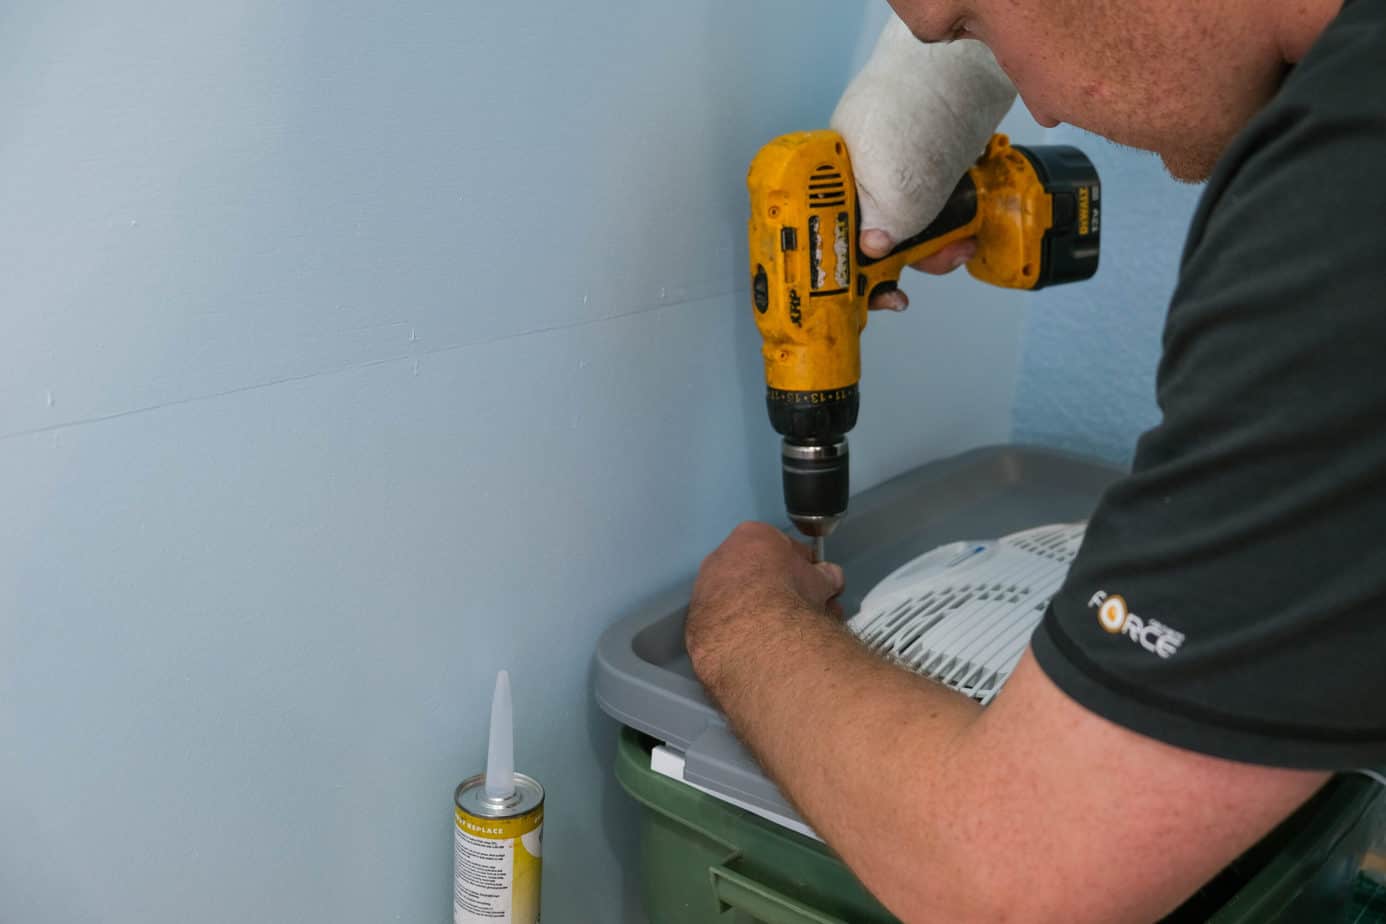
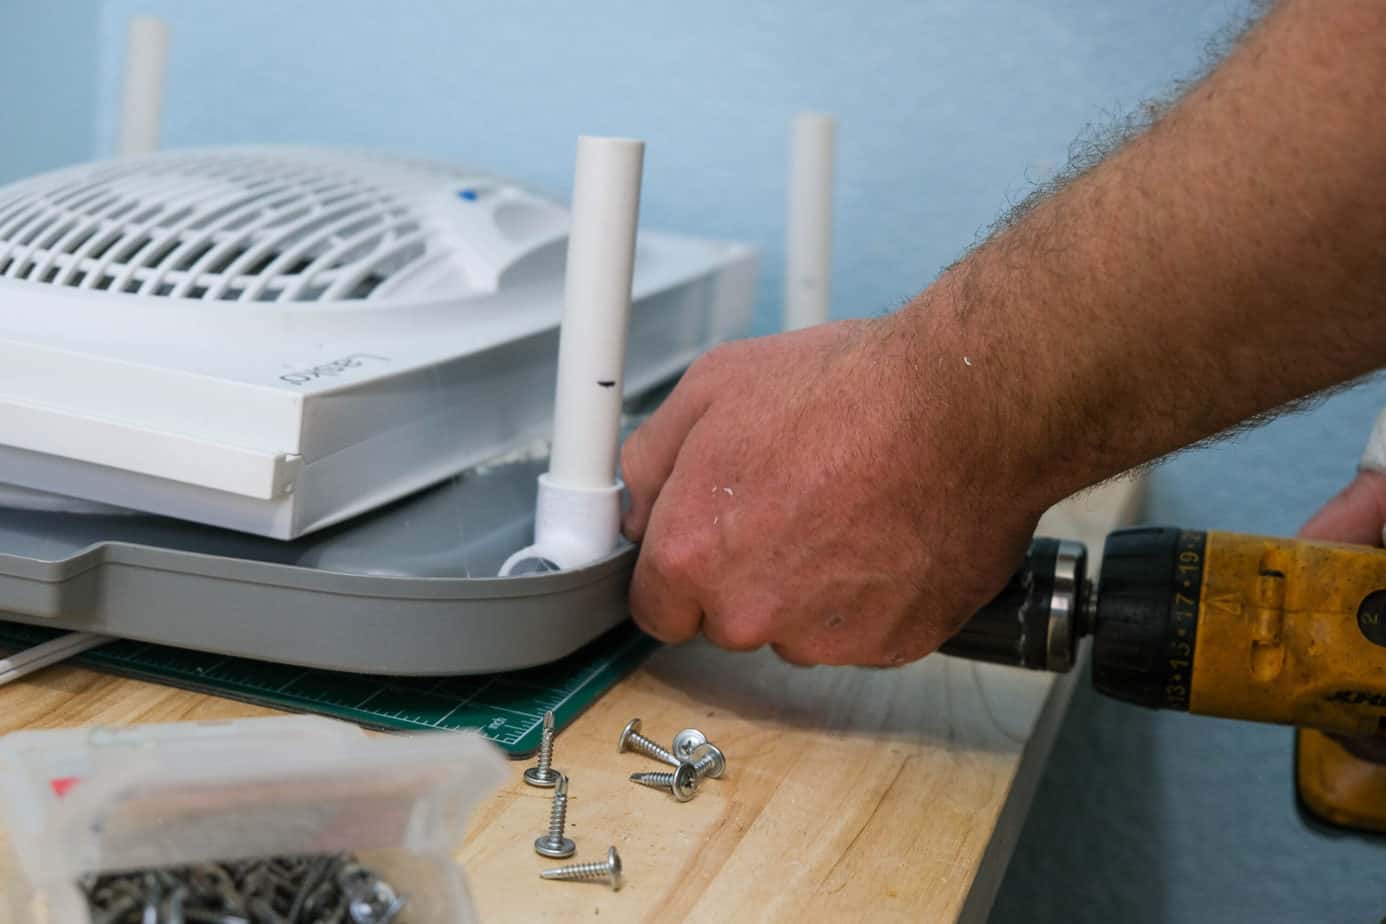
- Finish up. Use some weather strip material or foam double sided tape to line the rim of the tote lid that is now the dryer's base. Place the main dryer body onto the base. Use short screws to hold the sections together. No need for self tapping screws here, the rubbery material they make these totes out of will not split like the fan or pvc.
- Plug it in and try it out! This is also a time to make it "pretty". If you haven't noticed by now, ours isn't super pretty... and hopefully that will change soon! This project is still sort of going on as we are trying out ways to make it look nice and perform even better!

Notes
- Everyone's bins are going to be a bit difference size - you may need to improvise!
- If some pictures seem out of order, it's because we actually redid this a couple of times to find the best way and swapped out pics with the new way we did things!
- I would LOVE to feature your creation if you make this (especially if you found a way to put some material on it!)
- YES this can definitely be built out of wood or something else (we might actually do that for our upgraded one). We literally came up with this in a night and it's worked really, really well and wanted to share the knowledge!
Do you have any questions? This DIY boot and glove warmer is so worth it!!
Our stuff is typically dry within an hour and we’ve gotten our kids (3-5) able to put all their gear on themselves.
Pro tip: Speed up the drying process and set your DIY dryer over a heater vent!
Here are some ways to enjoy winter with your dry and cozy gear!
- 17 BEST Snow Toys for Kids to make winter AWESOME (and burn off energy)
- Here are 27 fun things to do with kids in the snow!
- Keep track of the snow with your kiddos with this cute snow measuring craft (and free printable snow chart!)
- Enjoy all winter has to offer with these 12 fun winter and Christmas scavenger hunts!
- Make some easy snow popsicles with just two ingredients!
- DIY your own Snow Paint for a creative session of winter play!
I found this article because my shoe dryer died. Funny story because I grew up in Thayne/Bedford area and was surprised to see a fellow Wyoming-ite. I’m going to give this a try since I already have most of the supplies.
Hi Rebecca! Yes we have some friends in the Bedford area! We have since moved to Tetonia in Idaho, and it is just as pretty! – Stacy