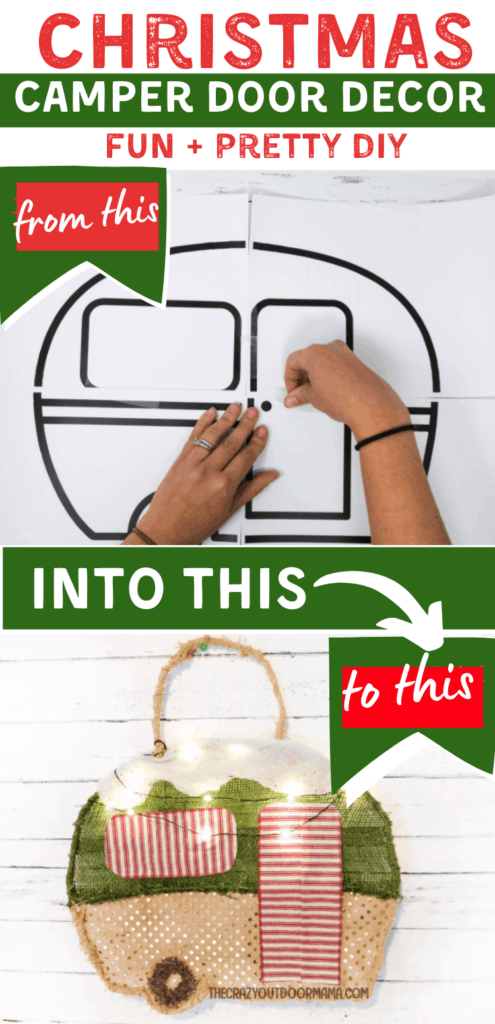
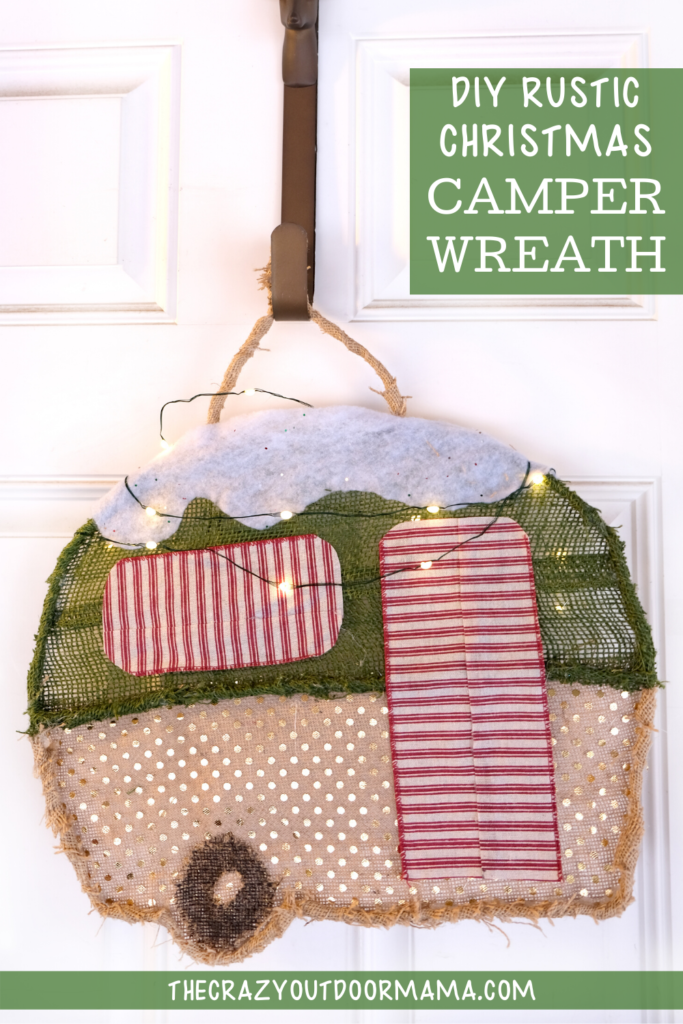
If you’re looking for a rustic vibe this Christmas that shows your love for camping… I almost guarantee that you’ll love this beautiful camper wreath!
I spent ALOT of time on this one, but I feel like it was so worth it! I had seen some chicken themed wreath, so I decided to try and find a camping themed one. There wasn’t really too much (besides sticking mini campers in a traditional wreath) so I figured now was a good time to create one for anyone else looking for some inspiration!
Now, this is sort of a lengthy tutorial. Once you do it, it won’t feel as long – just ALOT of hot gluing!
This year I’m trying to get a good assortment of Christmas themed camping ideas! Open these guys up in another tab for later!
- Get the camp COFFEE lover in you life one of these beautiful handmade camping themed coffee cups as a gift this year!
- 29 awesome camping themed ornaments to campify your Christmas tree!
- This FREE pack of 19 different camping themed Christmas printables has you covered – cards, wall art and gift tags all featuring snowy campers full of cheer!
- If you’re having Christmas in the camper this year, check out these beautiful ideas to decorate your camper for Christmas!
- If you plan on camping through the winter, check out these tips for winter camping in an RV!
- Make your own camping themed mini wine bottle ornament!
- DIY this felt tent ornament for the camping lover in you life!
How to make your own camp themed Christmas wreath!
This “wreath” is more of a burlap door decor thing… but I figure most people would call it a wreath who are looking for it! You’ll need some burlap, wire, and glue to make this beauty!
Make sure to sign up below to get the template!
DIY Rustic Camping Christmas Wreath
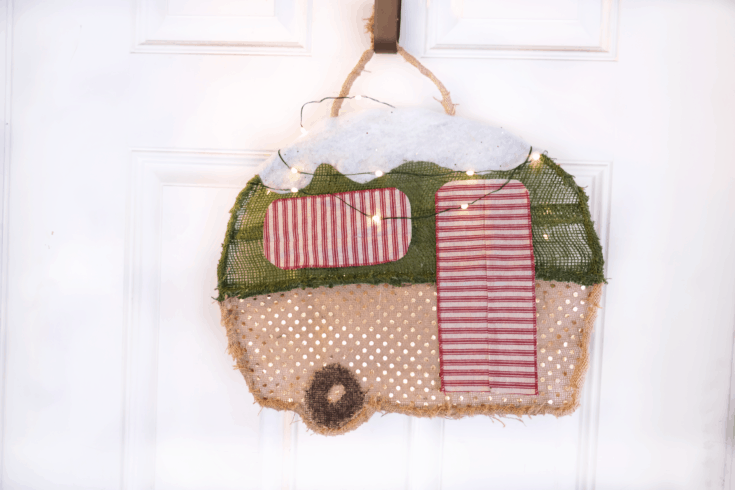
Make your very own rustic camping themed Christmas wreath with burlap, some shimmer, and plenty of Christmas cheer! This travel trailer door decor is a perfect way to show your camping love during the holidays!
Materials
- Fairly thick steel wire (you want something that can hang and support all the decor!)
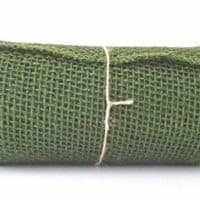
- Green burlap
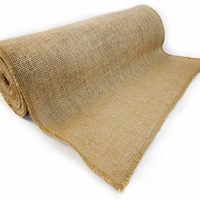
- Tan burlap
- Shimmery see through ribbon
- Festive accent ribbon for doors + window
- Two big hot glue gun sticks
- Optional: Fake snow material and battery operated mini lights!
Tools
- Hot glue gun
- Wire cutters
- Scissors
- Printer to print template
Instructions
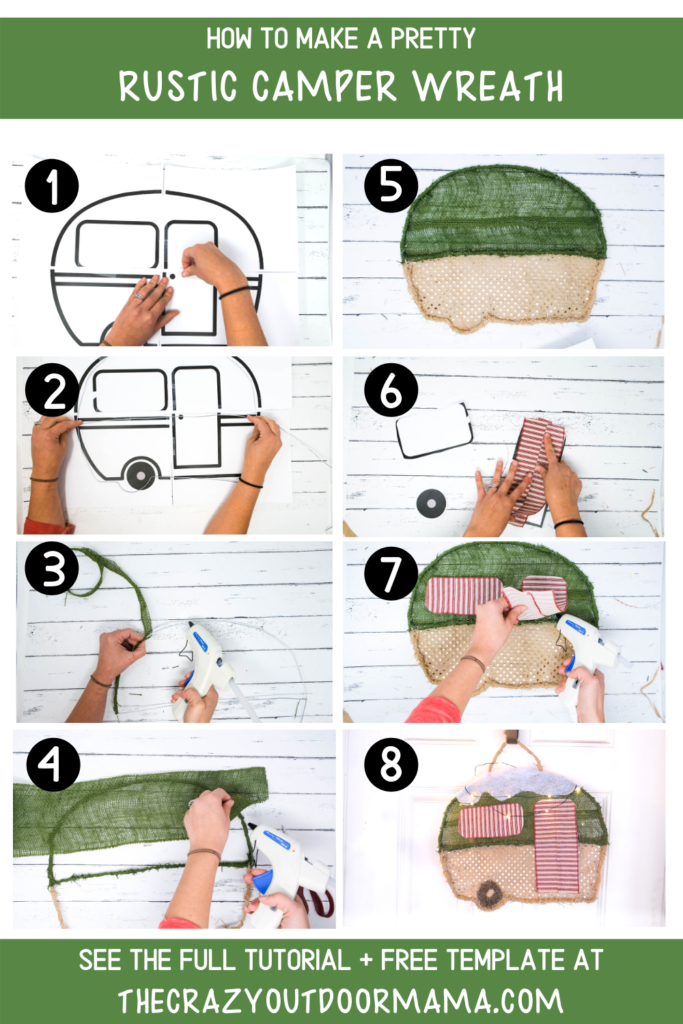
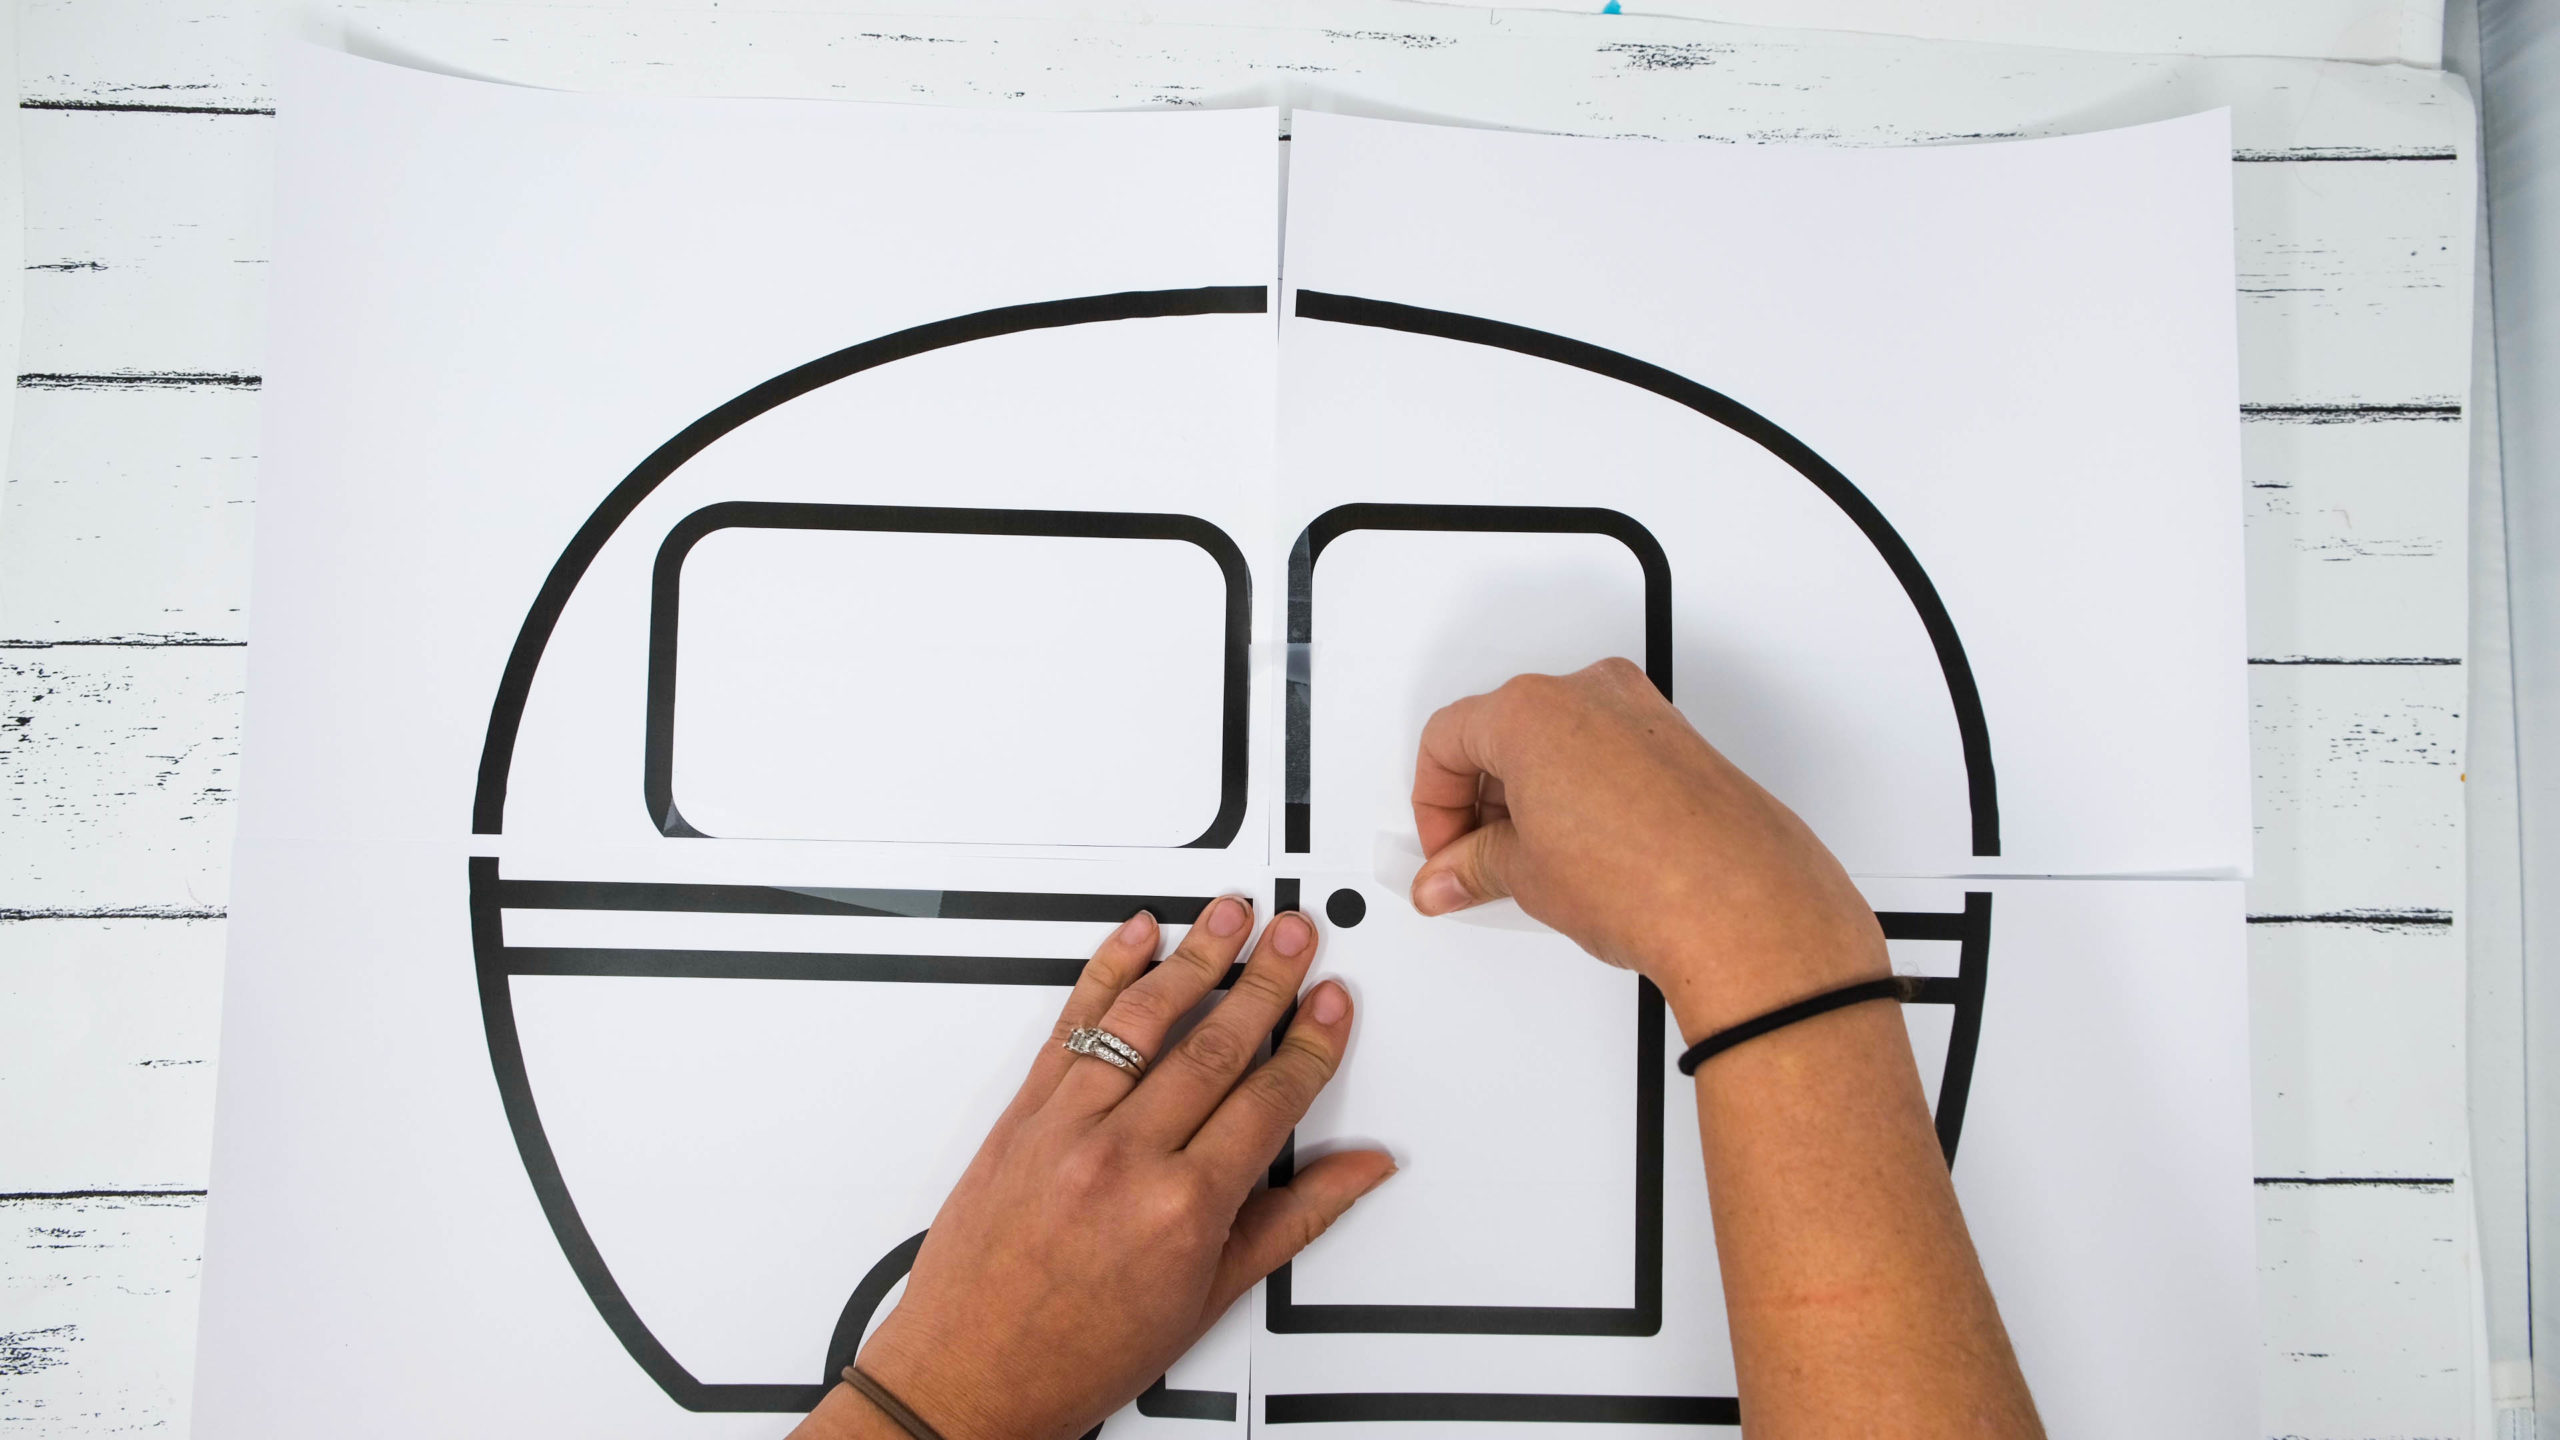
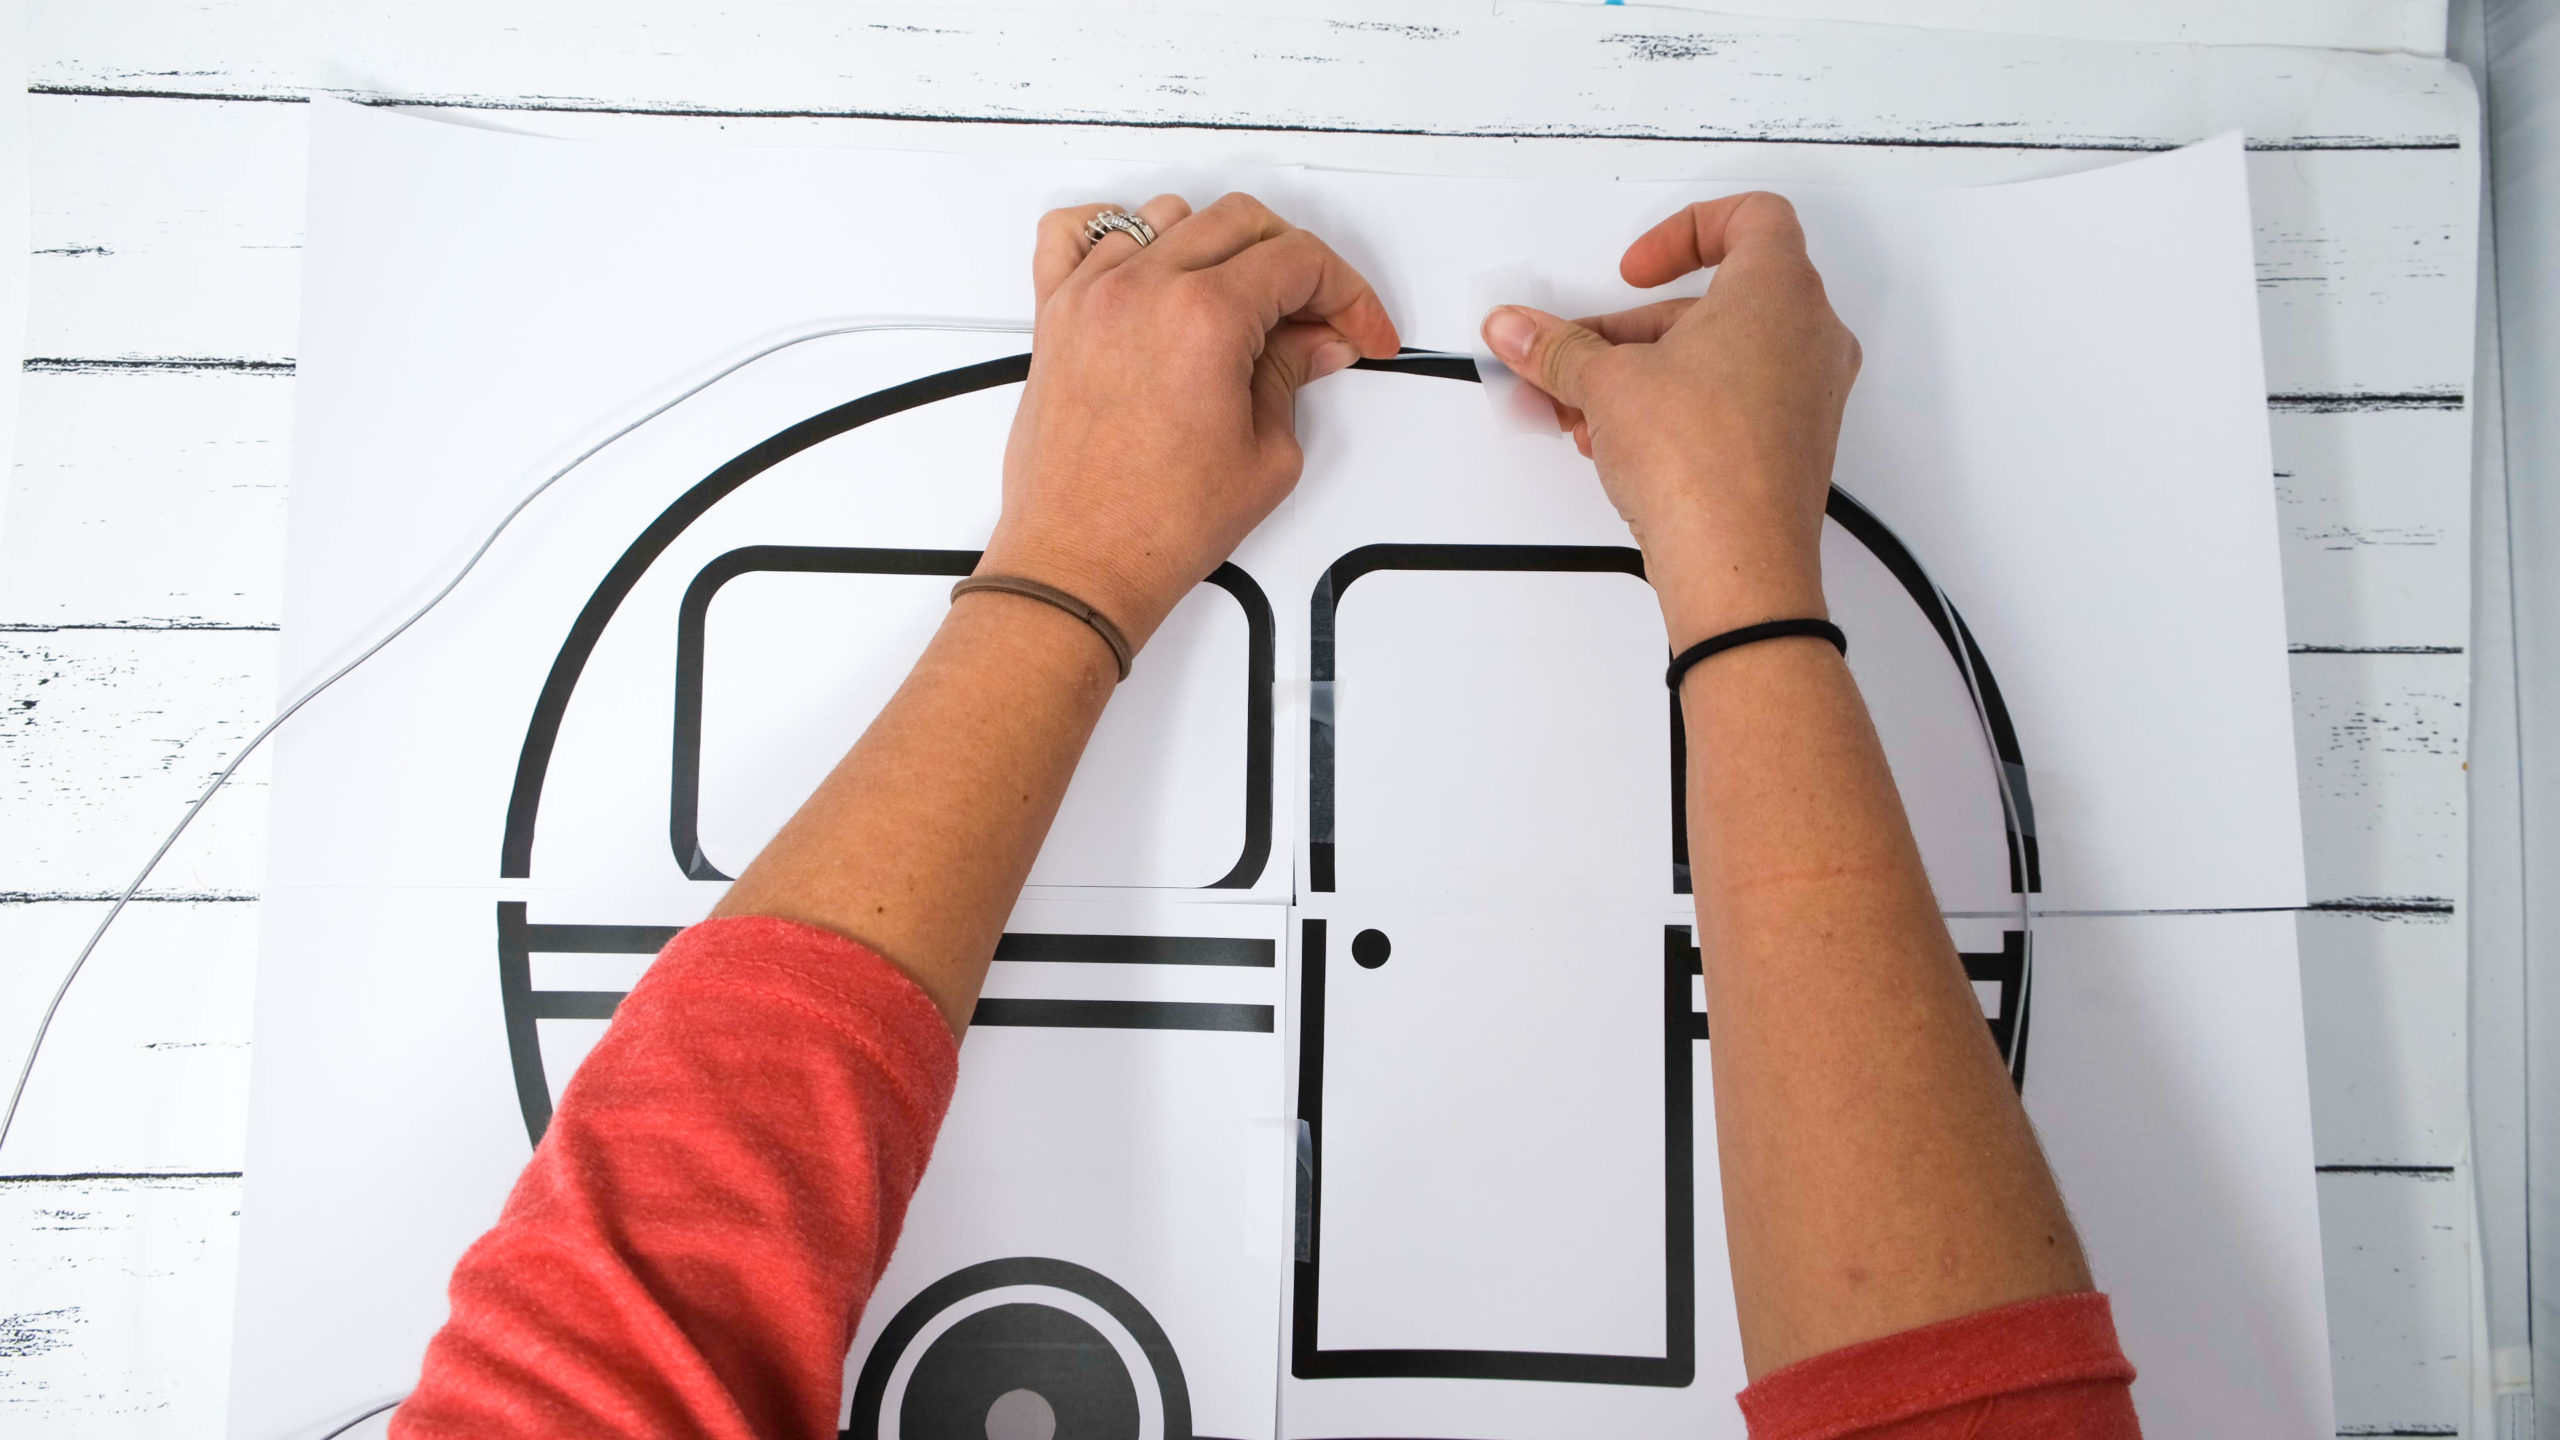
- Print out the template below and tape it all together (it's four pages).

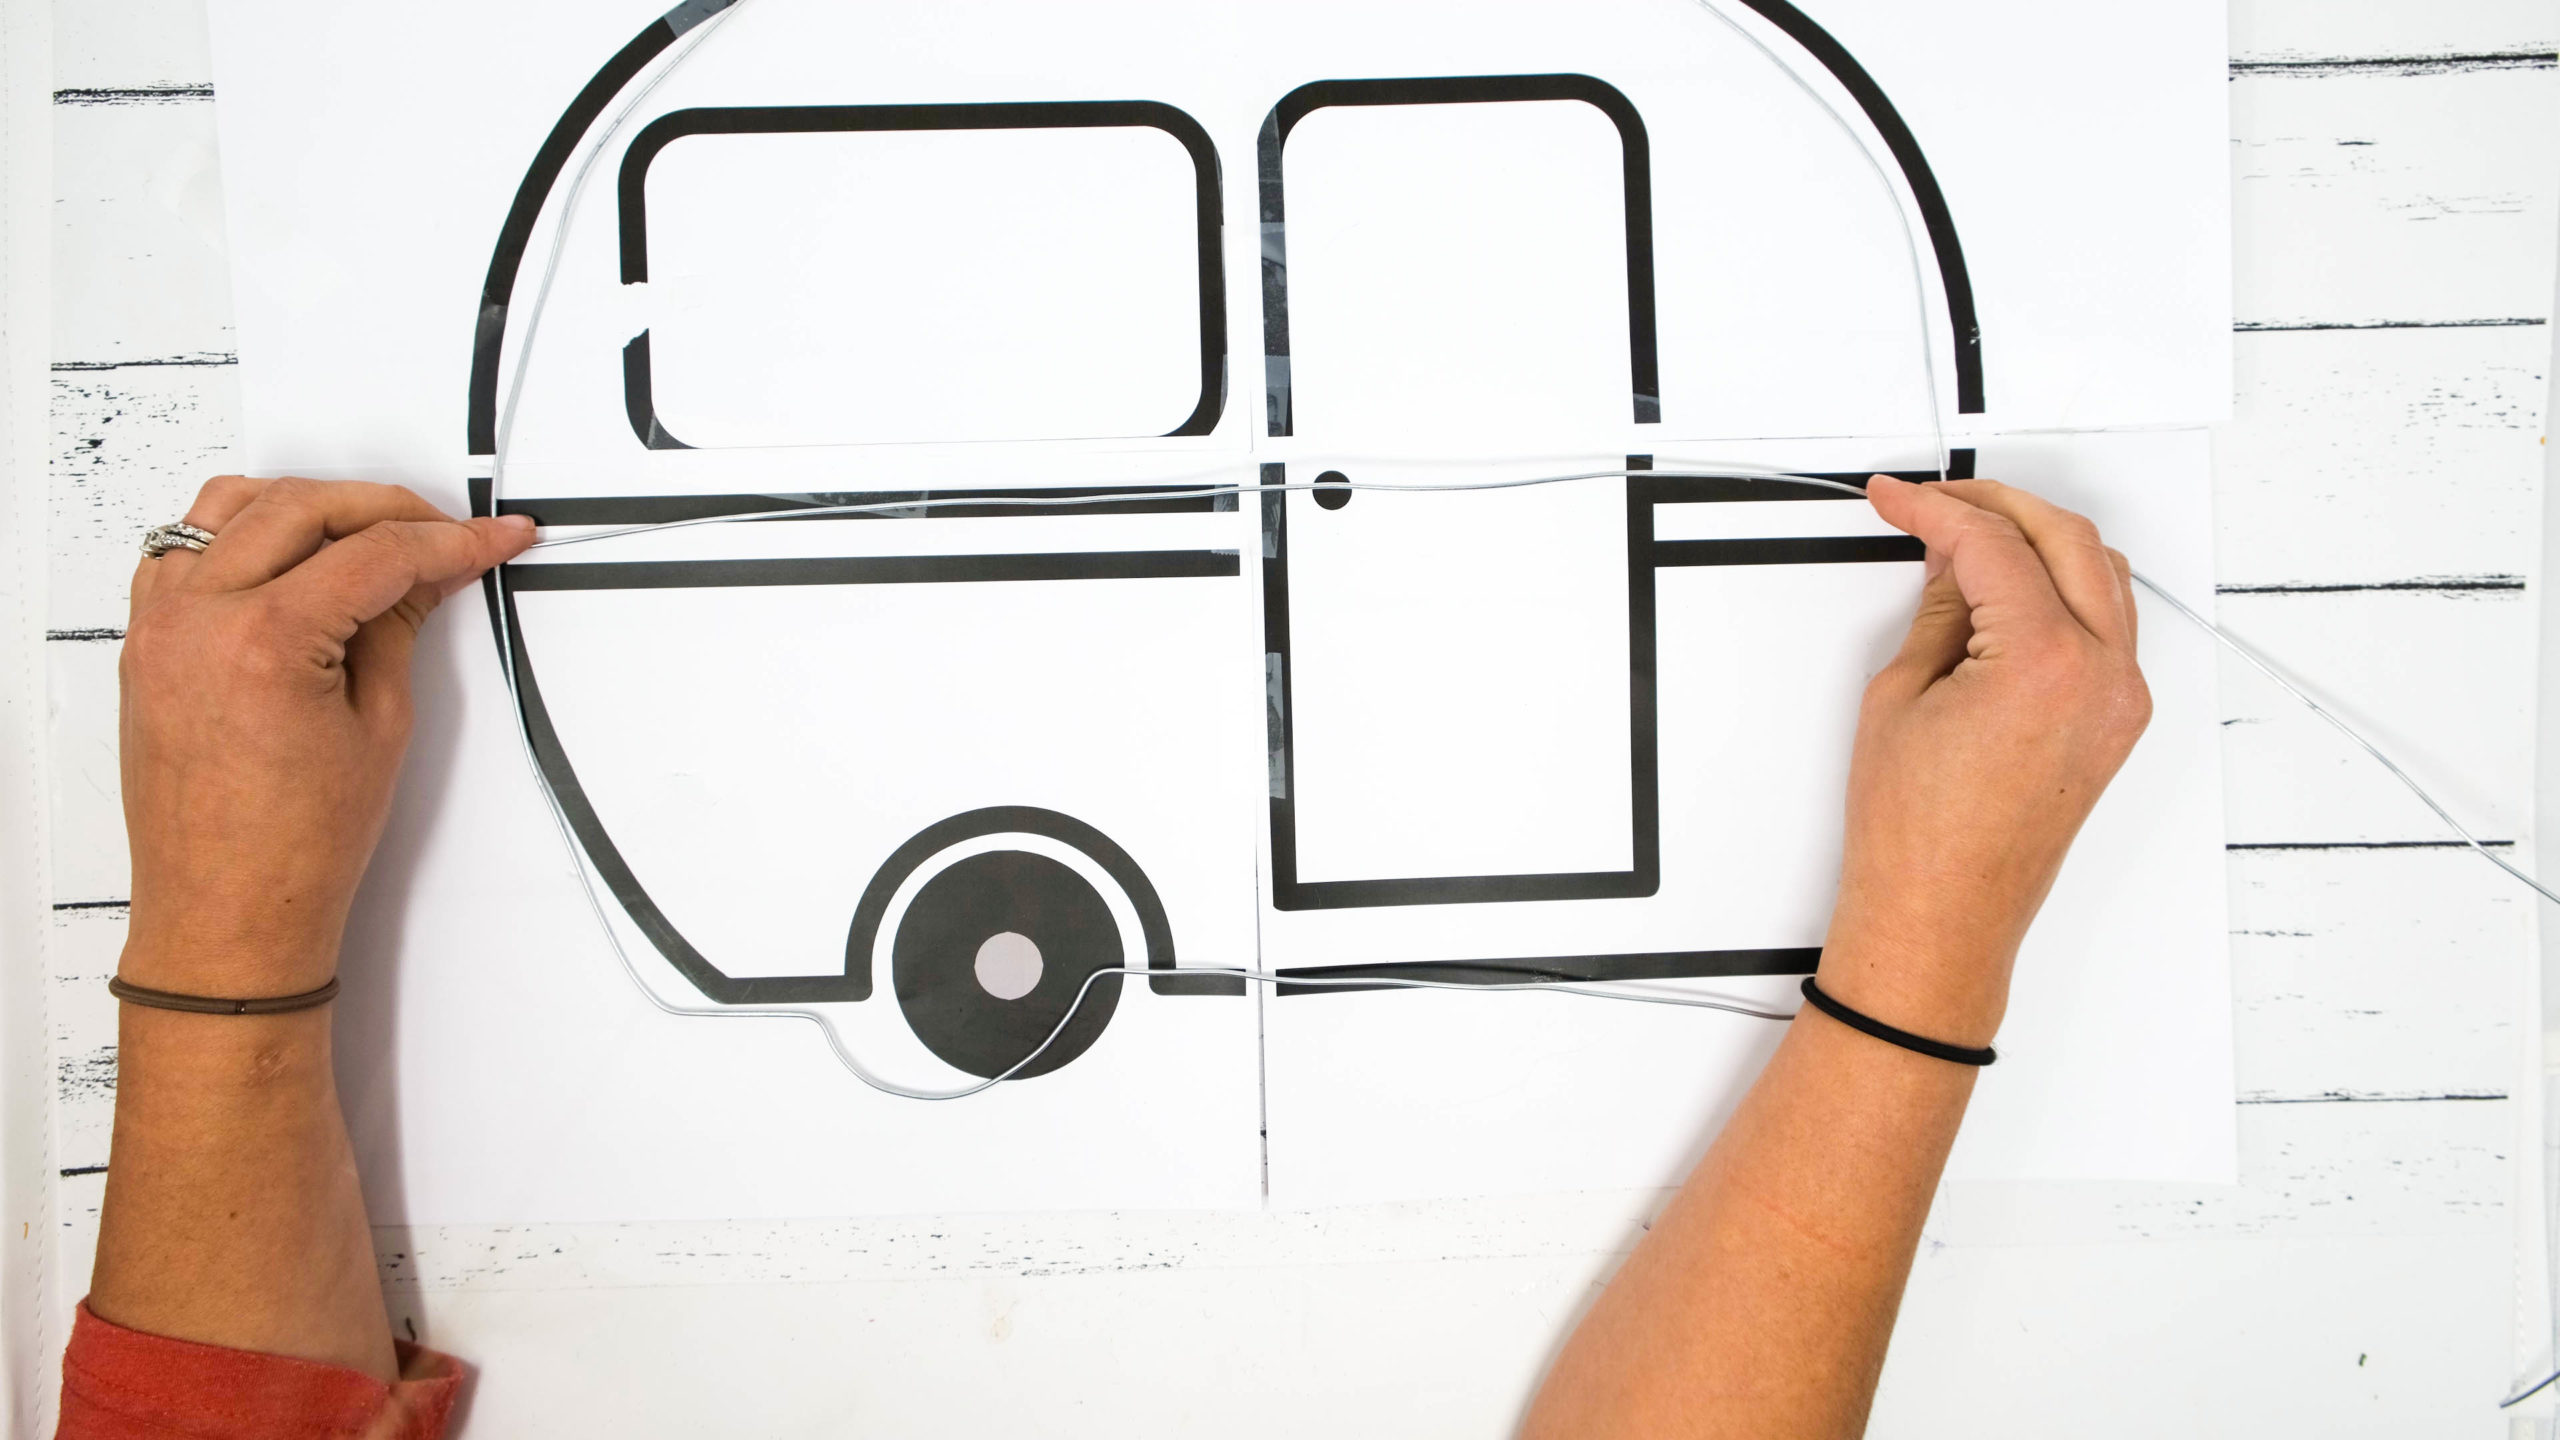
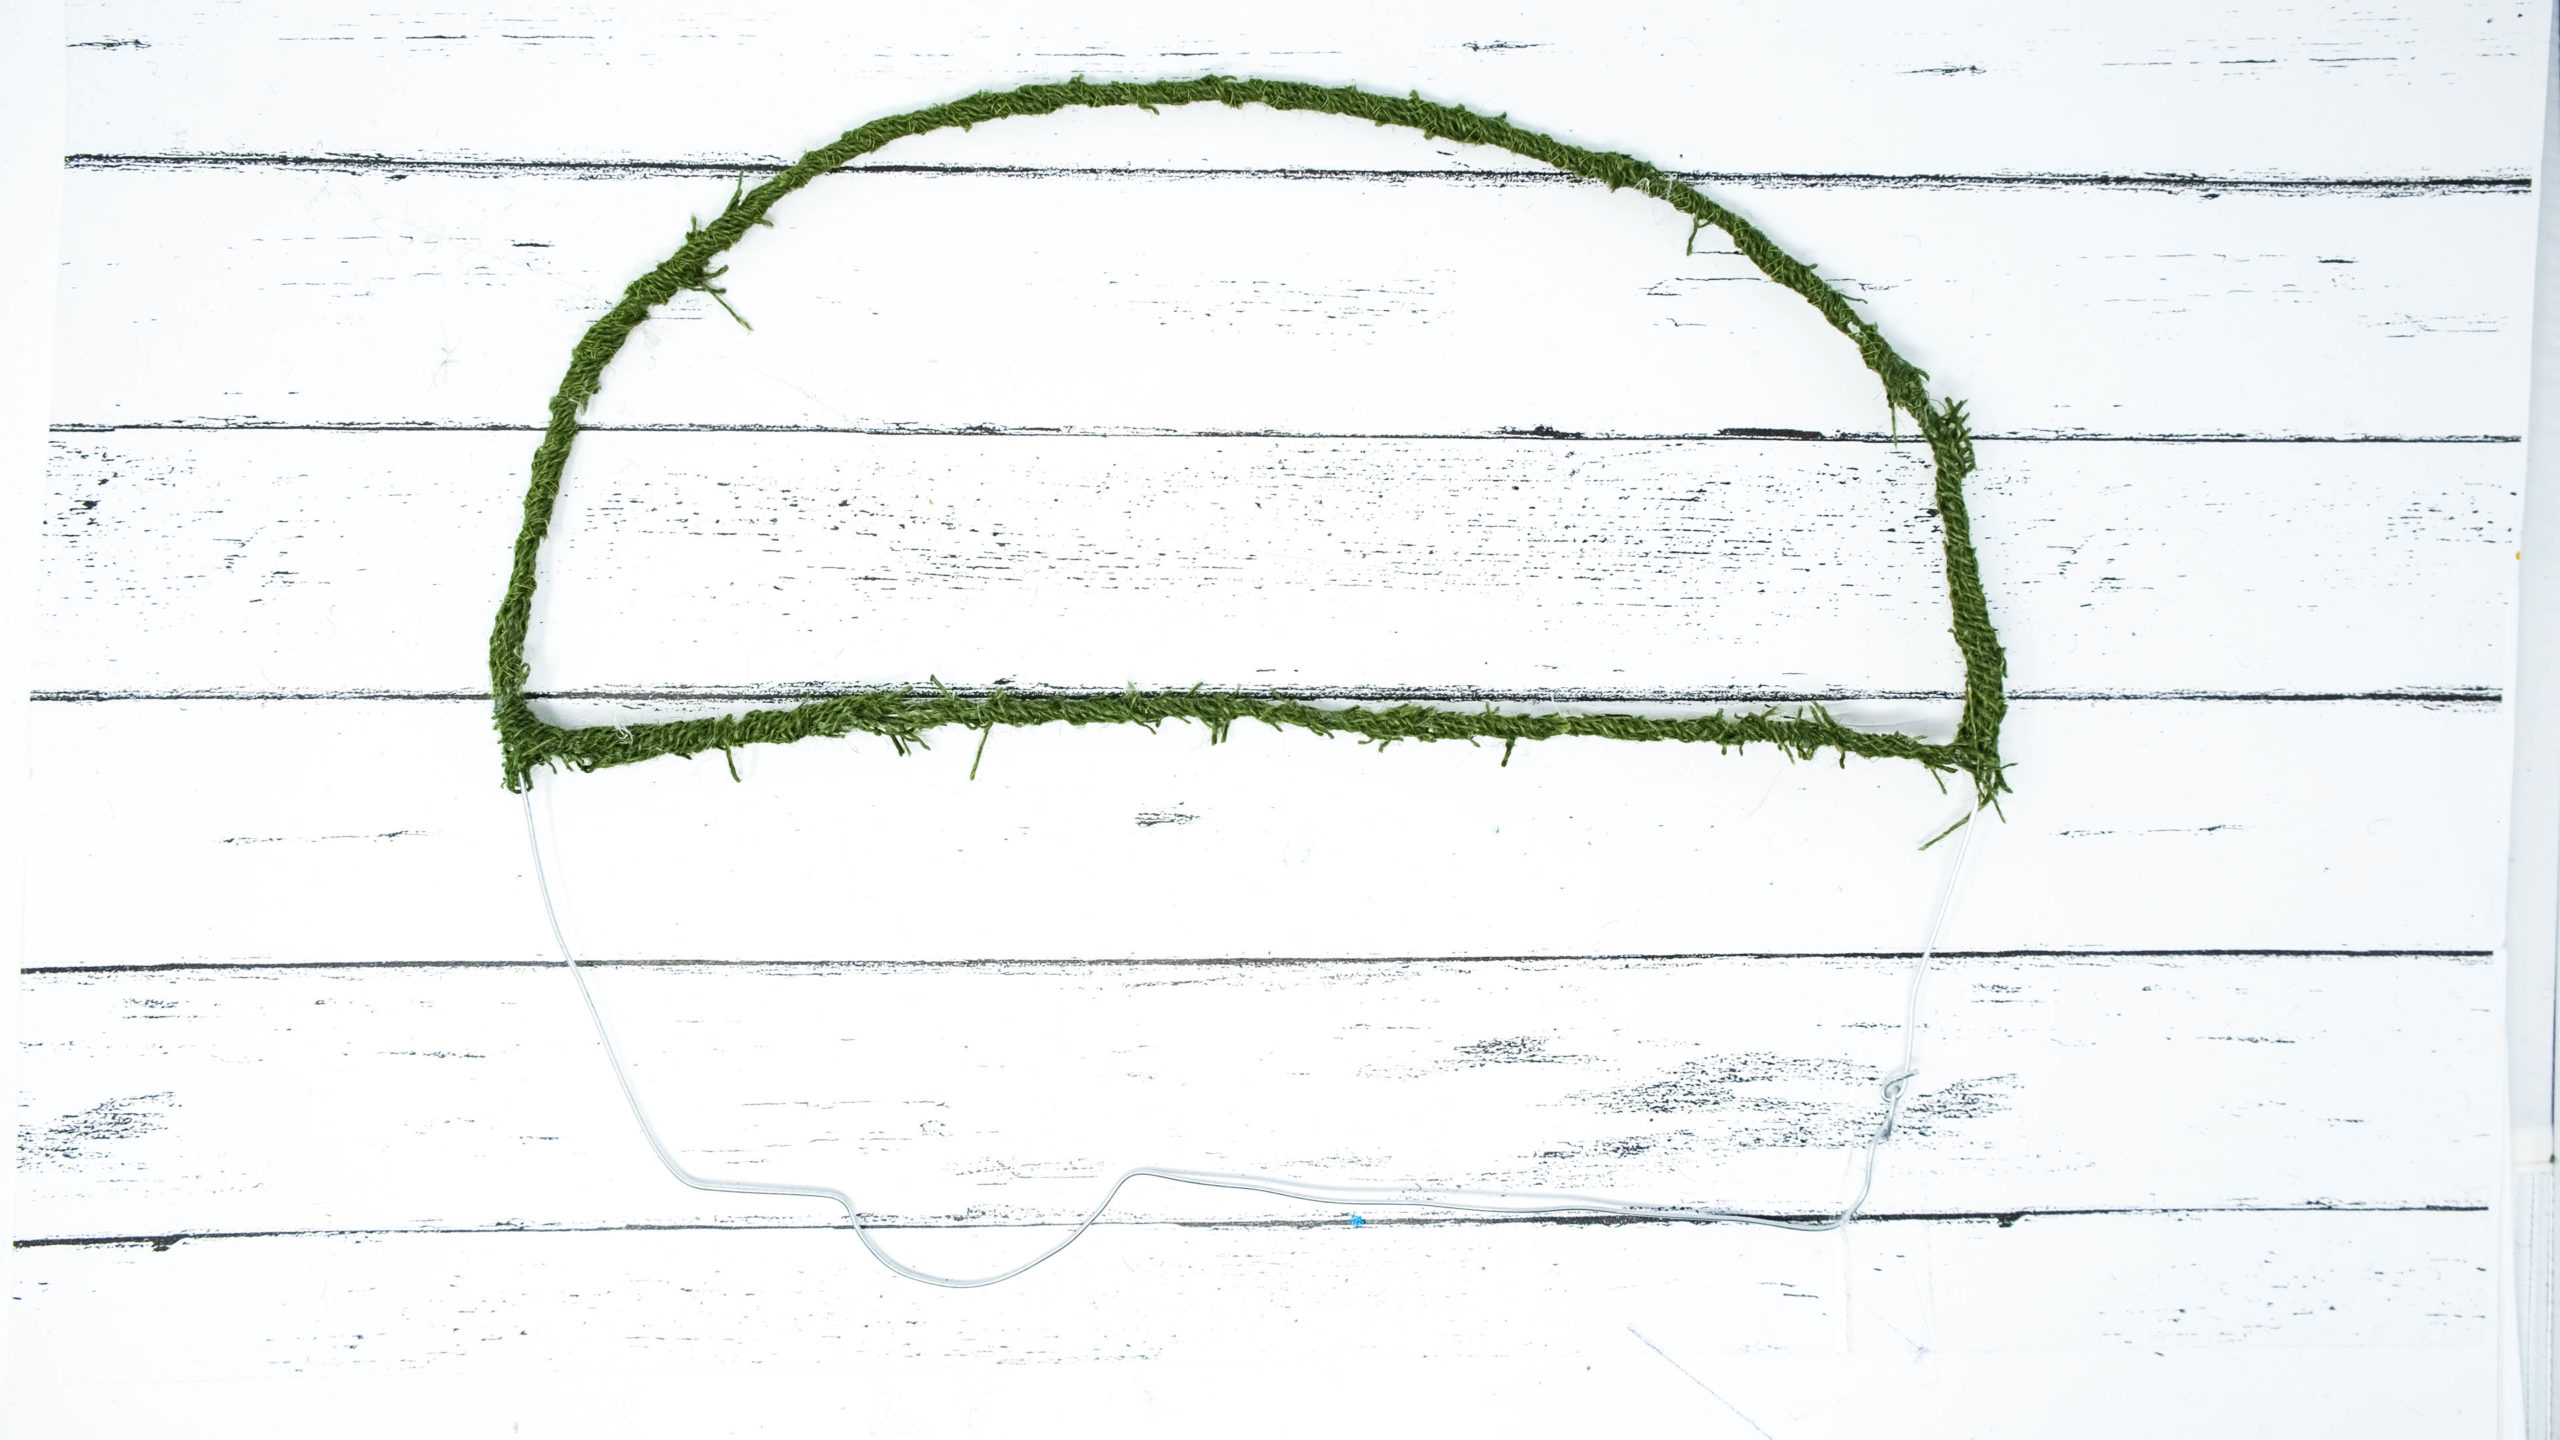
- Make a copy of the trailer template using your wire. The stuff can be pretty hard to bend, so be sure to have some needlenose pliers or something similar to help close it up. I found some tape super helpful to keep my wire frame in place while working on other parts of it!
- Create the divider/stabilizer bar - Measure the approximate length of wire you'll need to go across the middle, making sure to leave room to bend the ends to secure it to the camper frame. I attached it by just making a small hook on each side then fully closing it once in the right position (around the same spot as the divide is on the template)
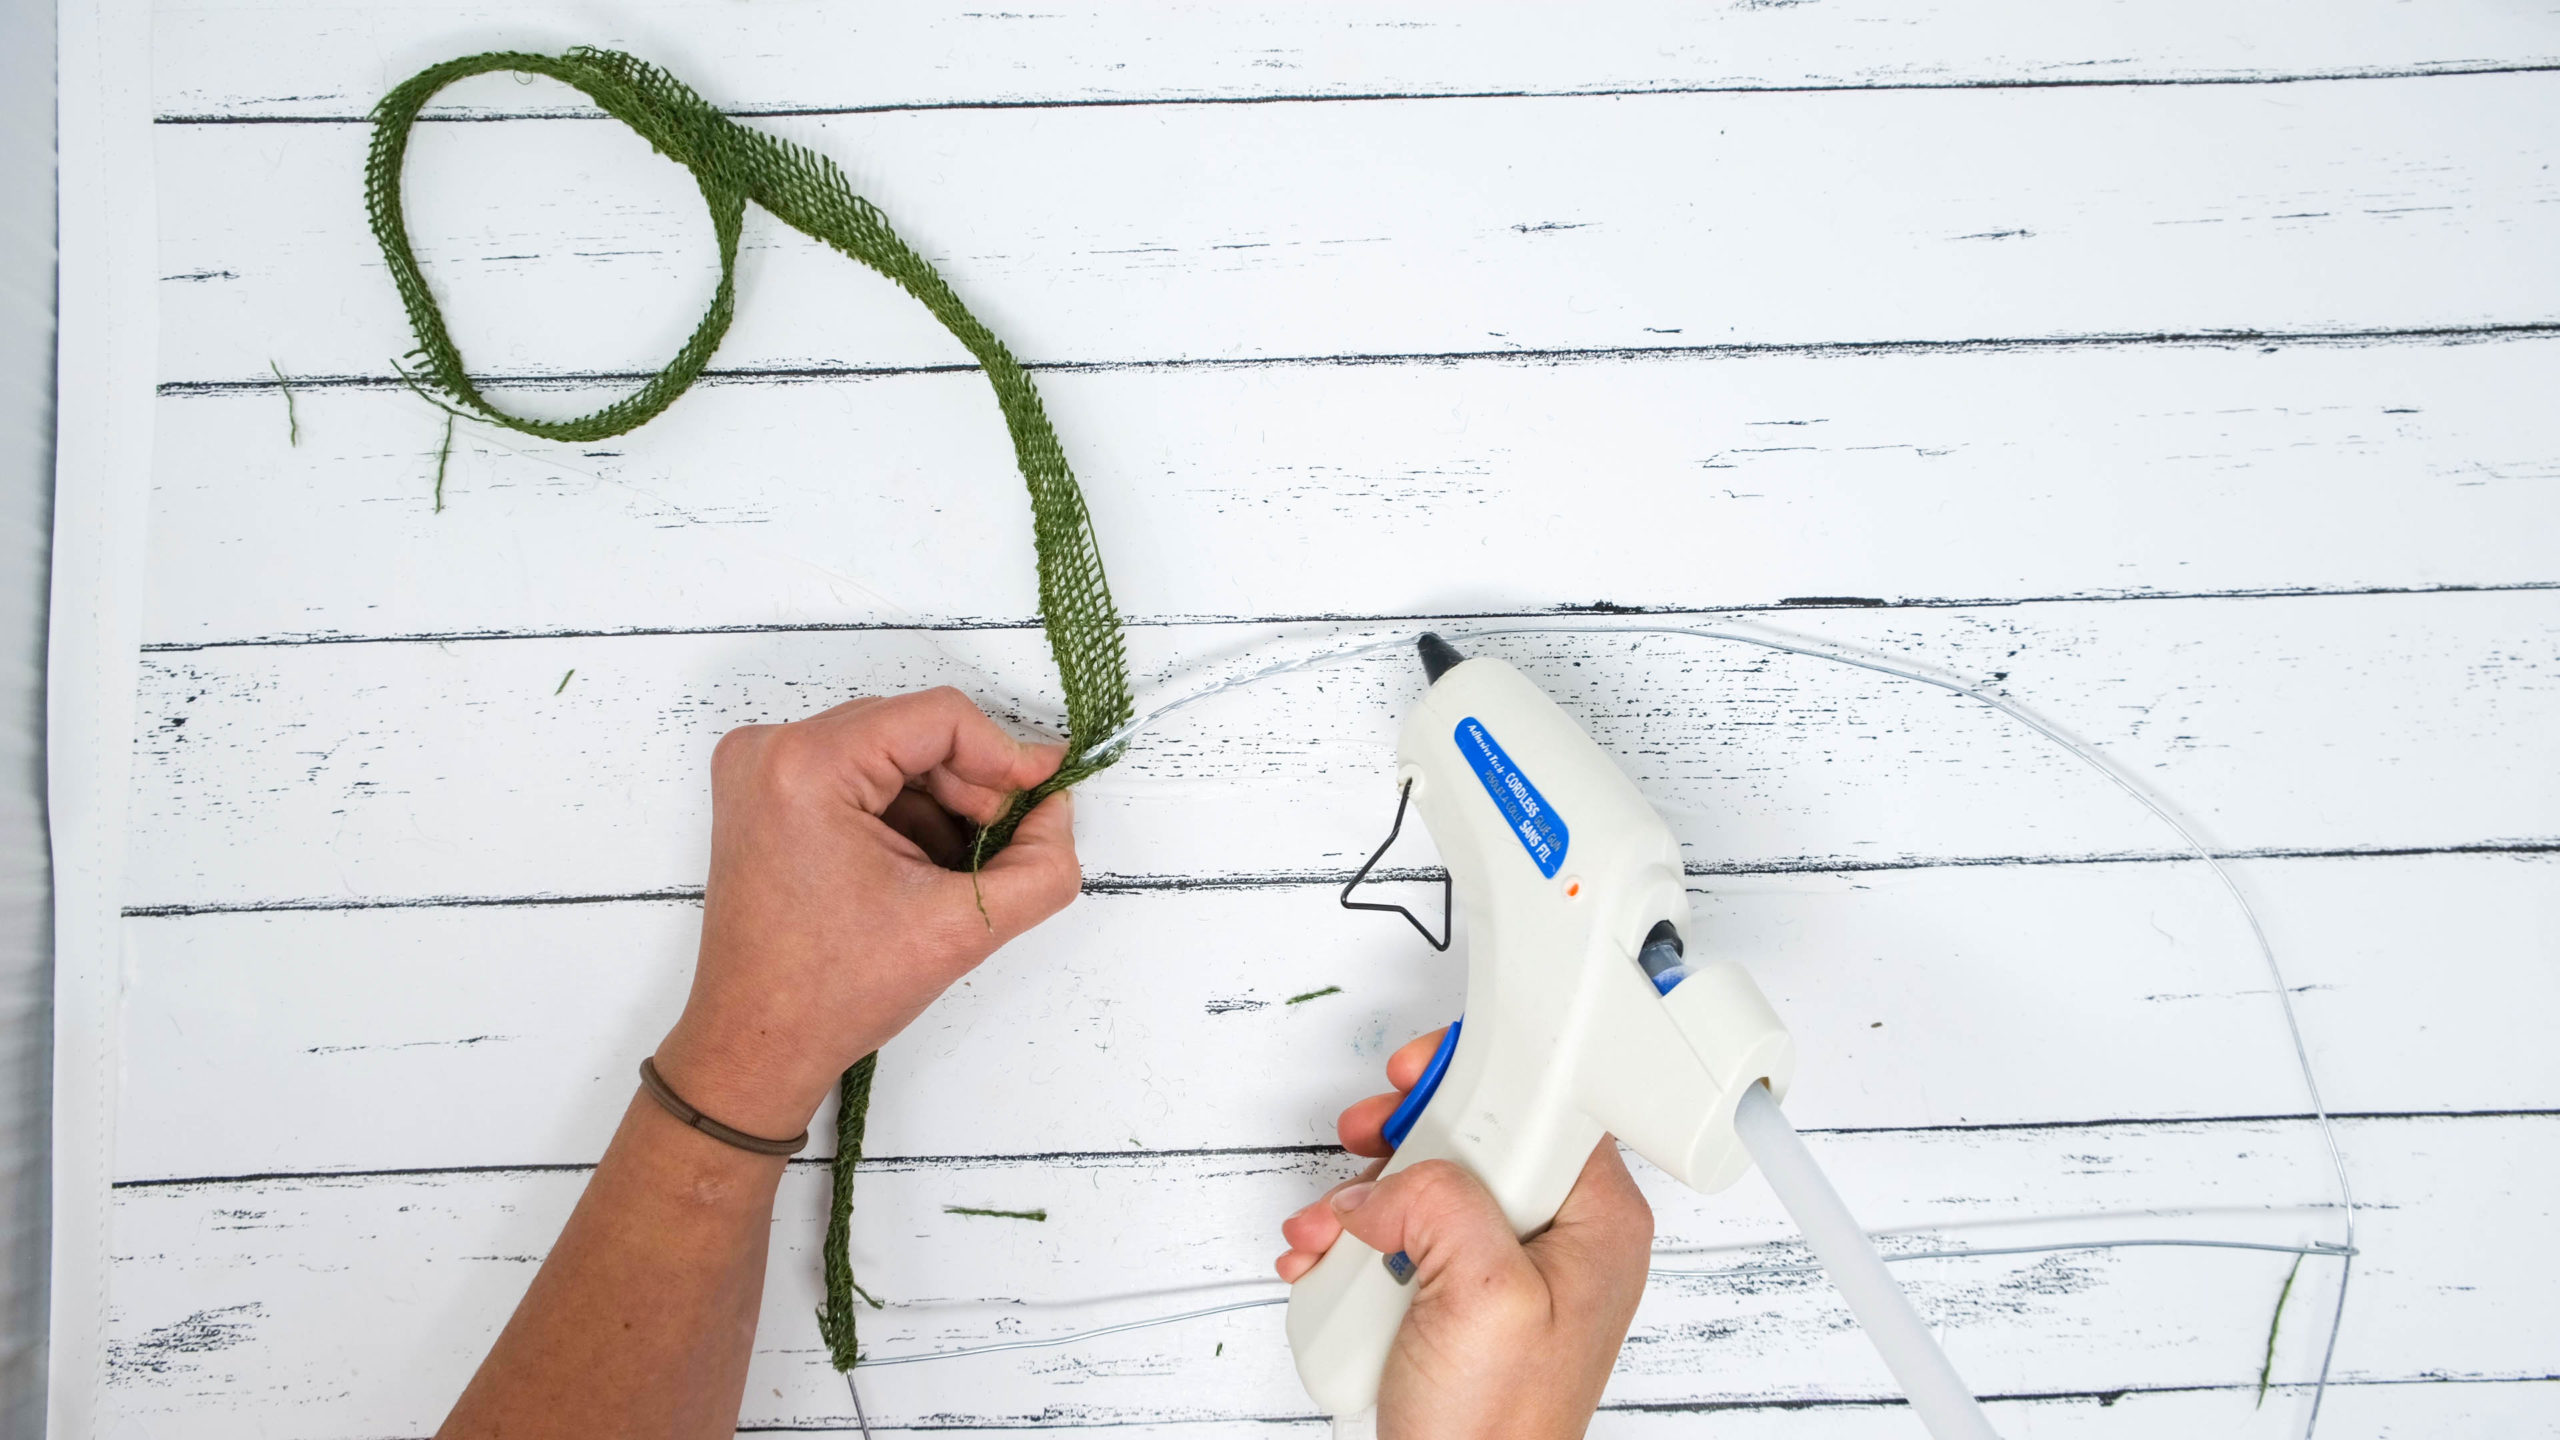
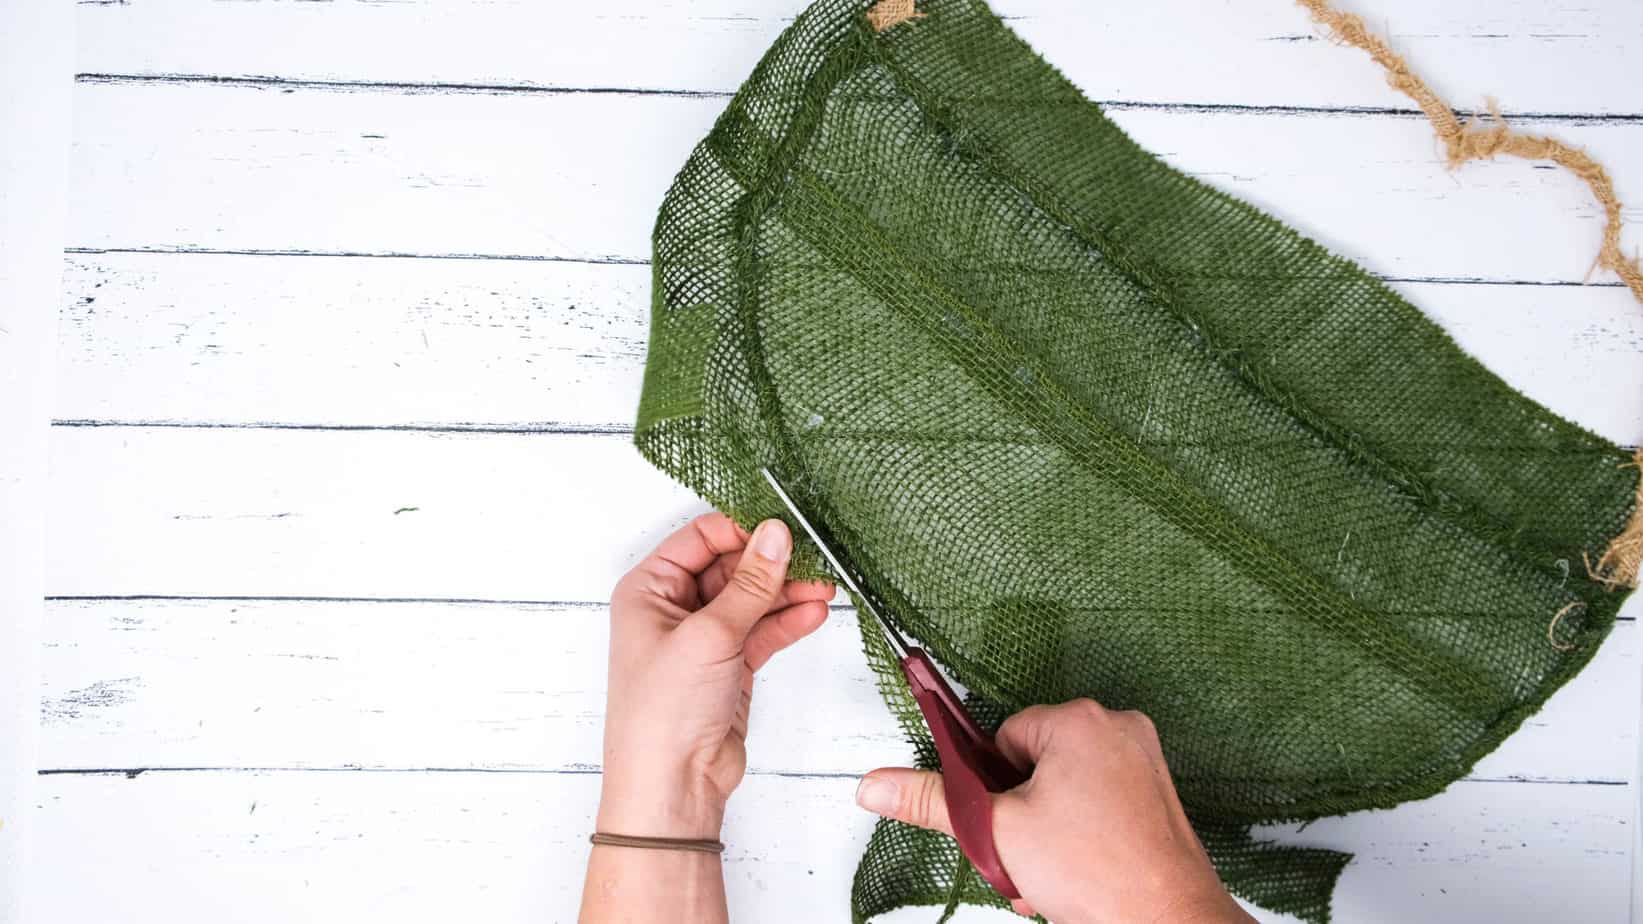
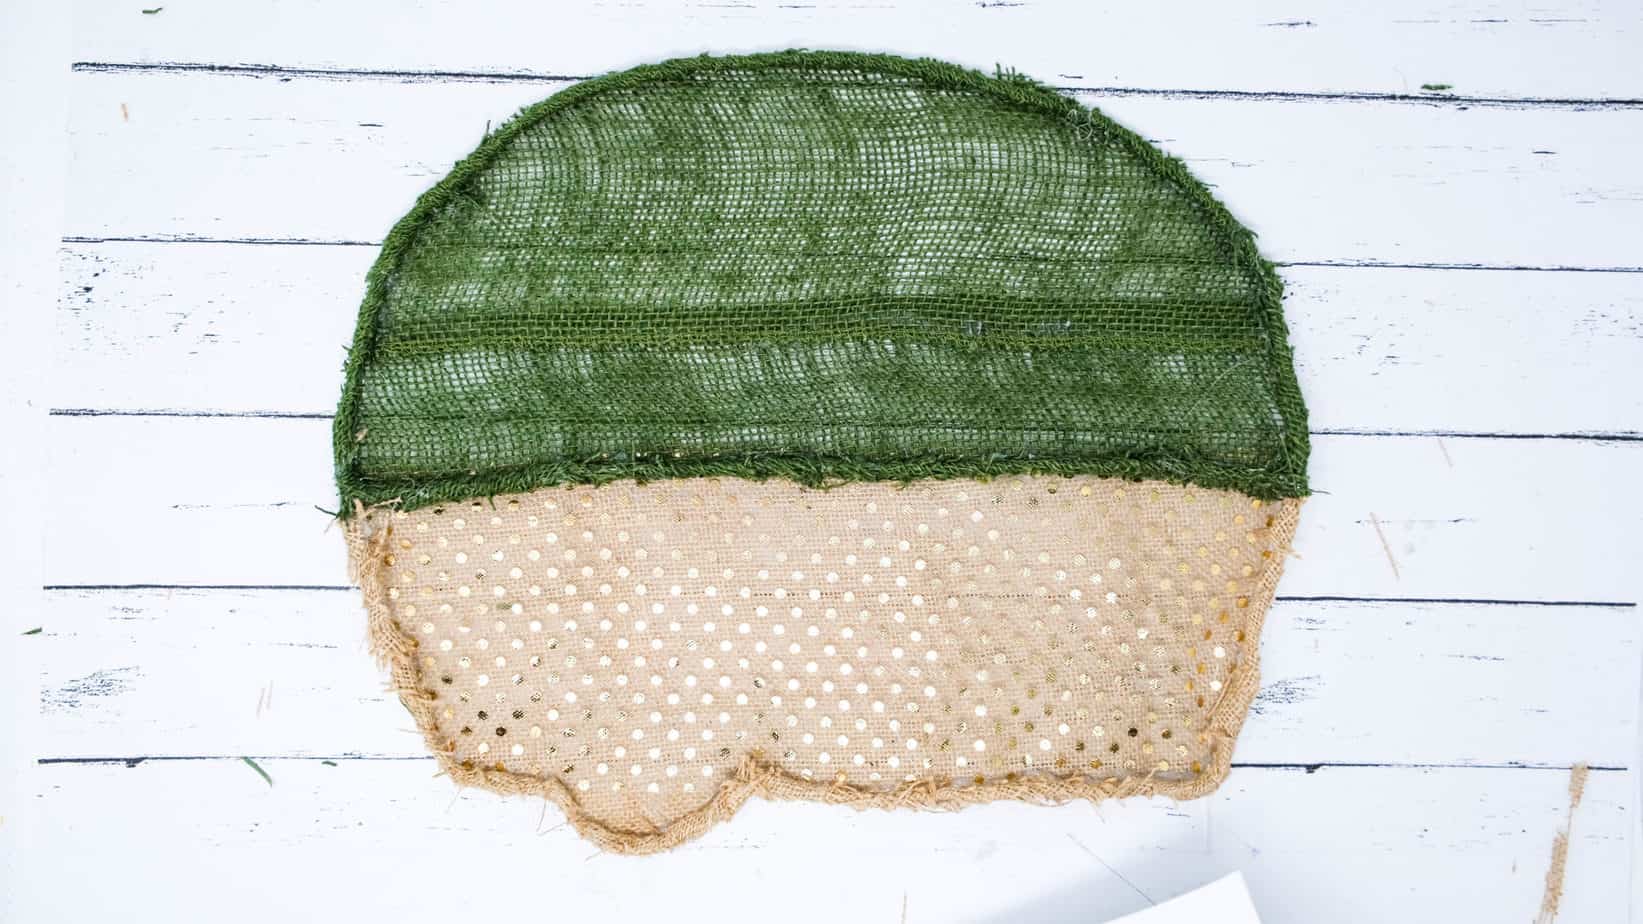
- Cut a strip of green burlap and wrap! (mine was about the width of my thumbnail, but it doesn't have to be exact). Lay down a small line of hot glue on the "green portion" of the wire (the top) and wrap your strip around it. Hot glue as you go in small sections until the top and the divider bar are wrapped in the green burlap.
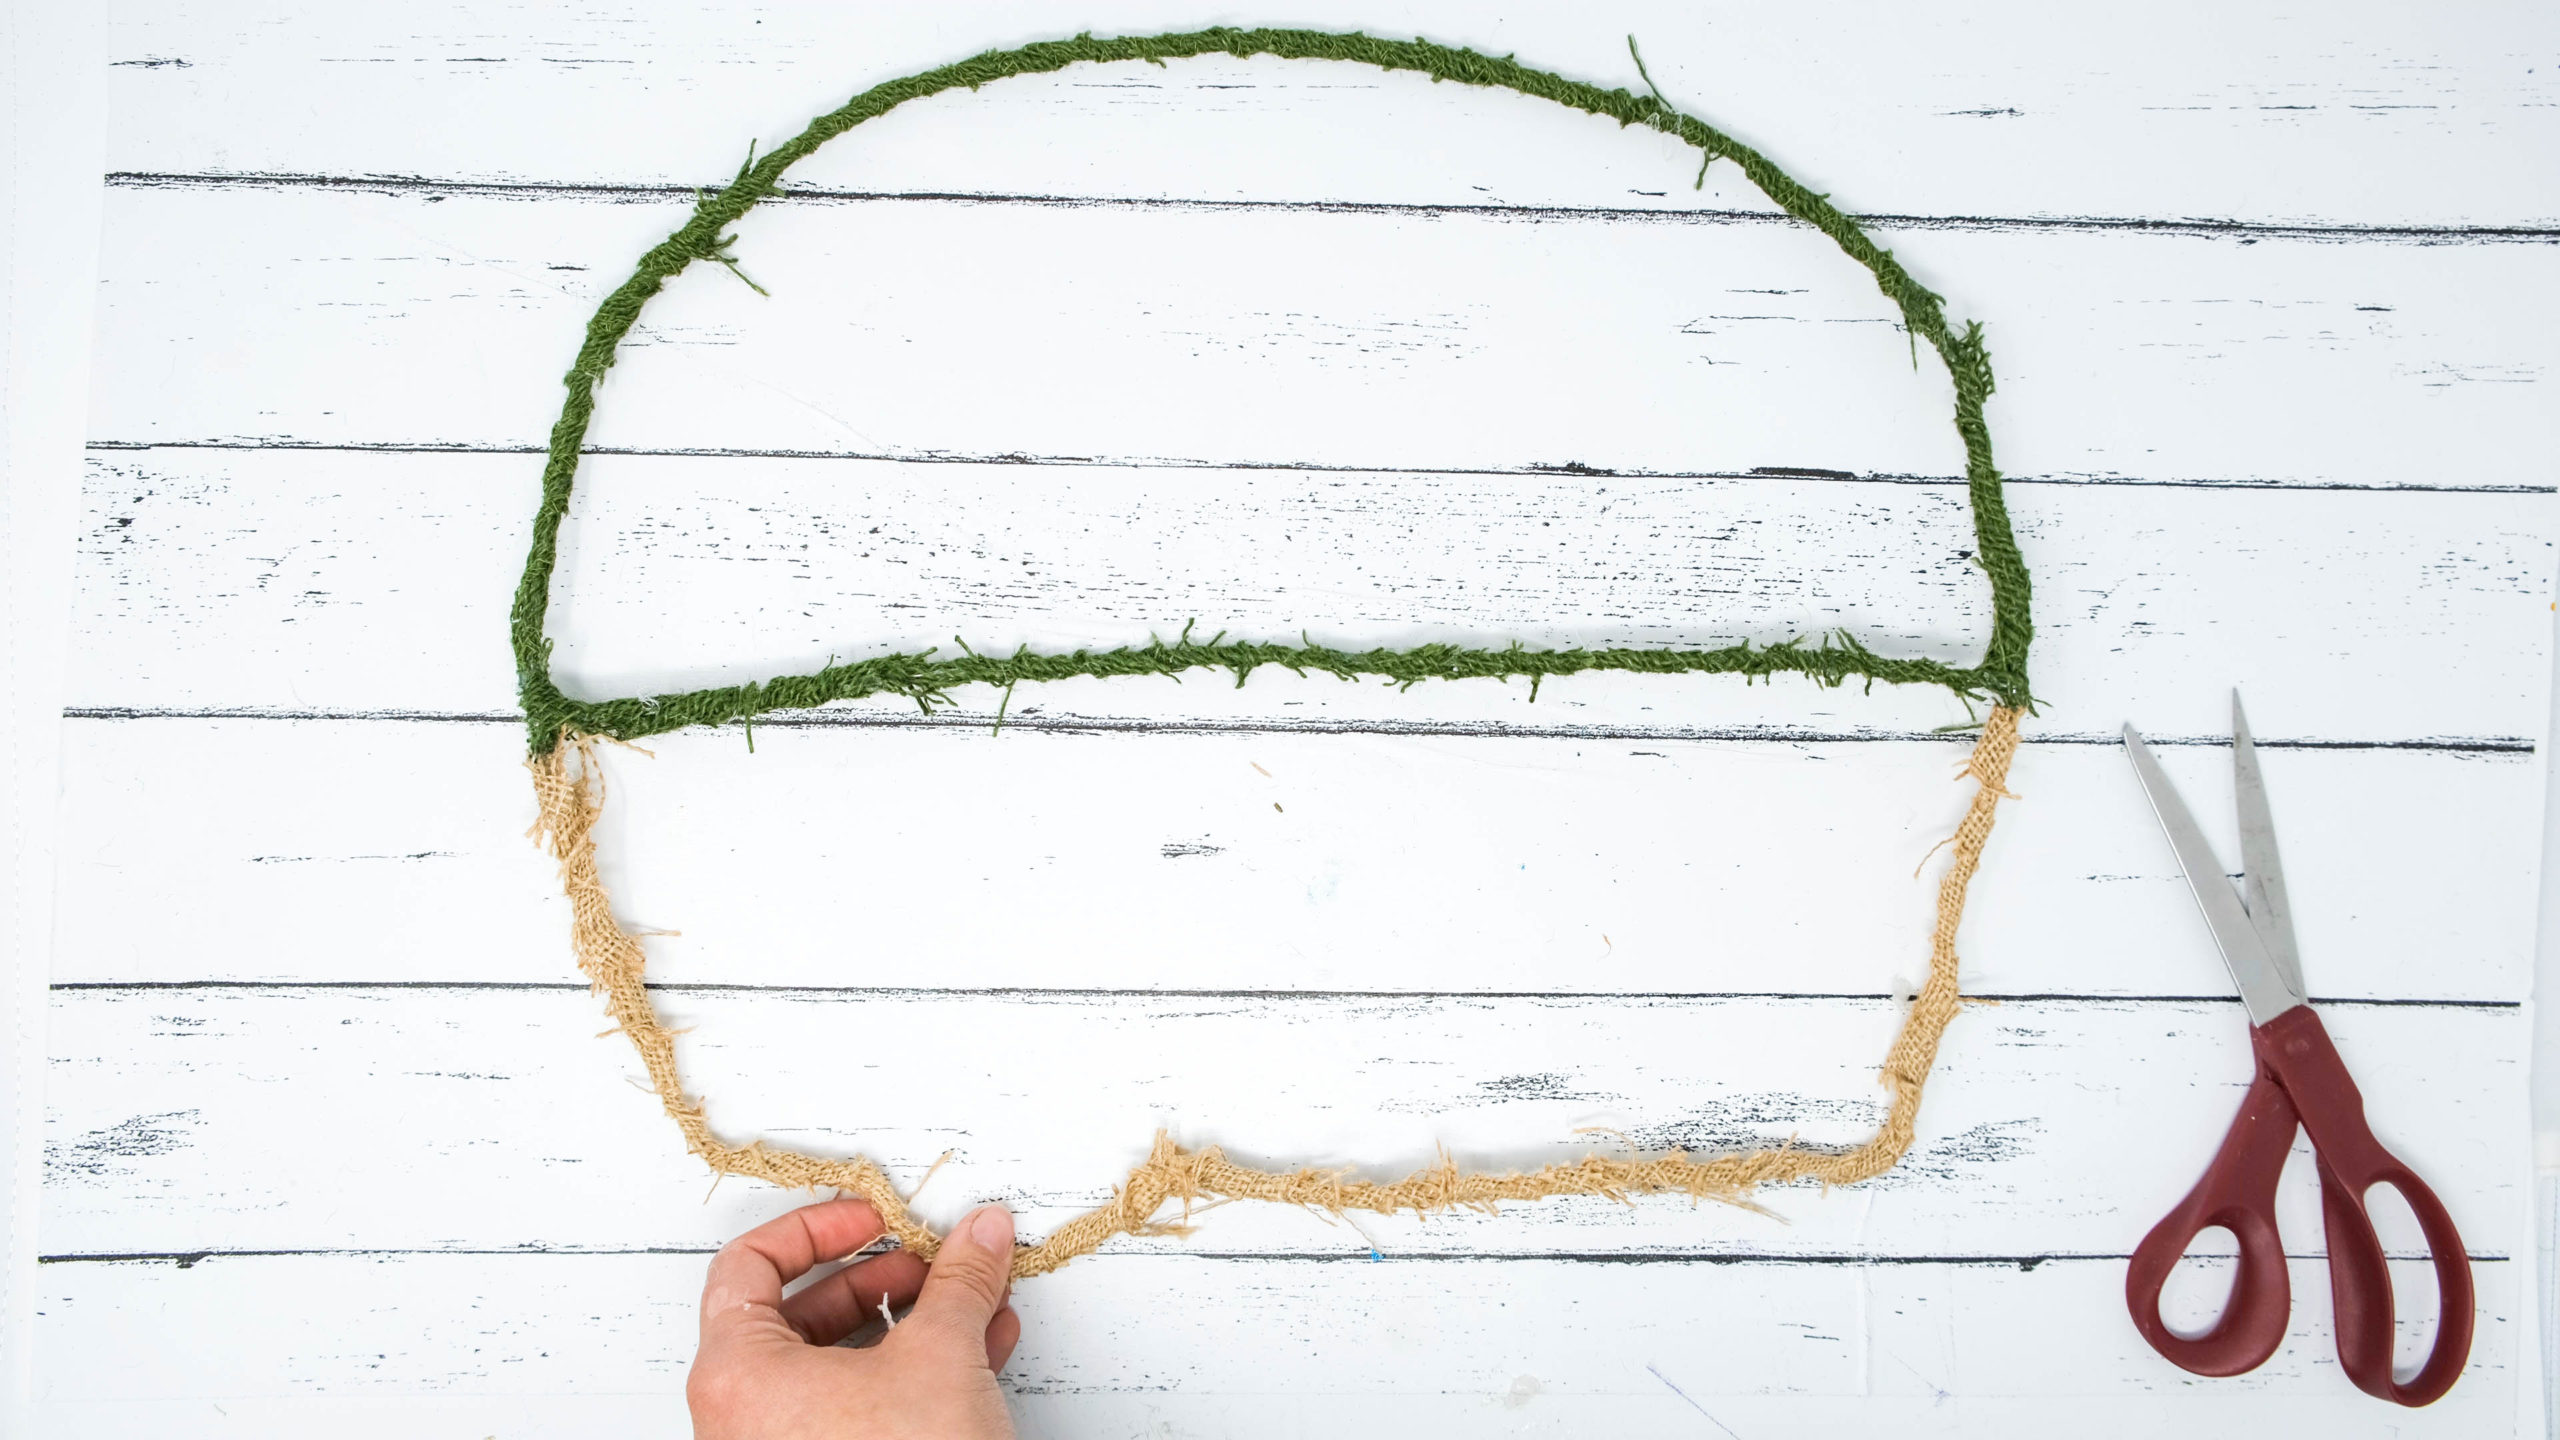
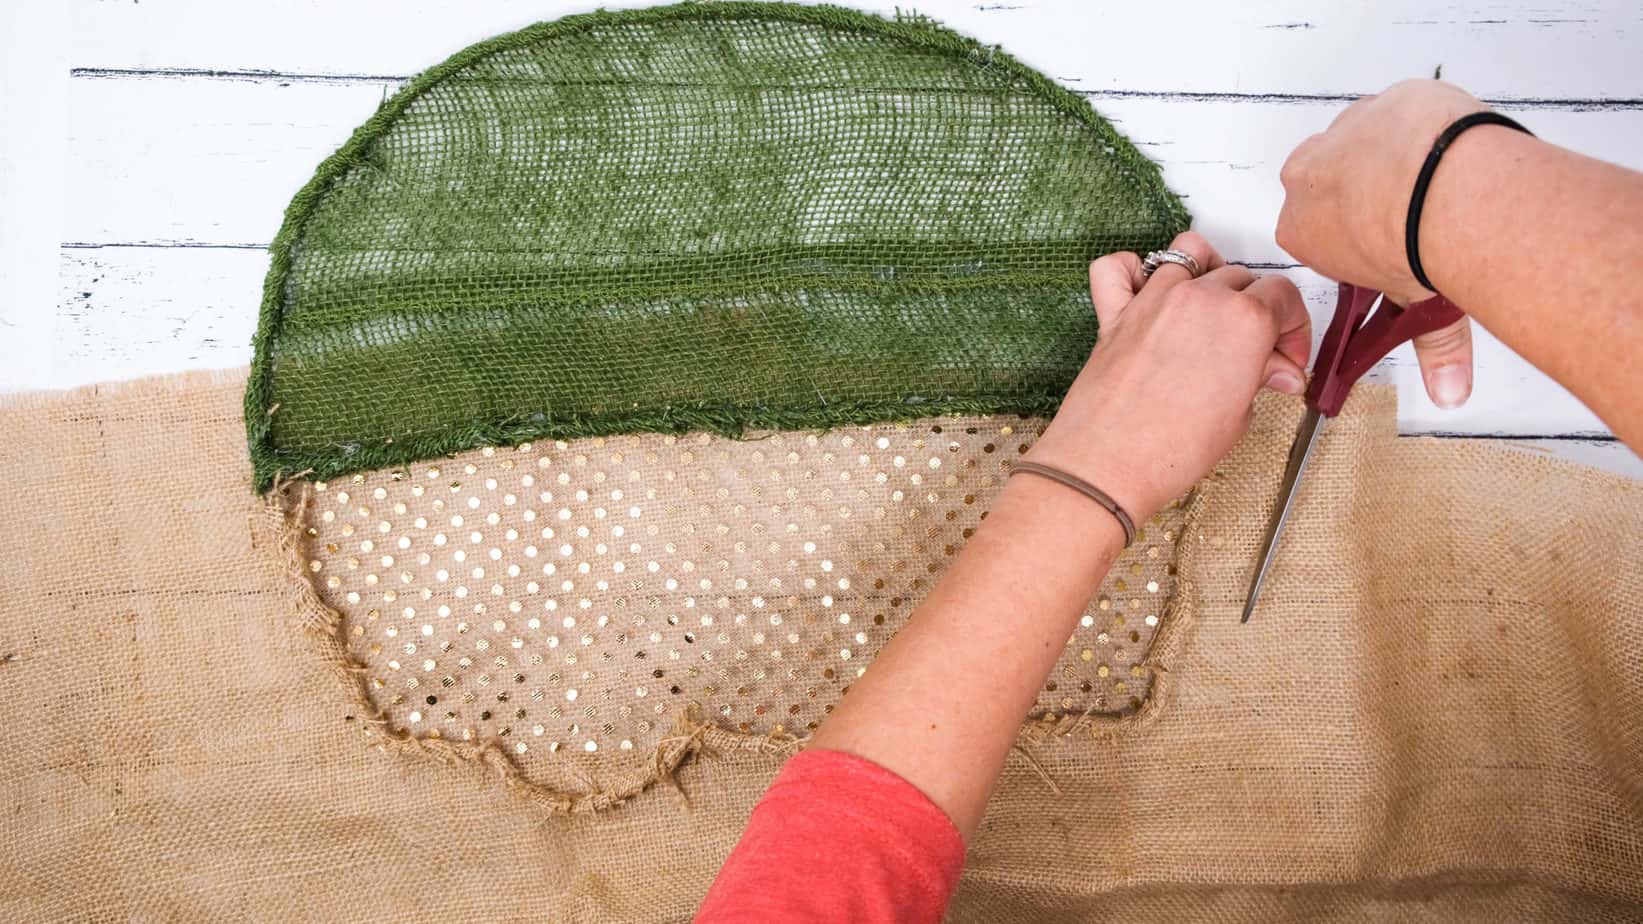
- Cut a strip of the tan/brown burlap now and do the same thing to the bottom of the camper till no more wire is showing.
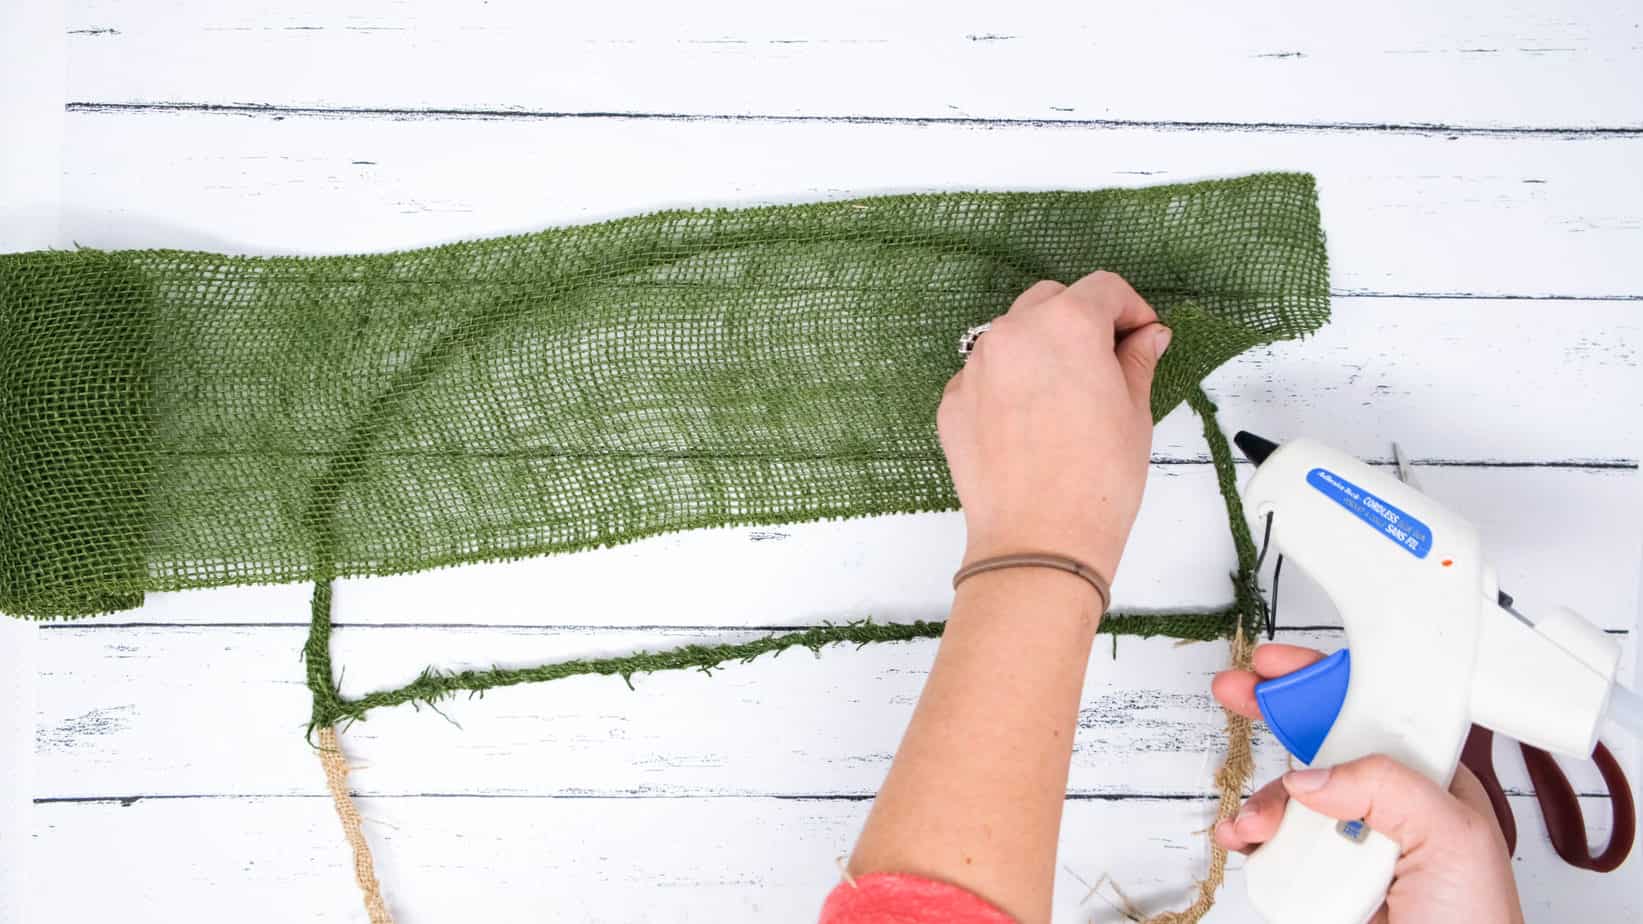
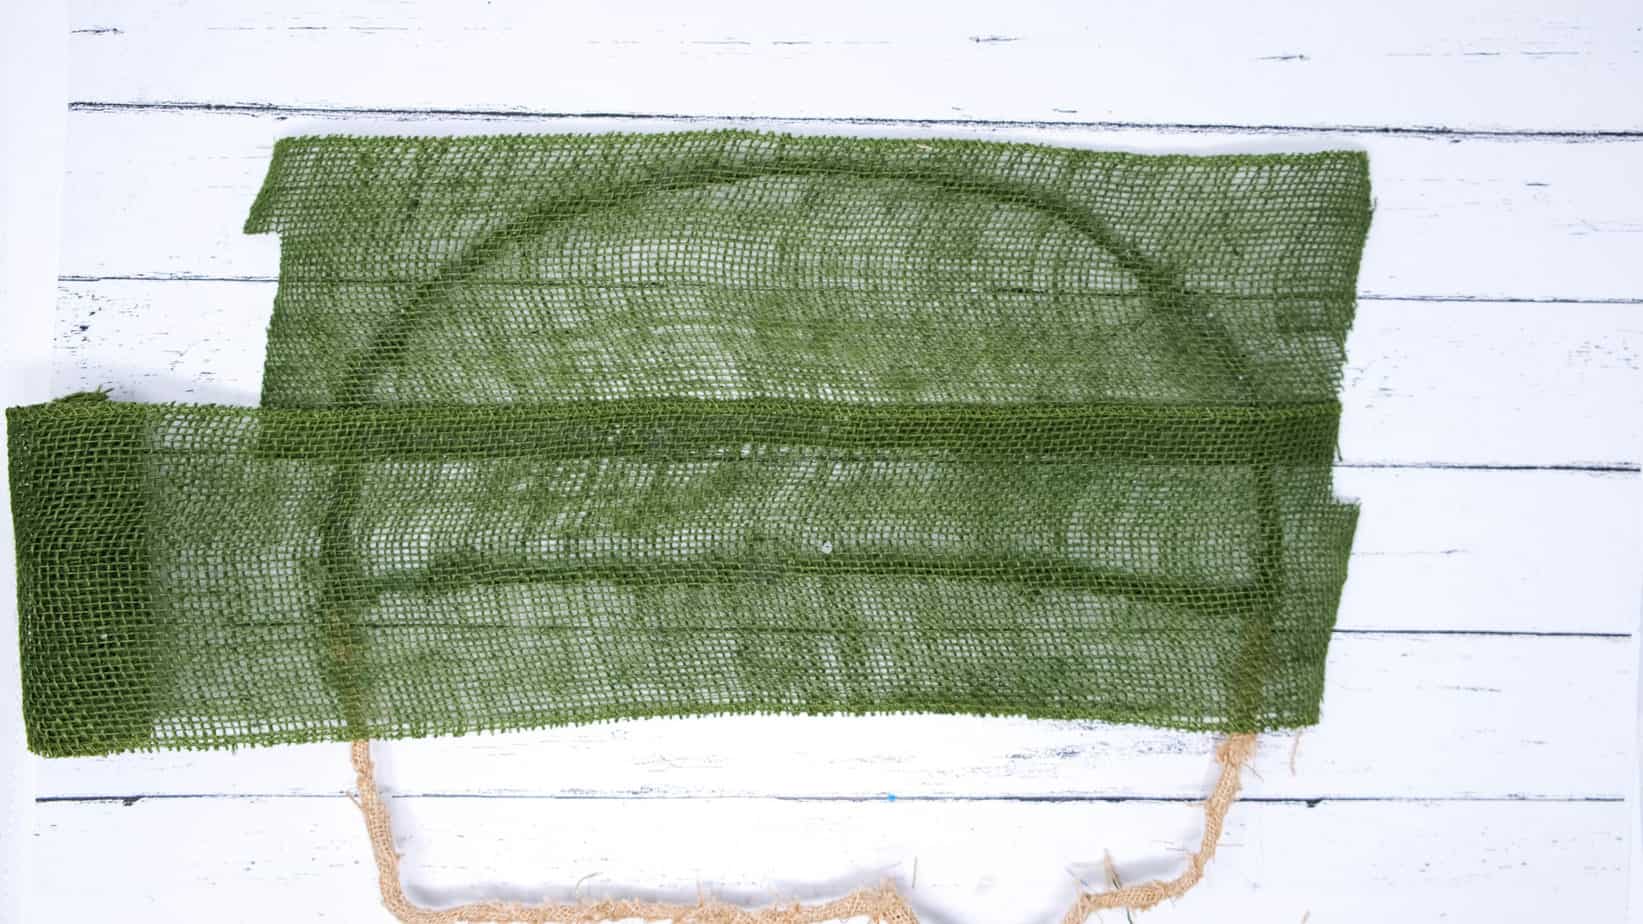
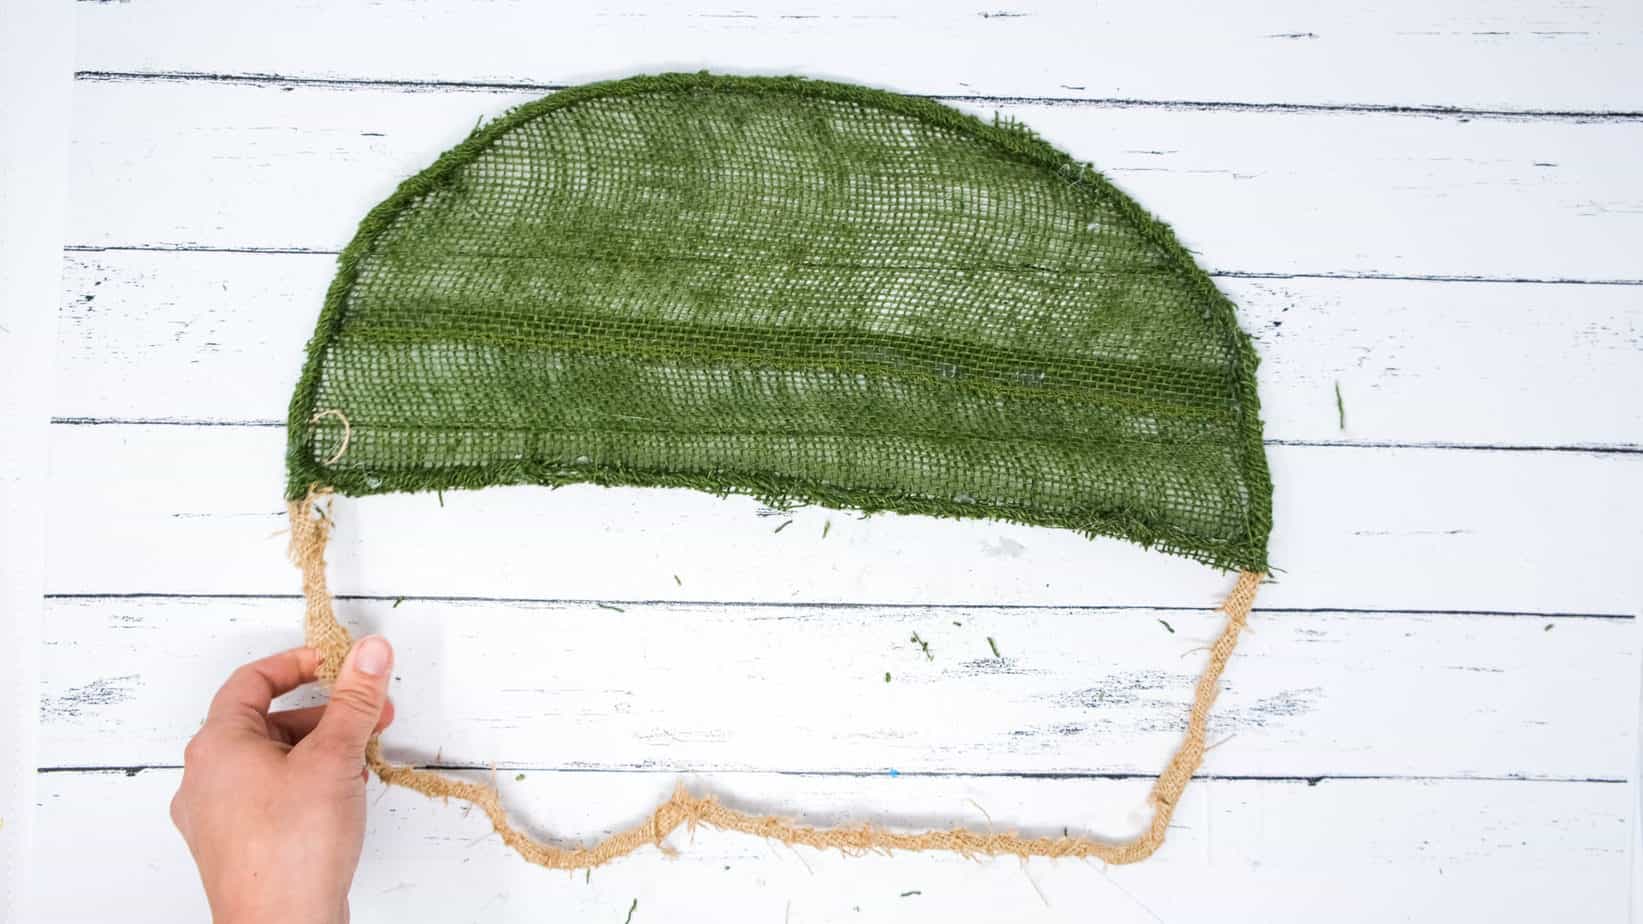
- Now it's time to add the green burlap backing! Cut a rough amount of what you think you'll need to cover the back (my green burlap was in the form of a wide ribbon, so I needed two strips). Once your strips are prepped, put hotglue on small sections at the top of the frame (remember, the BACK of it) and attach the green burlap. The stuff dries pretty fast, so that's why it's important to glue it down in sections. I did mine in about 3 or 4 sections. Make sure to hot glue the green burlap to the dividing piece of wire too. If you had to use multiple pieces like me, make sure to glue those together as well! Trim off the extra green that hangs outside the frame. It might help to go at an angle inwards to make sure no extra material is seen outside of the edges.

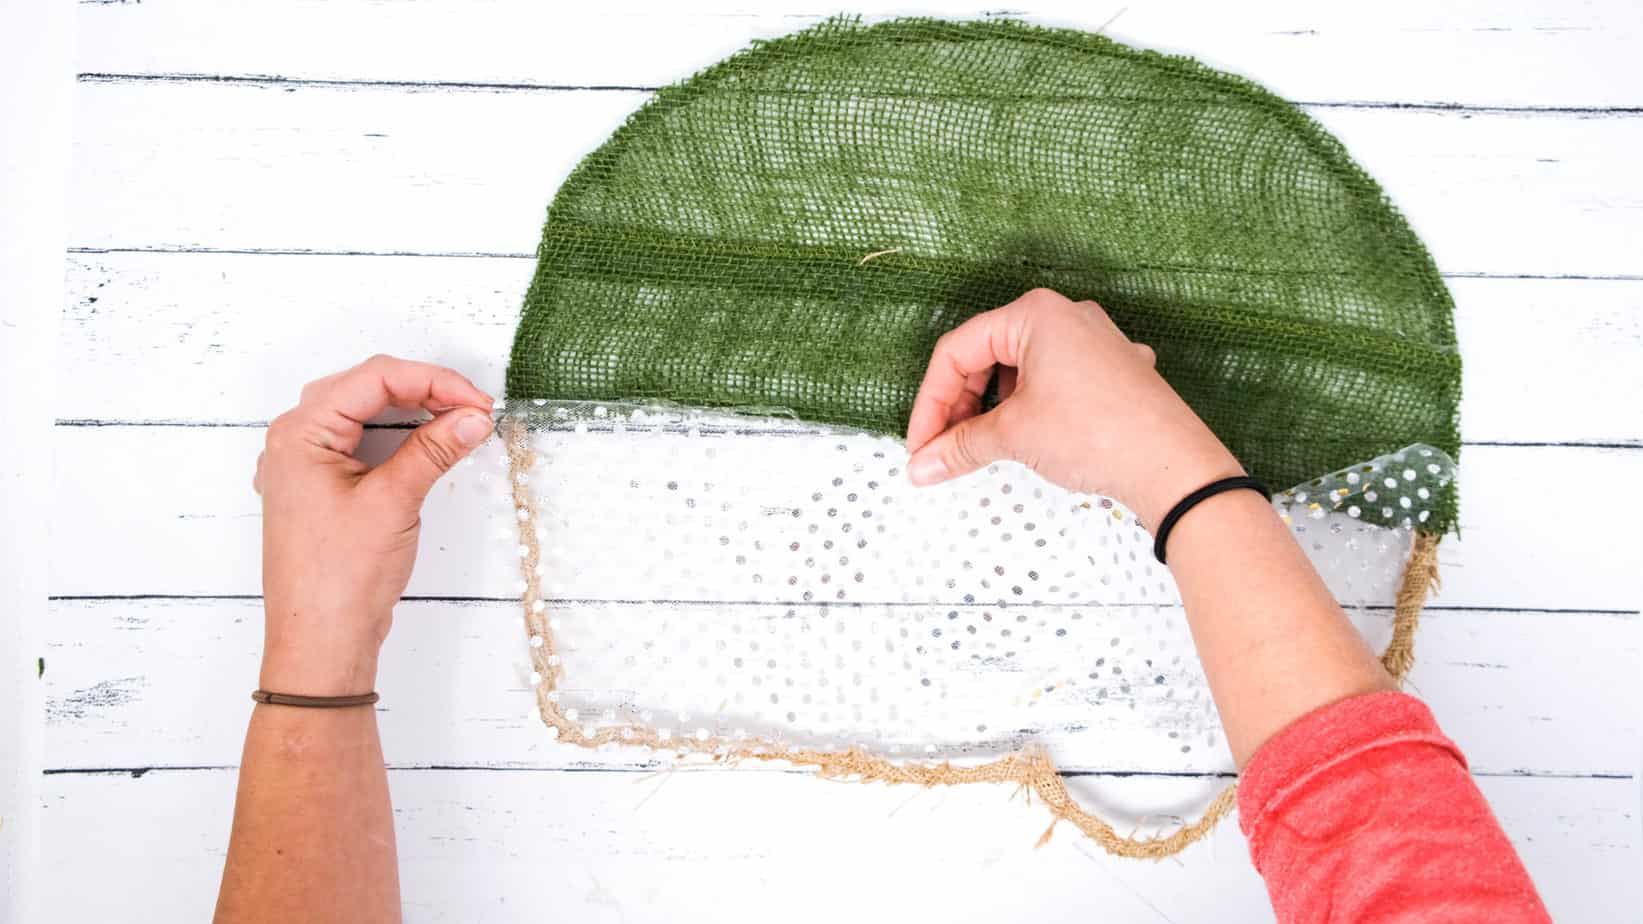
- Time for the sparkle ribbon backing (or whatever festive clear ribbon you chose. Mine was clear with gold dots). Do the same thing as we did with the green burlap on the top portion; cut the approximate amount of sparkle ribbon you'll need and attach it in sections with the hot glue. Make sure to also glue it to the middle divider bar. Trim off any remaining ribbon that is beyond the frame.
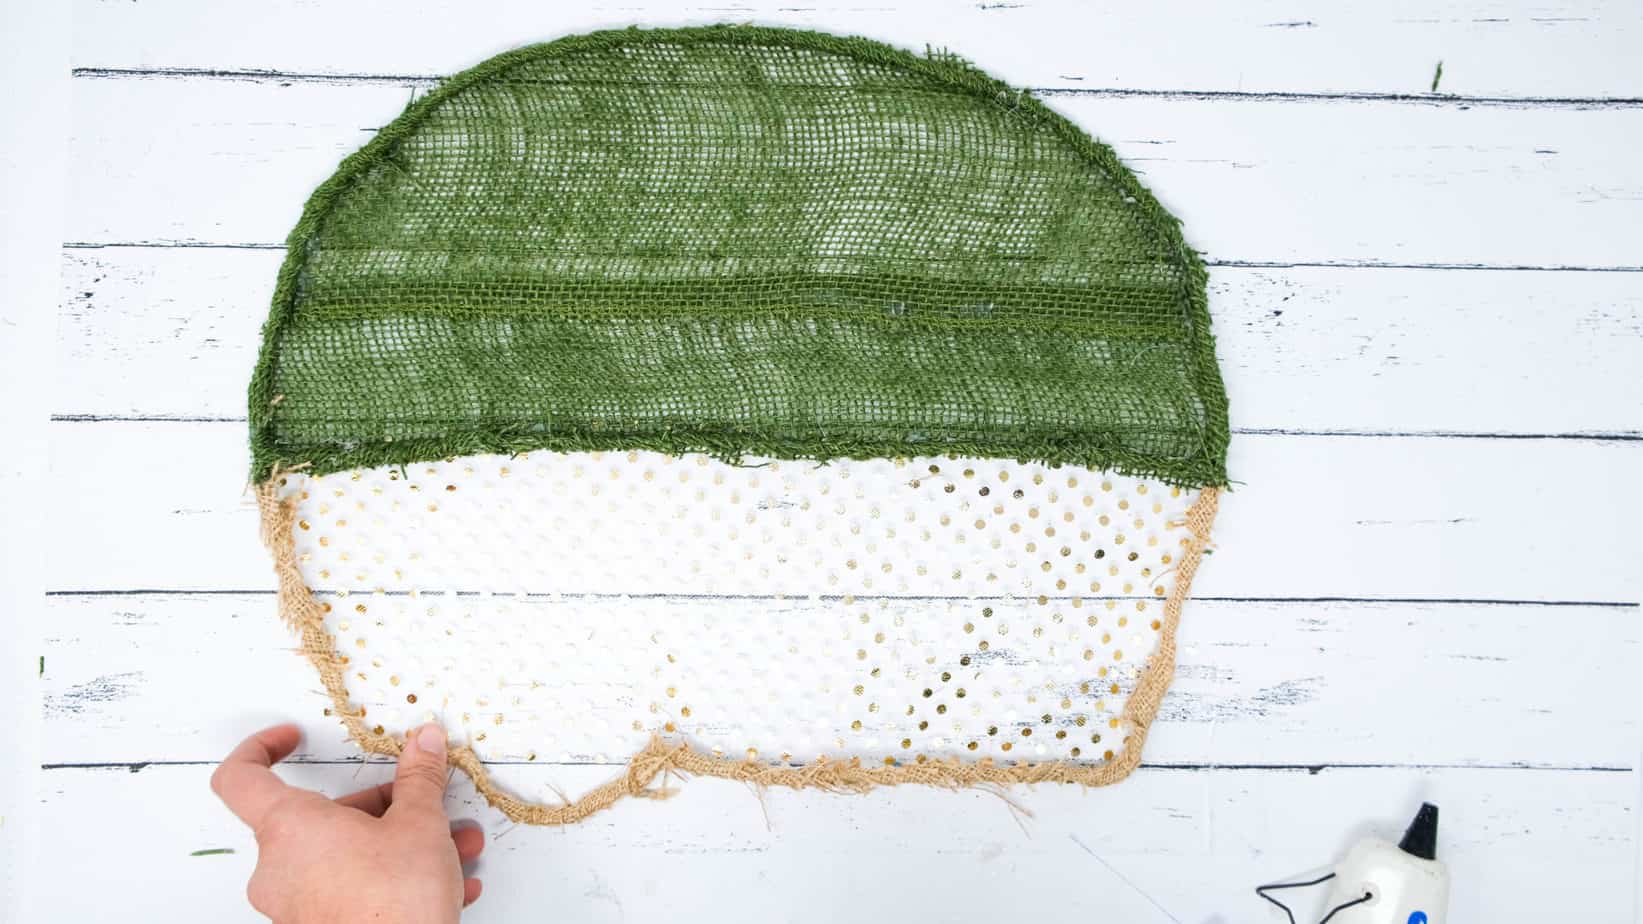
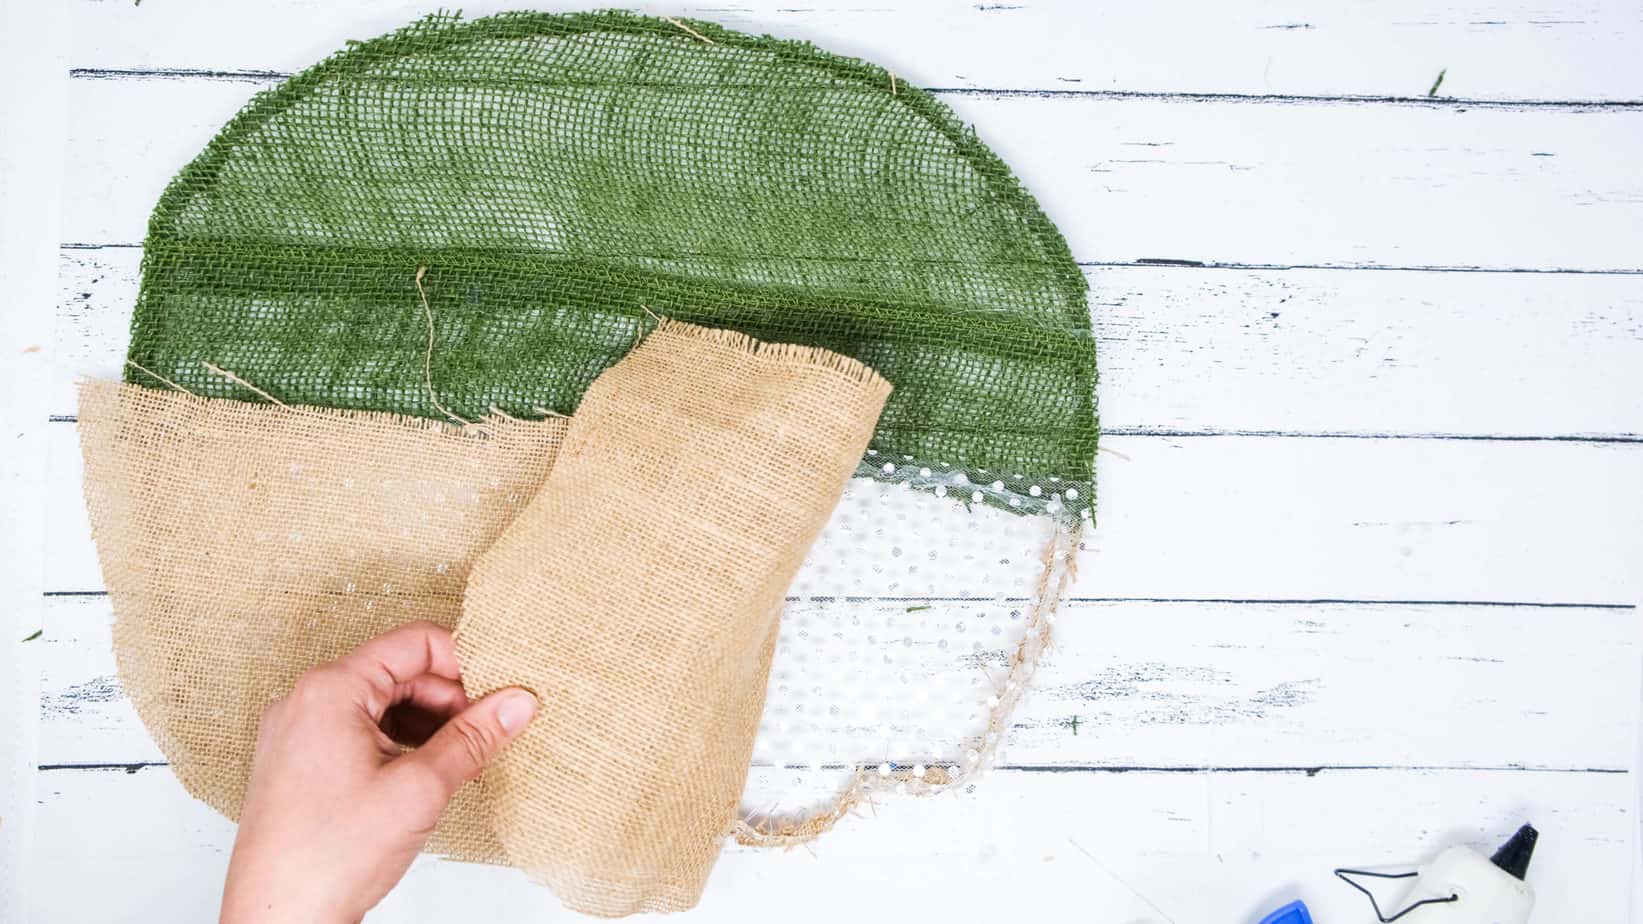
- Now time for the tan burlap backing! This will be done the same was as the previous two backings - cut the approximate amount you'll need, glue in small sections and trim the remaining away.
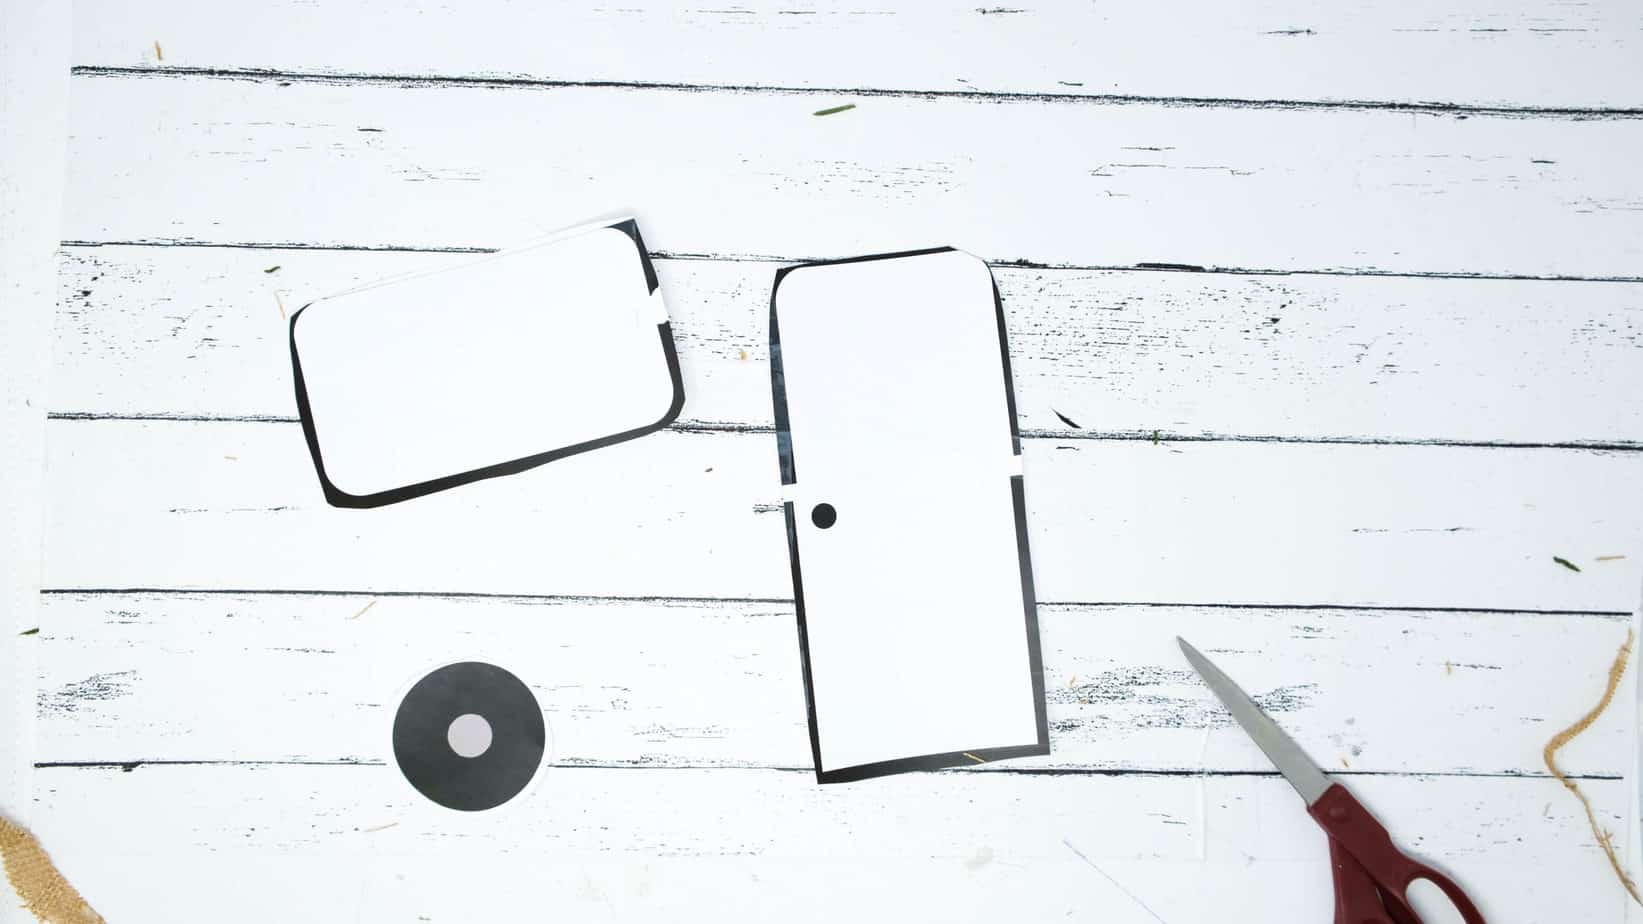
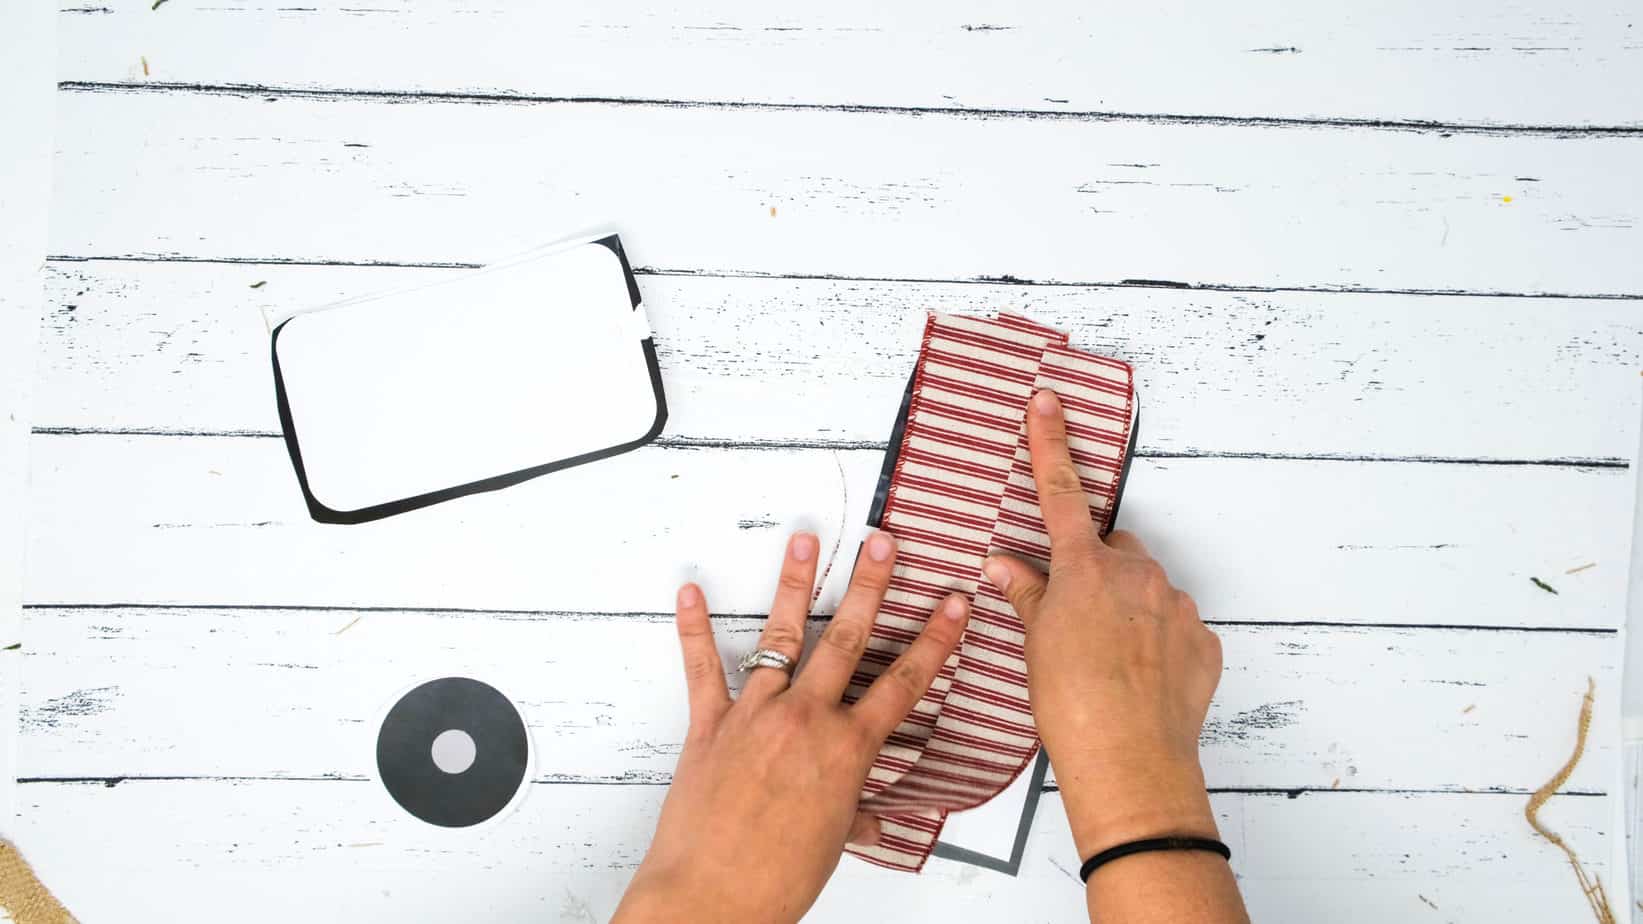
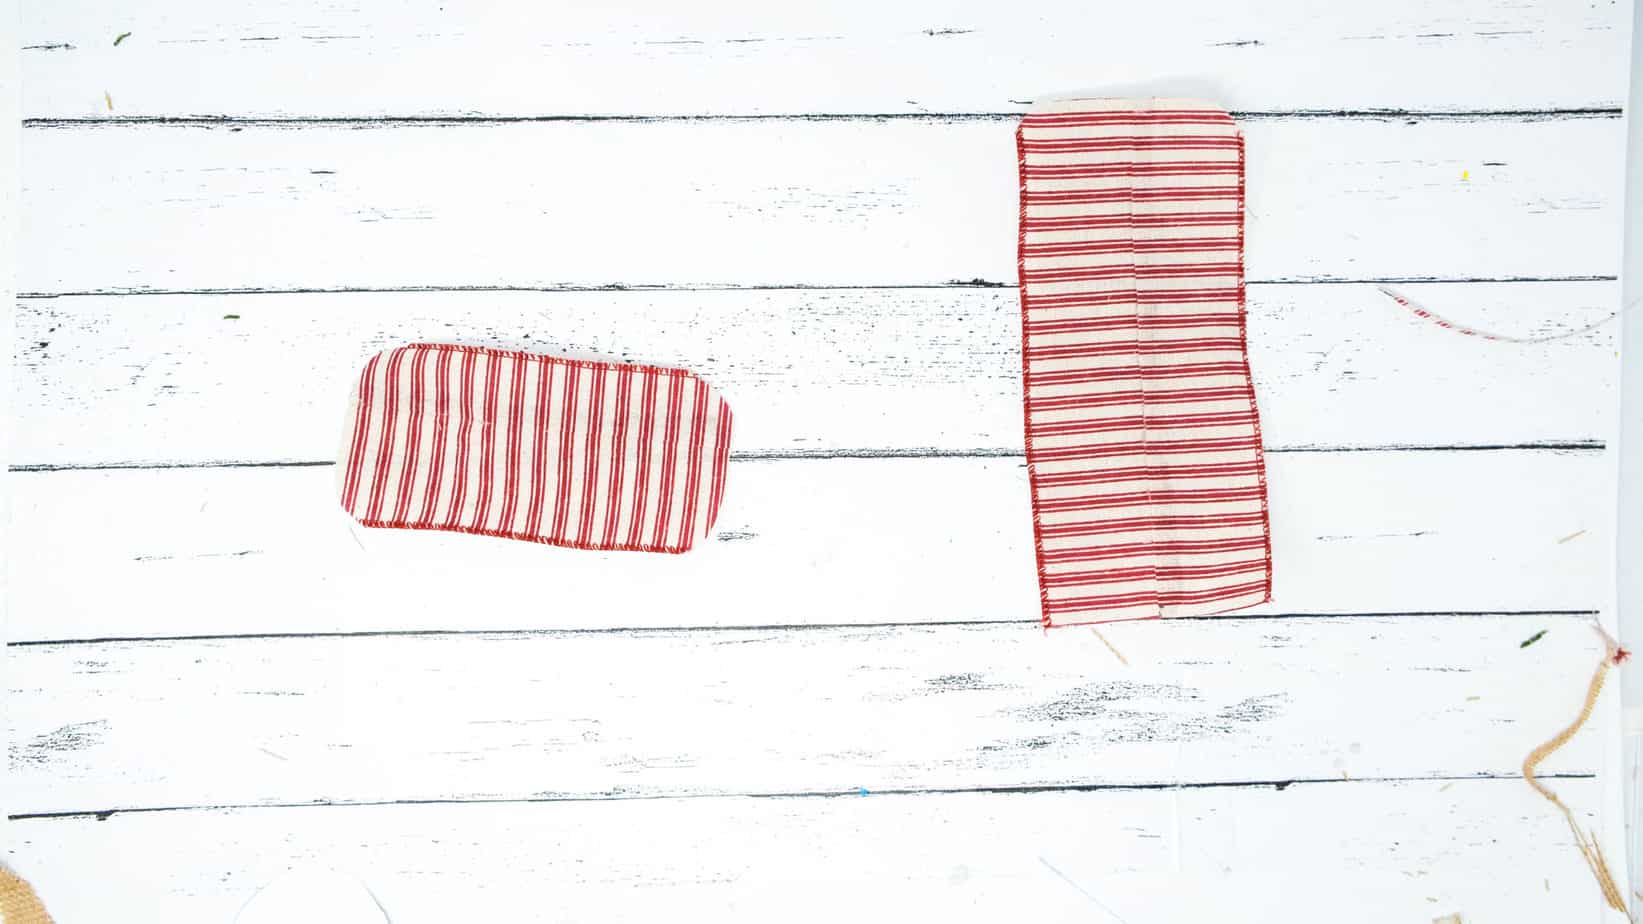
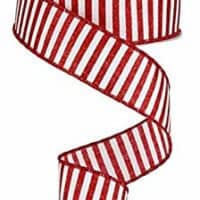
- Cut out the door, window and tire from the printed camper template you used earlier. Using your accent ribbon (mine was some striped red and white I found at Kmart), make a door and window the same size as the template. You may need to glue them together, so just make sure to cut off any large edges and match the pattern when you glue them for a seamless look. Round the edges to really finish it off!
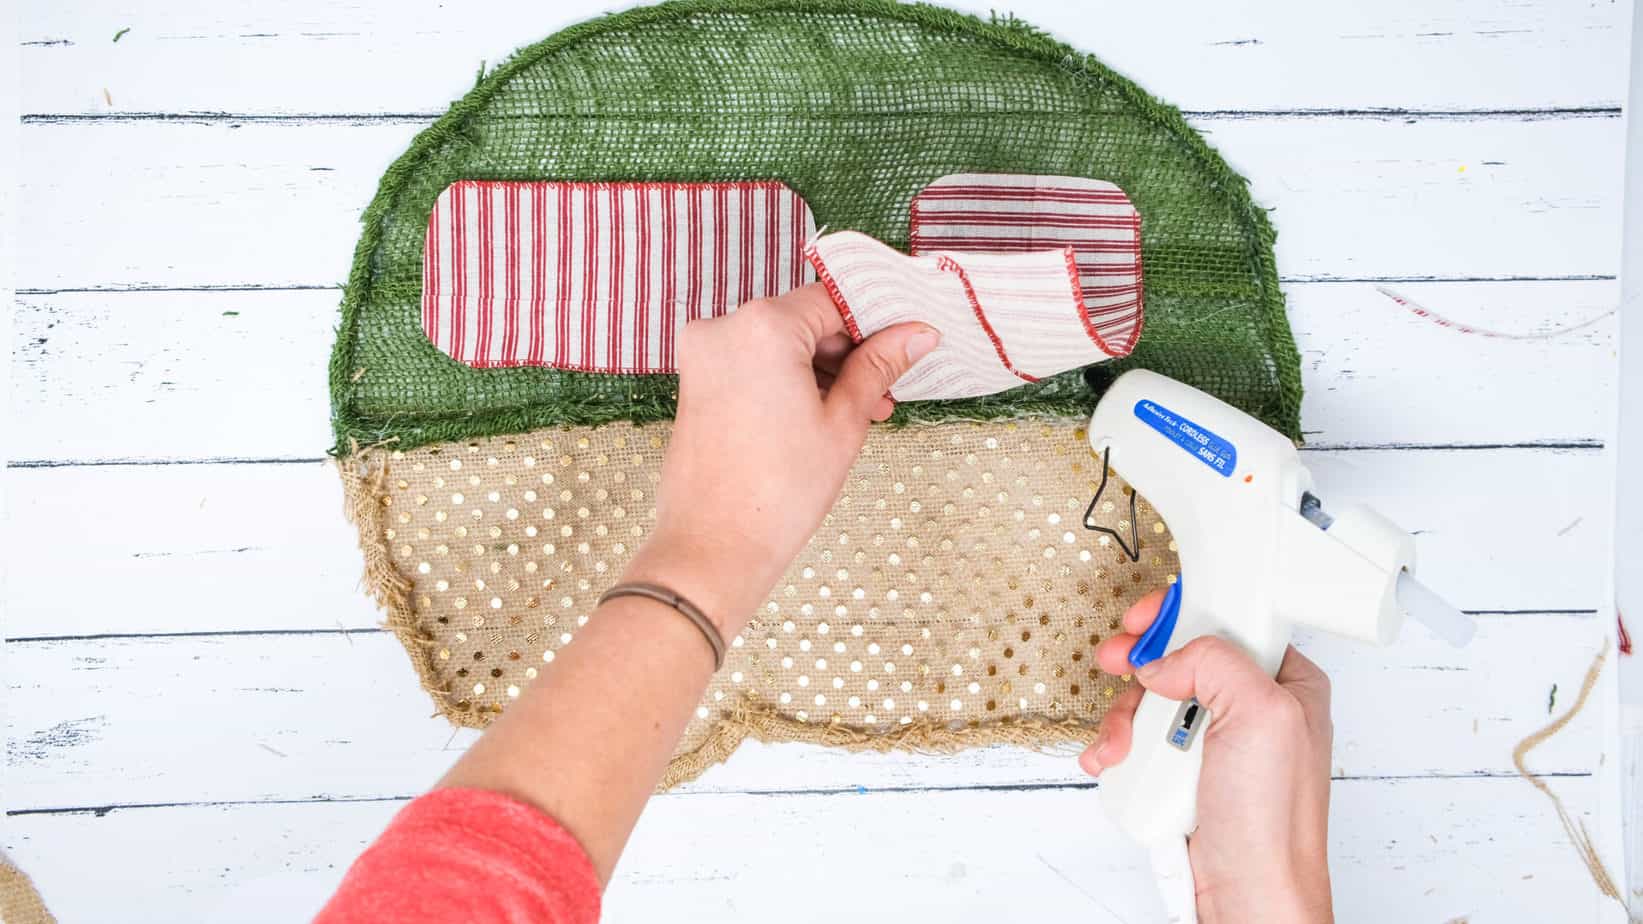
- Hot glue on the door and window in the same spot as they were on the template. It doesn't have to be exact, but it's a good guide so that everything looks right!
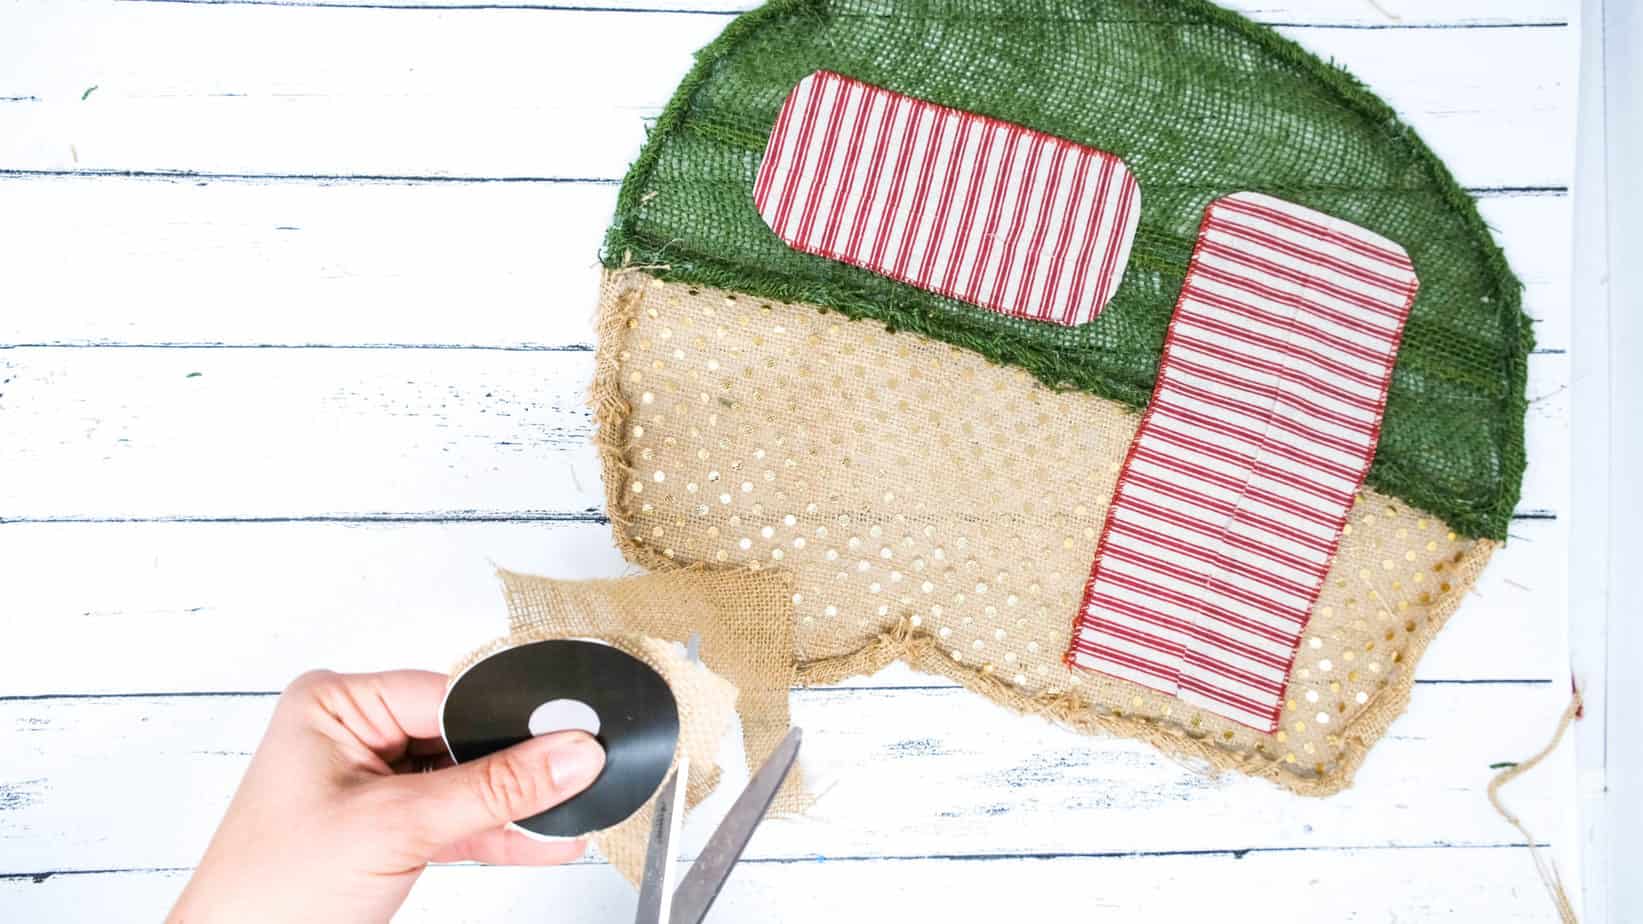
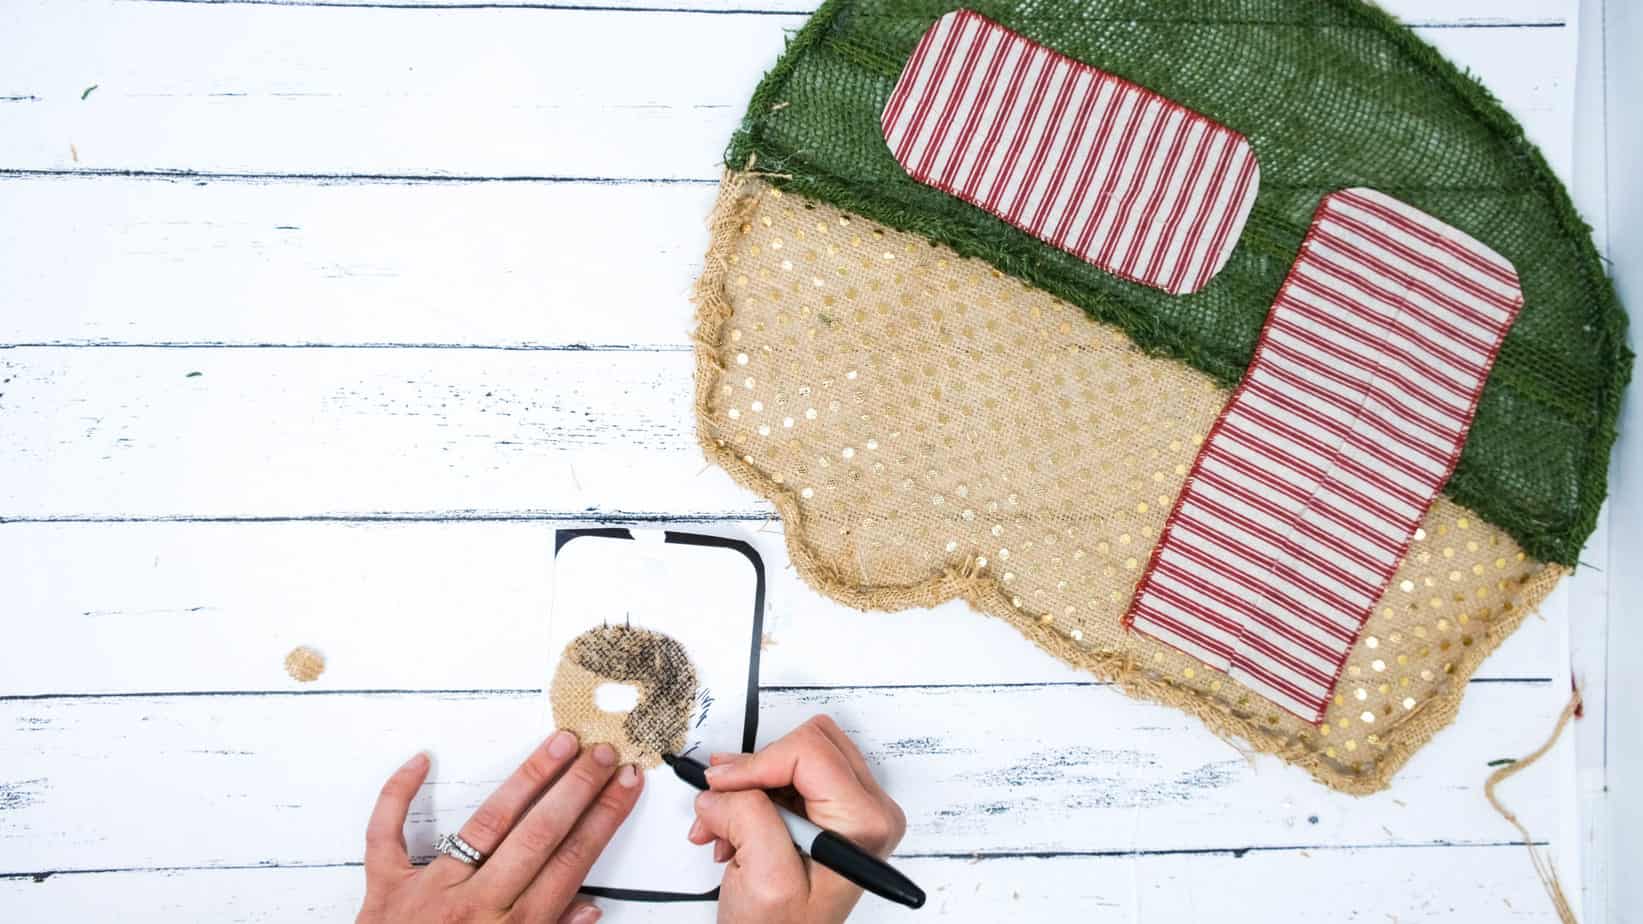
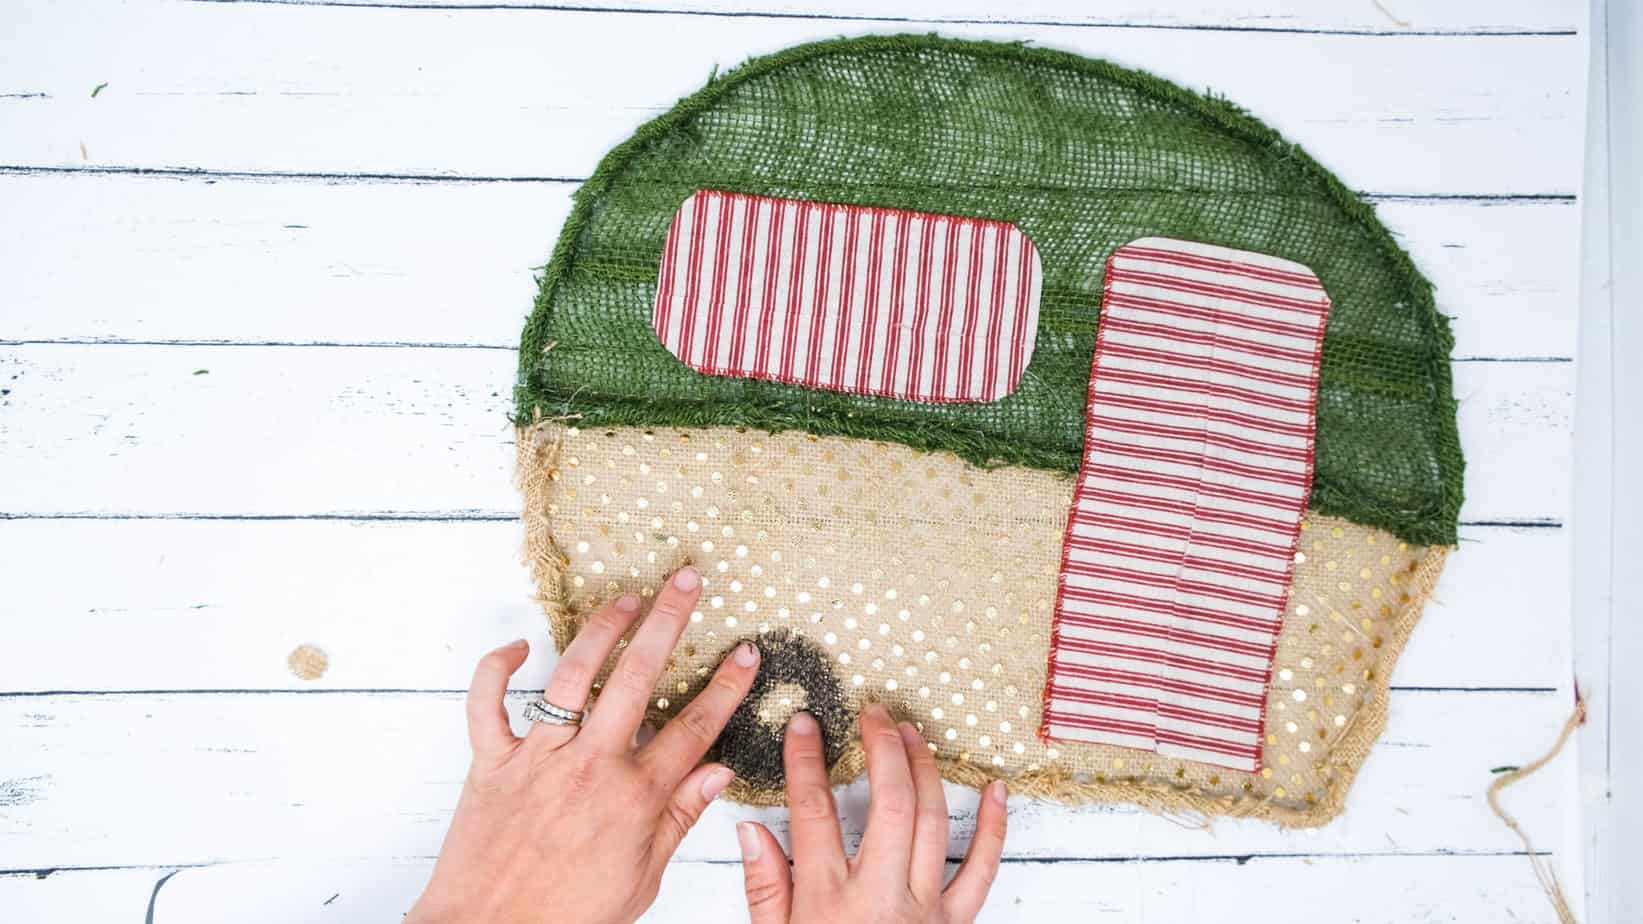
- Use the tire paper template to make one from the tan burlap then use a black sharpie to color it in. Glue this in the tire spot on your camper!
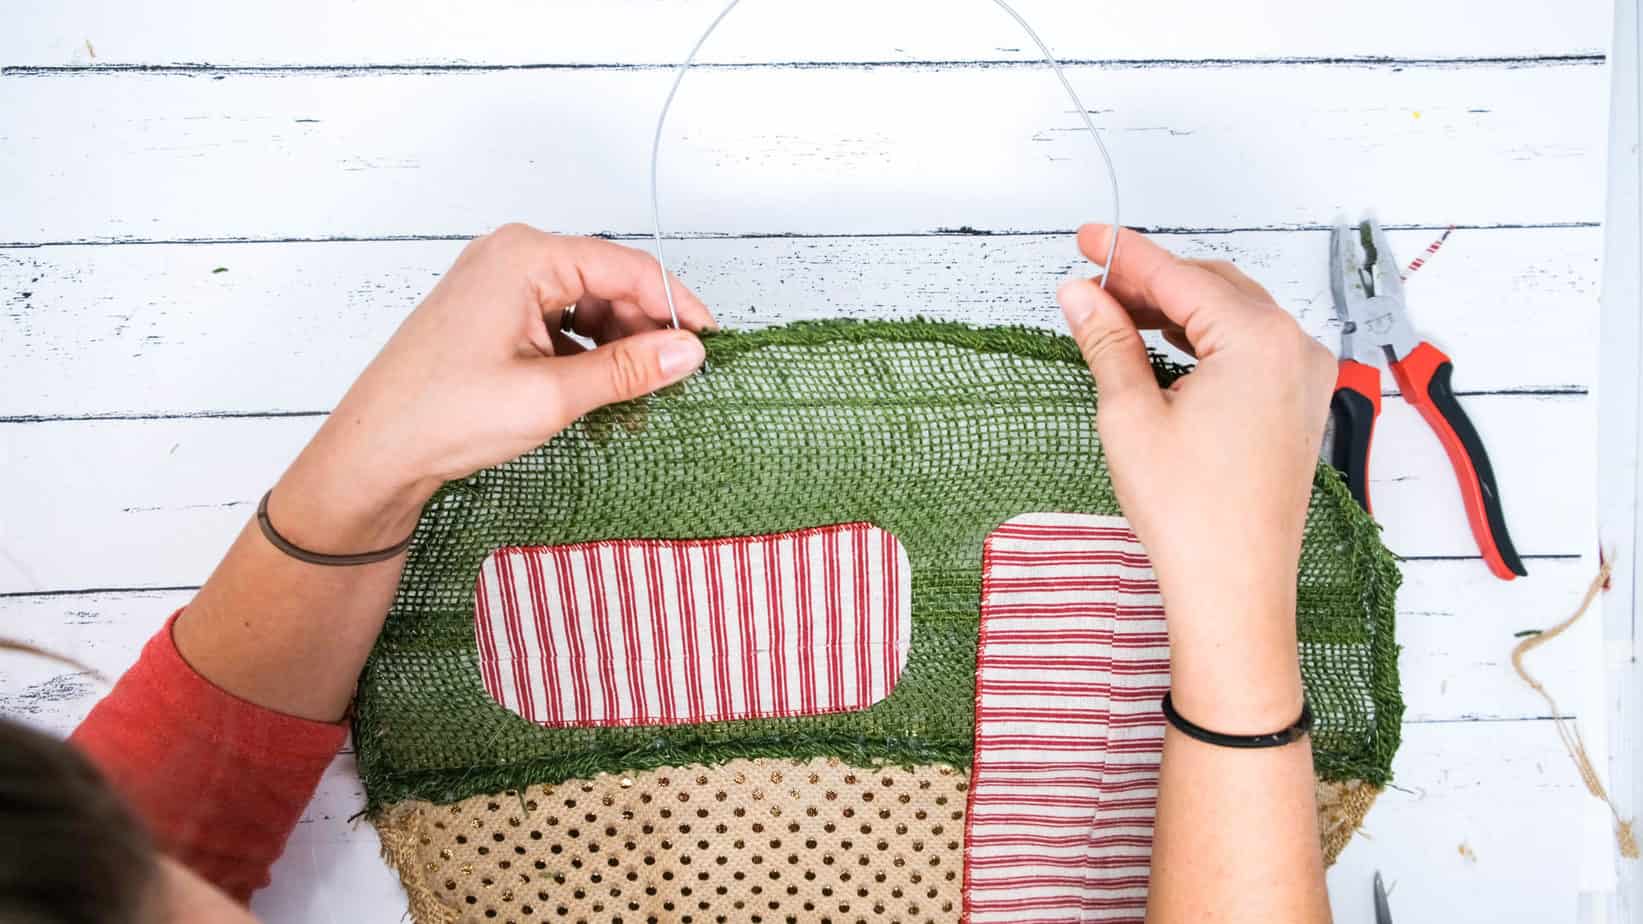
- Make a hanger using the same wire as earlier - Get a rough estimate of how big you want it, making sure to leave enough room to hook and secure it around the wire of the frame. I inserted the wire from the front (through the material), created a hook then got my pliers to squeeze it closed. Do the same for the other side.
- Wrap your hanger with the tan burlap in the same way as you did earlier - you can, of course, choose a different color, I just thought it was nice to bring that bottom color up to the top to make it balanced!
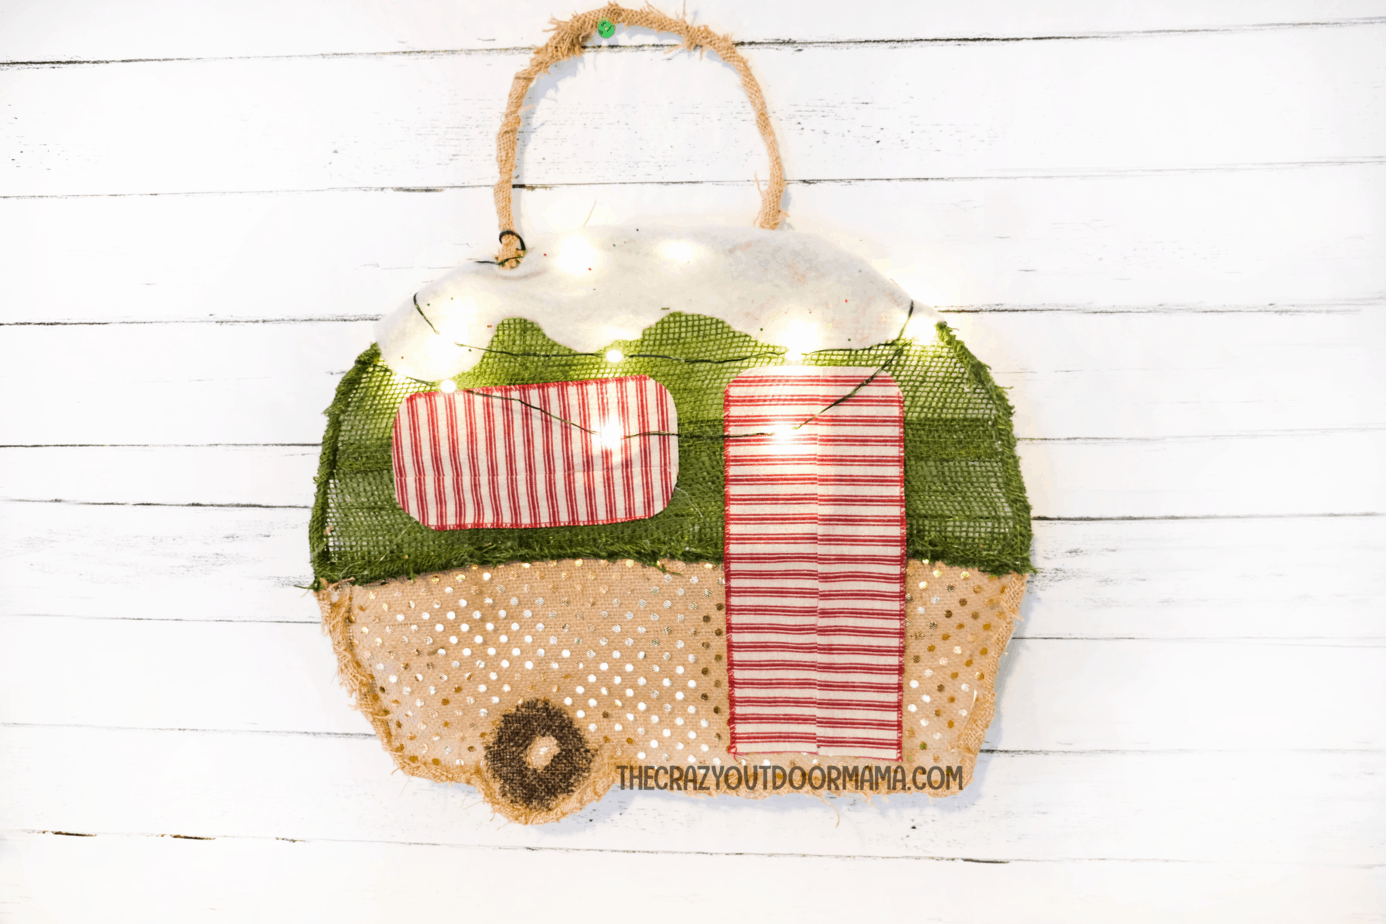
- Add your decor! - I used some fake snow material to create a snowy look ontop of the camper, then added a super small string of battery operated lights. In a previous version, I put a Christmas tree ontop of it. Now you're done! Woo!


Notes
I have tried to find the closest materials to what I used as I can, however you could always check your local craft store so that you can find exactly what you want! It would also be helpful so that you can get the smallest amount (unfortunately Amazon only seems to sell larger amounts of the materials I listed below!)
Recommended Products
As an Amazon Associate and member of other affiliate programs, I earn from qualifying purchases.

How’d it go – did you make it like mine or did you personlize your camper wreath?
I would absolutely love to hear what you guys did! This is probably my favorite thing I have ever made! I hope you guys have enjoyed it, and a video will be coming (currently working on it).
Have a wonderful Christmas and New Year!