Many people are afraid to use their RV ovens – they don’t cook evenly, they are hard to light, or they just don’t seem to be the same temperature as what’s show on the dial! – but I’m going to tell you some quick tips that’ll take you to perfect cookies and pies in no time!
We often do our baking in the dutch oven (check out these dutch oven cupcakes here!) but it can sometimes be easier to bake in your RV, especially if you don’t have the dutch oven gear.
I see this question pop up sooo much on RV forums and even real life.. so let’s go over how to get your RV oven to bake more evenly!
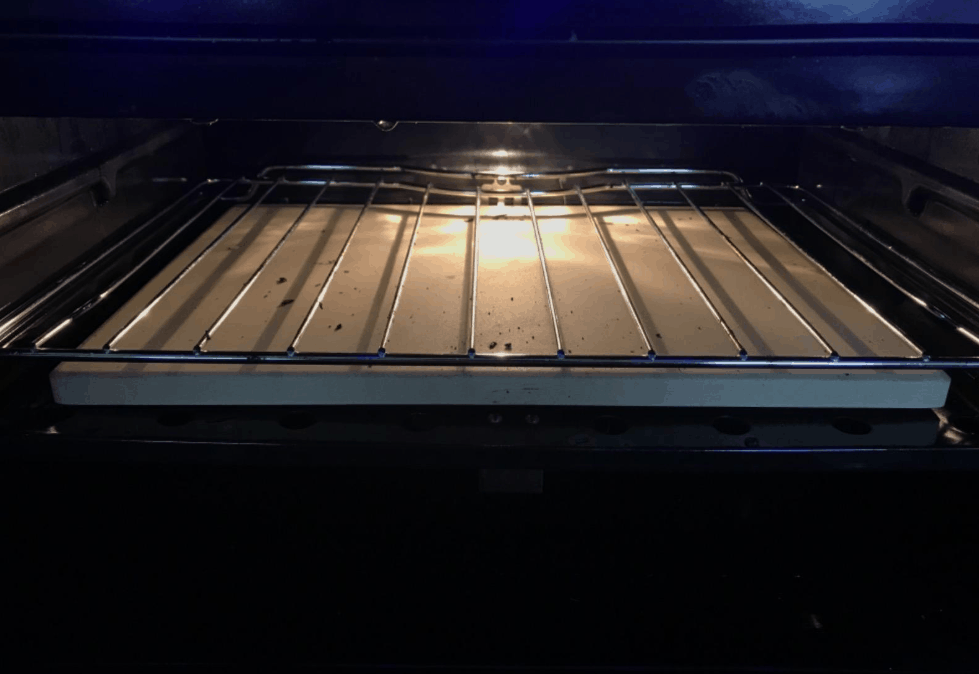
Get a heat distributor (“pizza” stone) to even out the hot and cold spots in your camper oven
This will be one of the most helpful tips, and may even solve most of the issues you have with your oven!
While there is a metal plate over the flames, it doesn’t actually distribute the heat well (the hot spot still remains over the area where the flame is!)
To remedy this, buy a stone such as this to place at the bottom of your oven (over that metal plate we were talking about earlier). Make sure to not cover the holes.
It’s often referred to as a “pizza stone” but there are actual rectangular stones out there that aren’t only for cooking pizza! And you don’t have to take it out – it can stay in there the whole time so that each baked meal is evenly cooked.
For my DIY crowd – I have heard you can buy unglazed tiles from somewhere like Home Depot and use those in place of an official stone. At under a dollar a pop, it might be worth looking into if you don’t mind experimenting!
I have also heard of wrapping heavy duty tinfoil around the bottom wire shelf (if you have two shelves) and just leaving a little space on each side!
Some tips on how to use your “pizza stone” in your RV oven
- Tinfoil for mess free use – Put some tinfoil over it so that if anything drips while it’s cooking, it does not get baked onto the stone
- Pre heat the stone – Always make sure that the stone is in the oven the whole time it is pre heating – putting a cold stone in a hot oven could cause it to crack
- You don’t need to “season” your stone – Some people put oils and such to season it, however this might cause an increased chance of smoking and staining!
- Flour it – If you do intend to bake on it as well, make sure to sprinkle flour or cornmeal on it so that your pizza doesn’t get stuck!
- Follow the instructions – The pizza stone I’m recommending says to preheat for half an hour on the highest temperature setting as well as to wash it thoroughly before use. Both these things are important for it to function well!
- Do not use soap to wash it – Just use the included scraper to get off what you can – this is why it’s best to use some tinfoil to catch any drips!
Recommendation: UNICOOK Heavy Duty Ceramic Pizza Stone

- Heat safe up to 1,450 F
- Made of FDA approved Cordierite stone with thermal shock resistance
- 5/8″ thick and 6.6 lbs lbs for optimal heat distribution
For my fellow clumsy cooks who are scared of cracking the stone (or just tired of hearing about it!)… check out an air bake cookie sheet
I know that the pizza stone does work for ALOT of people, but if you’re worried about the care needed to maintain it, you might want to check out an airbake cookie sheet for your camper’s oven.
It works by having a middle layer of air insulation so that the top of it doesn’t overheat or burn.
It also tends to be cheaper than the official pizza stones.
Recommendation: AirBake Natural Cookie Sheet

- Air insulation in the middle layer stops hot spots from burning your food
- Has micro dome technology to decrease baking time (by up to 15%!)
- Dishwasher safe (don’t use the tabs though or fully submerge when pre washing it)
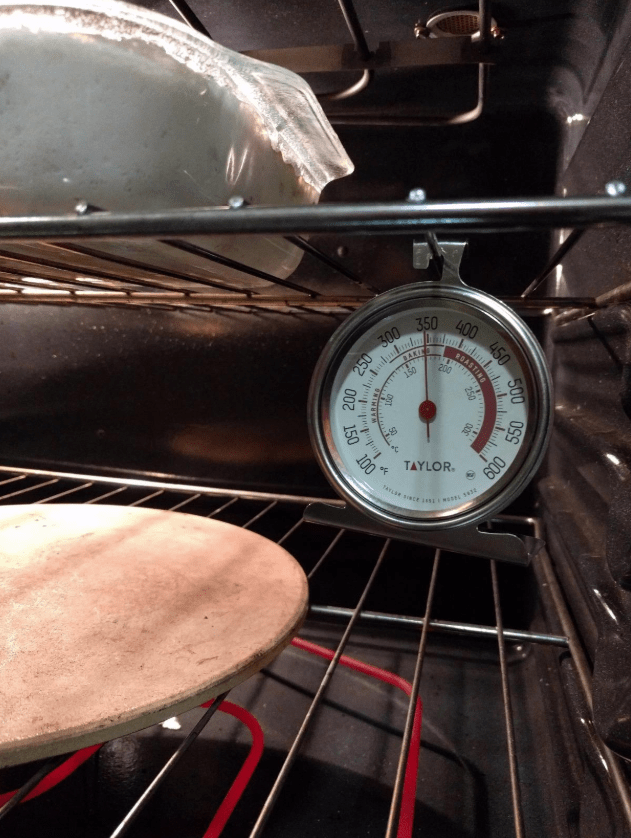
Verify your RV’s oven is actually at the temperature you set it to
Dials and such being inaccurate when compared to what the temp actually is happens at home, so it’s no surprise that it happens in an RV that is likely a step-down or two in quality.
To verify that your oven’s temperature actually is what it says it is, get an oven safe thermometer to monitor while baking. Some people have reported as much as a 20 degree difference in what the dial was set to and what the thermometer read!
If there is an issue, you can just test out how much higher you will need to set your oven to achieve the baking temperature you want.
I recommend this budget friendly RV thermometer, however if you are REALLY into baking you might want to look into something like Rubbermaid’s industrial thermometer for increased durability. Both are easy to use in an RV!
Recommendation: Taylor Classic Series Large Dial Oven Thermometer

- Extra large 3.25″ dial for easy to read measurements
- Can be stood up or hang from the reack
- Reads temperatures from 100 F to 600 F
Rotate and adjust to maintain perfect temperatures!
Just like at home, it’s good practice to move your shelf as needed. The middle is usually the default, but you can raise or lower to really get that good temperature (and distance from the heat).
It’s also good to rotate your food at the half way point to ensure there are no hot spots causing an uneven bake (just set a timer on your phone).
Do you feel a little more confident about baking in your RV now?
A few simple additions can really make the difference between half burnt biscuits or flakey goodness! Are there any tips you love that help you bake better in your camper? Let me know in the comments!
Here are some other RV articles you’ll love
- 13 Best Quiet RV Generators (2021) for Camping in Peace
- 11 Best RV Covers for Winter | Video Reviews + Buyer’s Guide
- To compliment your RV outdoor mats, check out the Best RV Step Covers
- 61 tips to completely organize your whole camper (from a professional organizer turned full timer!)
- The secret listing tips to get your camper sold or rented FAST
- 9 gross spots in your RV you probably totally missed!
- Get your RV Shower set up spill proof with these easy tips
- This set of basic tools should fix almost anything in your camper
- 9 steps to organize your tiny RV bathroom and gain a ton of space!
- Check out how to DIY your own black out shades for your RV for temperature control and darkened afternoon naps
- All the outdoor upgrades for your RV that will make camp life way easier (check out the indoor RV upgrades too!)
We bought a variety to exchange for an old stove that was installed in our RV after we bought it. This oven is the perfect solution. I like the glass cover over the burners. Adds shelf space when covered with a fish mat when not in use. Large oven. I prefer the way the glass lid fits within the front when traveling.